Well, not much has changed since last September, right? WRONG!!!!
Quick recap:
We finished our crawlspace work and installed our radiant floor heat
We went to Wales, the Cotswolds, Cornwall, and London.
The Nationals won the World Series
more]]>Well, not much has changed since last September, right? WRONG!!!!
Quick recap:
We finished our crawlspace work and installed our radiant floor heat
We went to Wales, the Cotswolds, Cornwall, and London.
The Nationals won the World Series
We started a basement laundry room renovation (still not finished)
We also started the renovation of our Foursquare's upstairs hallway (still not finished)
I got really sick with an unknown ailment that left me feeling terrible beginning in early November through January
We've had several articles published in Old House Journal over the last few months (did you see them?)
Wendy was working crazy amounts the whole time, helping people buy and sell houses
I rebuilt our entire boiler driven hydronic heating install (while still feeling awful)
By early January I was diagnosed with a failing and diseased gallbladder
I had surgery to remove my gallbladder mid January - felt much better almost instantly
I then got the flu (actually diagnosed) in early February - knocked me out for another two weeks
Then when we thought all of the bad stuff was behind us for the year the Coronavirus was all, "HOLD MY BEER!!!" and this global pandemic kicked off.
So that's where we are. As you can see, lots of highs and lows, so there's plenty to write about as we approach our blog's 9th birthday later this month. We've been sharing most of our ongoing efforts and life over on Instagram, including detailed stories with how-tos, hacks, tricks, and favorite tools. So if you don't follow us and you're on Instagram, you should definitely add us to your list.
Beyond all of that, I did have something to share with you today. After many years of wanting to do this, I finally put together a video tour of our 1886 row house. We didn't want to create another long and boring home tour video that you'd have no interest sitting through, so I decided to make it in the style of MTV Cribs. Give it a look and let us know what you think.
I hope to have a bit more time in the coming weeks and months to summarize many of our ongoing efforts. I've also learned a ton in the last several years regarding plaster repair and restoration that I want to share with you.
]]>
Just because we haven't posted here in a while sure doesn't mean we haven't been working hard on house projects, I can assure you! Between our row house's basement project, the hallway in our Foursquare, teaching our new dog, Truman, the ropes, a server crash that impacted the blog, life in general, and many outdoor projects, we've sure had our hands full. Rather than trying to bombard you with a million and one little details from all of the projects, let's focus on just one for today.
It's THE CRAWLSPACE DIG!!!!!!
This is a project that we've been thinking about since nearly day one in our home. Way back when we bought our house in 2003, we knew that we'd possibly need to handle our mess of a crawlspace. I mean, this is how it looked in those early days.
more]]>
Just because we haven't posted here in a while sure doesn't mean we haven't been working hard on house projects, I can assure you! Between our row house's basement project, the hallway in our Foursquare, teaching our new dog, Truman, the ropes, a server crash that impacted the blog, life in general, and many outdoor projects, we've sure had our hands full. Rather than trying to bombard you with a million and one little details from all of the projects, let's focus on just one for today.
It's THE CRAWLSPACE DIG!!!!!!
This is a project that we've been thinking about since nearly day one in our home. Way back when we bought our house in 2003, we knew that we'd possibly need to handle our mess of a crawlspace. I mean, this is how it looked in those early days.
That's the look from our basement peering into the crawlspace. Abandoned steam pipes, random insulation, HVAC ductwork, a rats nest of wires (most of them not doing anything), and a mound of dirt almost up to the floor joists in the middle.
This is following the first hour of digging
While we've been staring at this mess for over 16 years, we were never quite sure how, when, or why we'd tackle it. So before I launch into the project, let's take a moment to cover the purpose.
One of the projects we're working on is the conversation of our home's heating from forced air to boiler-fed radiant floor heat. We'll eventually cover this in more detail, but it's an essential factor as to why we're digging out our crawlspace.
We're not trying to turn our crawlspace into another room because that would require way more effort and engineering. Rather, in order to install radiant floor heating on our first floor, we're going to need access to the underside of the floor. We can only accomplish this via our basement and crawlspace...and while our basement is in good shape for it, our crawlspace doesn't really have enough room for us to even think about crawling!
To complicate matters, years ago someone ran plumbing and HVAC duct through the crawlspace and to the back of the house. To run this they had to dig space for themselves. In the true half-assed nature of a lot of the work that seems to have been done to our house in the 1980s, the dirt that was dug wasn't removed, but rather mounded onto its neighboring dirt. This is why the dirt was piled up to the floor joists of the room above. This is also what we had to rectify.
We'd given this epic hand dig process a fair amount of thought. Our questions boiled down to these.
"How does one remove mass amounts of dirt from a small area?"
"How does one accomplish the above in an area to which there is no access from the outdoors?"
"How would we accomplish this without making a giant mess in the house?"
"How do we dispose of the removed dirt?"
"How in the hell are we going to do this ourselves?"
To perform this task, we initially settled on a ridiculously inefficient process that highlights my foolishness.
I just started digging...digging and filling a 5-gallon bucket full of dirt. Then I started to dump that bucket into a pile on the floor on a tarp. I mean, this ain't rocket surgery after all.
This seemed like a reasonable approach...apparently because I hadn't really giving my stupid plan much thought. Then we'd need to take the dirt out of the basement one bucket at a time, filling those buckets up again from the pile on the floor and dumping them into a vehicle of some sort (I was thinking...a truck...because I'm brilliant like that).
Then we'd drive the dirt to...somewhere...then shovel it out of the truck. If you're following along, that's filling and emptying the same dirt into a bucket or container three separate times before it reaches its final destination. I am so SMRT! The look on Wendy's face says exactly how smart I am.
To facilitate this poorly formulated process, we also enlisted the assistance of our neighbor, Connor. Connor is the 22-year-old lad that lives across the street, son of our good friends, and boy that I've known since he was about six years old. Connor is a recent college grad, looking for a little extra cash for the summer, a fan of CrossFit and agony, and willing to lend a hand to my desire to do my own manual labor, probably because he's worried I might share embarrassing photos of him when he was much younger. I would never!
However, Connor is not a small guy. Unlike the photo above, circa 2010 and showing off his masterpiece gingerbread house, he's now approaching 6'2" and has me beat by probably 40-50 pounds. This did mean that Connor would not be able to dig in the tight space of the crawlspace. Lucky for him, I would be the one digging and pushing dirt toward him. Connor would stand at the opening to the crawlspace and would fill the buckets and take them out to the truck.
"Truck?!?" You ask. No, we don't own a truck, but we were able to borrow a truck for a day. Our good friends and neighbors own a 2000 Ford F150 that they graciously allowed us to use.
I'm telling you, if you ever luck into a neighborhood as good as ours, hold onto it as your life depends on it. You can't put a value on friends and neighbors like the ones we have; it's truly priceless.
Ok, back to how I was taking advantage of our friends and neighbors' generosity to enable us and our ridiculous attempt at a labor-intensive project.
The first truckload of dirt was underway. I was in the crawlspace digging and Connor filling, hauling, dumping, and returning. While I dug, I also did math in my head. The truck we were using is a half-ton truck, but that doesn't indicate the amount you can haul in it like it did in the 1970s or so. Instead, modern trucks have a payload capacity based on the Gross Vehicle Weight Rating (GVWR). Sparing you the crazy details of using this value to calculate payload, it means that the truck we were using could comfortably haul about 1,500 lbs of dirt at speed before things get a little squirrely.
I said to Connor, "Hey Connor, about how much do you think each bucket of dirt weighs? We need to know this to calculate how many we can safely dump in the truck."
Connor responded, "Not sure. Maybe 30 pounds?"
From the dirty and cramped sarcophagus from which I was digging, I enthusiastically responded "Great, that means we can dump..." quick head calculation, "about 40 buckets and still be in good shape."
Connor filled bucker after bucket, almost as quickly as I could push the dirt back to him. Once full, he would walk them out back to the truck, two at a time, and return to the basement to keep filling. When we'd successfully filled and dumped about 40 buckets, Connor reported our progress, and then we dumped four more and called it a load.
I thanked Connor for his effort and headed out back to drive the dirt to our Foursquare, where I planned to dump it in the low spots in the front yard.
As I walked to the truck, tired and broken as if I'd just spent several hours rolling around and digging in nothing but dirt as old as dirt, I noticed a problem. The bed of the truck was nearly touching the rear wheels.
It turns out that young Connor doesn't truly know his own strength. Apparently, those 30 lb buckets of dirt weighed in more in the realm of 50 lbs - 60 lbs. So the truckload we thought was good to go at about 1,250 lbs actually weighed in at a solid payload of about 2,100 lbs - 2,500 lbs. I wasn't about to chance it, so I did what any reasonable insane person would likely do in this situation (don't you even say "hire someone"), I started shoveling the dirt back into buckets and setting it in our backyard for the next dirt run.
After removing about 600 pounds of dirt from the truck, satisfied that I'd successfully rectified this minor misstep among many other flawed aspects of strategery, we headed to our Foursquare to dump the first load.
Sweating my butt off in the 100-degree heat of the day, and then working well into the night, we filled and dumped load after load. However, with each passing load, we got just a little bit smarter. Watching us figure out how to do this smarter, faster, and easier was likely similar to watching a monkey learn how to use simple tools.
To ease our pain, we hit up Lowe's and bought ourselves enough 5-gallon buckets to make a full truckload (25 to be exact). Then we started filling those buckets and staging them in the basement, rather than dumping them on the floor only to fill them up again. Our exercise in near futility gave way to a somewhat fruitful yet foolish endeavor.
Filling the buckets, staging them, then carrying them up and loading them in the truck bed for transport was far more effective than the constant filling and dumping we'd attempted early on in the process. Twenty five buckets, about 1,250 lbs of dirt per load, and a relatively quick process for both filling the truck and dumping the buckets. Our process was becoming a well oiled machine full of dirt and debris.
The digging itself was difficult but not impossible. Using a trenching shovel to pull and push the dirt around, and a rotary hammer with chisel bit to break up the hard packed clay soil, proved to be an effective means for accomplishing our goals.
While Connor had to head back down to a summer job, I continued to work on my own, albeit at a much slower pace. We shuttled load after load of dirt, and when all dirt had been removed we tallied roughly 11,000 lbs of earth that we'd removed from the crawlspace.
Now mind you, we were only removing enough dirt to give us space to work. We weren't "digging down" or removing anything more than the mound that was in the middle of the space. I can't imagine the effort if there was going to be an attempt at any actual added room. But here's the "after" of the space to show how far we've come.
For reference, here's the before.
At the end of each day my clothes looked like they'd been in some sort of a spaghetti western and I'd just taken my horse down to Old Town Home, gonna ride until I can't no more, covered in dirt from head to toe.
This is just the first phase of a much larger project. This is decidedly unglamorous but undoubtedly necessary. Next up we'll install a vapor barrier, install the radiant floor heat, and insulate the entire space.
And before you ask, yes, we found LOTS of really cool stuff while digging. But that's a story for our next blog post, that I promise will be in many fewer months than the span between our prior post and this one. Here's a teaser.
So stay tuned, as we'll take some time to share some of the fantastic stuff we found while playing around in the dirt below our floors.
]]>Ever since we lost our beloved Scottish Fold, Mel, on Thanksgiving morning 2017, our house has felt a little off. For weighing in at around 7 pounds, Mel was an anchor in our home. He was a part of our family since 2001, was Lulu’s best friend, and was a constant companion to each of us.
We feel like we’ll never be able to find another cat that lives up to what we loved about him, but we’ve been considering adopting a second dog for a while now. The only problem with that idea is the fact that we had to find the right personality to fit in our home.
You see, Lulu is, well, how do I put this kindly, high maintenance? She doesn’t have a lot of friends, doesn’t get along well with others, and has been the only dog in our household for nearly nine years now. And to put it bluntly, she can be a bit of a territorial jerk when interacting with other dogs.
more]]>Ever since we lost our beloved Scottish Fold, Mel, on Thanksgiving morning 2017, our house has felt a little off. For weighing in at around 7 pounds, Mel was an anchor in our home. He was a part of our family since 2001, was Lulu’s best friend, and was a constant companion to each of us.
We feel like we’ll never be able to find another cat that lives up to what we loved about him, but we’ve been considering adopting a second dog for a while now. The only problem with that idea is the fact that we had to find the right personality to fit in our home.
You see, Lulu is, well, how do I put this kindly, high maintenance? She doesn’t have a lot of friends, doesn’t get along well with others, and has been the only dog in our household for nearly nine years now. And to put it bluntly, she can be a bit of a territorial jerk when interacting with other dogs.
For this reason, we had to find just the right dog, with just the right personality, or we were at constant risk of a battle royal that would likely result in an escalation of tempers typical of a classic drunken barroom brawl, with about the same level of coordination. The only problem with this equation is the simple fact that Lulu is terrible at being a fighter. She’s all posture, no substance. You could say, she’s all bark, no bite (or at least only failed attempts at bites). She’s your stereotypical schoolyard bully, but she’s our bully and we love her. So when it came to finding the right dog, we had to find someone that was submissive and didn’t mind putting up with Lulu’s crap.
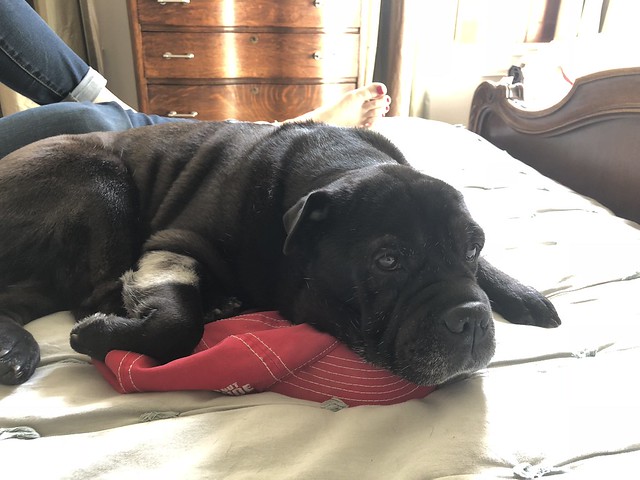
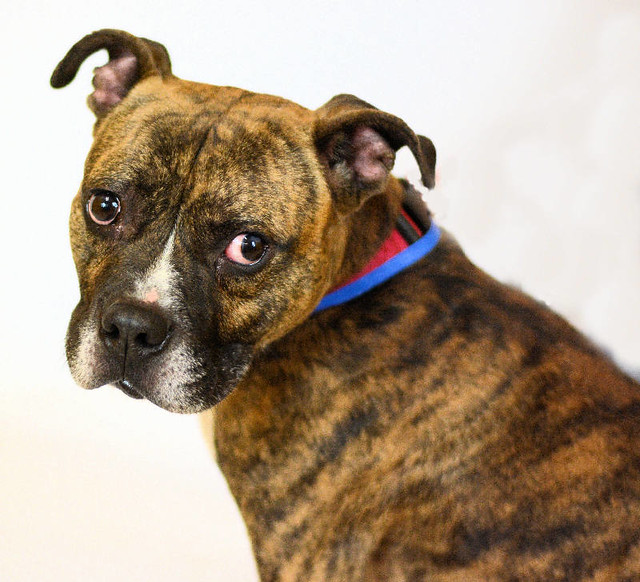
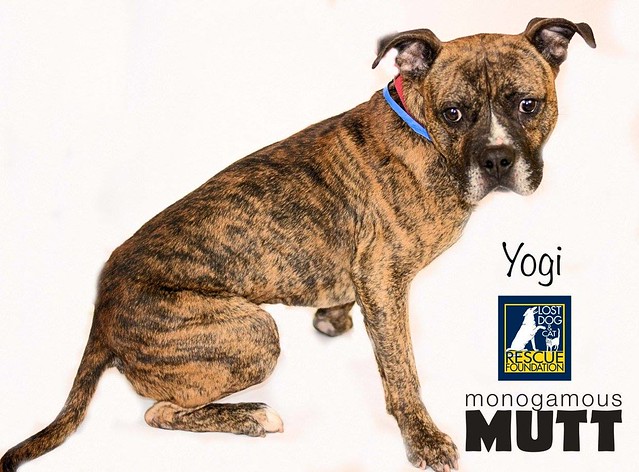
After many months of searching, Wendy stumbled across a cute pup on PetFinder named “Snowden.”
Snowden was at a local rescue and had been with them for a few months. Though his name may suggest he’s a well known leaker, rather than a. potty trained doggo, he was found wandering around in traffic during a snow storm, hence the name. Wendy felt an instant connection to his adorable photo, and the visible tooth in the next one, and filled out an application to adopt him.
While we waited for word we started the second guessing and what if game. Was he the right dog? What if Lulu hated him? What if he hated us? How much extra work is a second dog? Do we have the time? What the hell were we thinking? Well, that was all for naught when we received word that Snowden had many applications and the rescue was adopting him out to a family with children. We didn’t understand the logic, but shrugged our shoulders, felt it wasn’t meant to be, and went on living our three family member lives.
Over the next little while Wendy kept thinking about Snowden, and the rescue was on the lookout for another dog that might work for us. They called our references (Lulu’s vet, Lulu’s oncologist, our friends who can vouch for our ability to successfully raise and care for dog and place them on a pedestal unlike most people could experience in life), and we waited and kept looking.
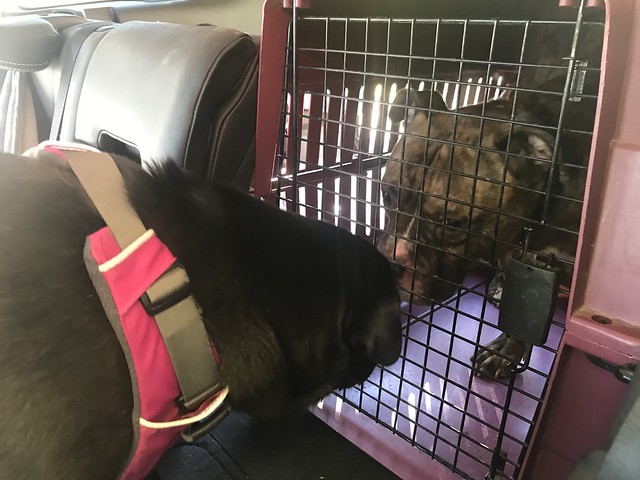
A few weeks later we received a call that was very unexpected. Snowden’s new family wasn’t working out for him and we’d been moved to the top of the list if we wanted to meet him. It was shockingly similar to Lulu’s entrance into our lives, so much so that we couldn’t ignore the possibility that fate was bringing him into our lives. We decided, with Lulu accompanying, to drive up to the rescue on the Eastern Shore in order to meet this pup to see if he’d be a good fit for our family.
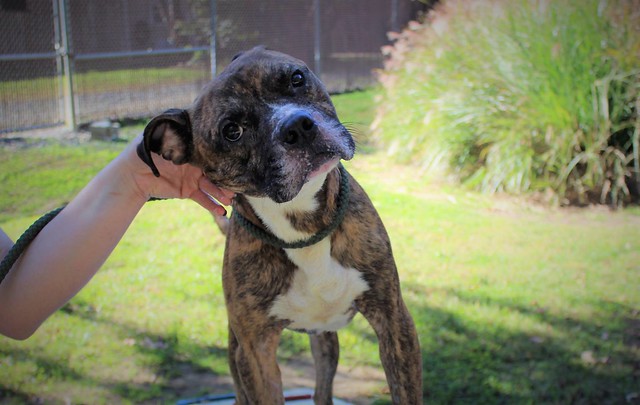
When we arrived the in-house trainer walked him out and we got to see his friendly face and snaggletooth, a result of his rather pronounced underbite, live and in person. We held Lulu, let them sniff each other, and then walked them around the yard on leashes for a few minutes. They seemed to get along without issue, so we let them off leash in fenced play area and they were romping and having a great time before we knew. It was more or less neutral territory, so no real concerns about territorial disputes. Both of them ran and played endlessly, only pausing long enough to check in with us and make sure everything was good. They were like old friends.
Upon our first meeting Wendy wasn’t so sure about him. He had a *lot* of energy on display that afternoon. Over the last six or so years we’d settled into a very comfortable life with Lulu and Mel, one where we all understood each other. Wendy worried that adding Snowden to our pack was going to be like welcoming the Tasmanian Devil into into our otherwise peaceful but already hectic lives, seriously upsetting the apple cart and rocking our wonderful balance.
On the other hand, I saw a young and very cute dog that was romping and getting along swimmingly with our typically difficult Lulu. Above all, I saw potential that we’d found a dog with a personality that would be a good fit and able to get along very well with our #1 daughter.
Wendy side eyed me at one point and said “if you want to leave, we can.” What she was really saying was “omg I’m not sure this is right and I’m sort of freaking out, so how about we forget we ever had this idea and call it a day?” I looked back at Wendy and said “I don’t know, I think we should do it.”
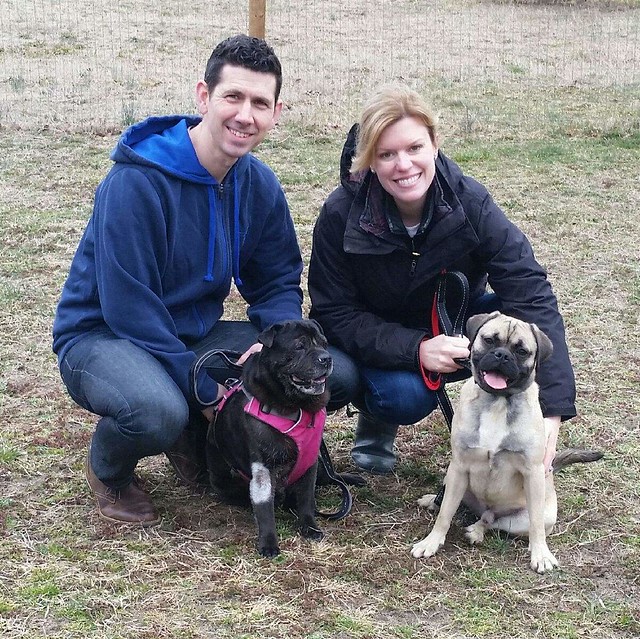
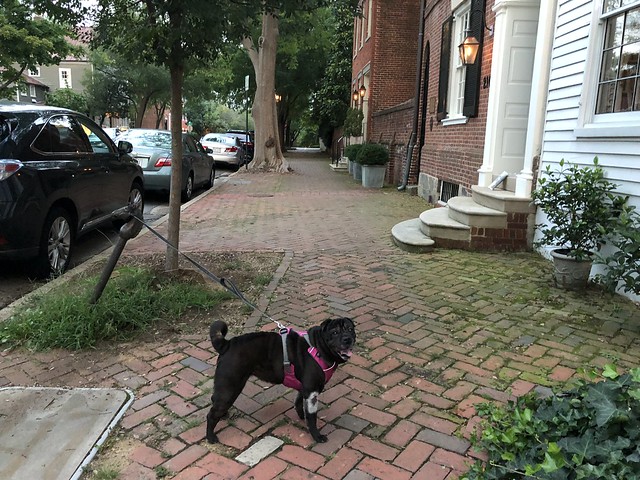
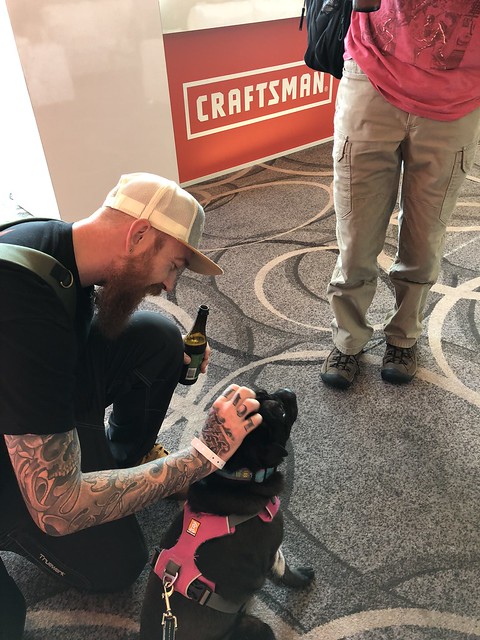
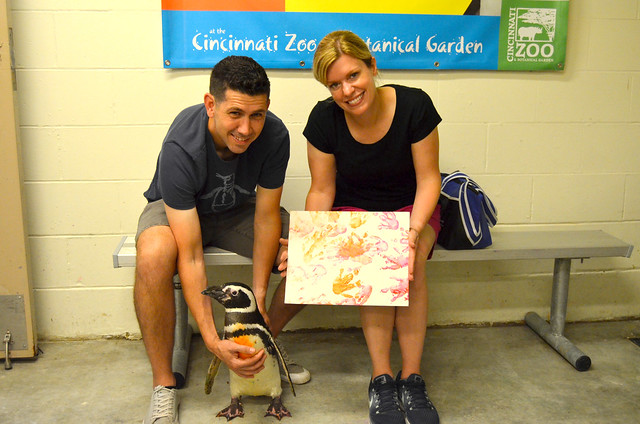
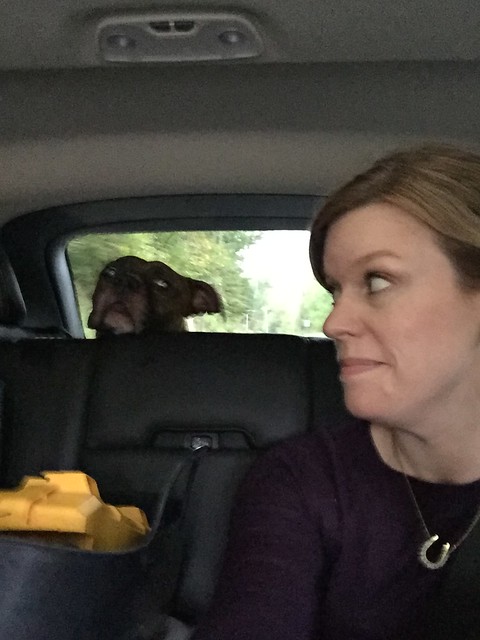
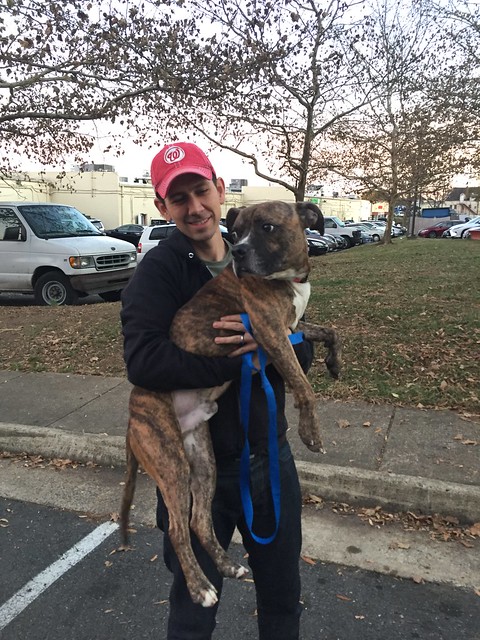
After about 45 minutes of watching them play in the yard, no fights, no disagreements, lots of compromise, and a whole lot of fun, we decided to take the plunge and take him home. Here's our first family photo as our newly established family of four.
On the car ride home I let Wendy in on an important secret. Before meeting this pup at the rescue, before having our application accepted, Wendy told me “we have to agree on this, this isn’t a done deal just because we’re applying or meeting him, the decision isn’t mine, it’s ours, and we can walk away if it’s not right." What Wendy didn’t realize is that I'm soft, and simply by meeting him at the rescue, by driving out to see him, and by having Lulu play with him, it was sort of a done deal for me. Pretty much, if we met him and he wasn’t a total jerk, and he and Lulu played and didn't fight, I wanted it to work out. Decision made. I’m weak for dogs. Nothing can be done about this.
When we got home that night the fun continued. We went on a long walk around the neighborhood with both of them before going into the house, then made sure we introduced them to the house slowly, putting Lulu in charge, and letting him know that she was Queen. Lulu and the doggo formally known as Snowden kept romping and having fun. It seemed like everything was going to work out perfect. He was used to being crated at night so we put him in his crate where he's most comfortable, and Lulu went up to sleep with us. It was our new routine.
As part of bringing this little pup previously known as Snowden into our home, we also started working on a good name that might fit a bit better for us. While he may have gotten used to Snowden, we didn’t feel it was necessarily the best name for him, aside from the inevitable "leaker" jokes that would never get old. “No” is an important command in a dog’s life, and we were worried that the name “Snowden” has too similar of a sound to “No,” which could cause some major confusion.
After talking it over on the phone, Wendy’s mom suggested Truman. We felt it adequately captured the “grumpy old man” look this little pup possessed, was a good two syllable name, and seemed a good fit. We agreed we’d start calling him Truman and started getting used to it as his name.
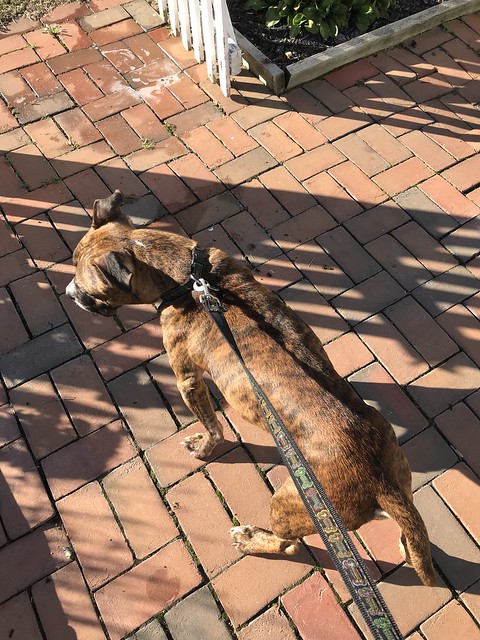
The next day we woke up, went downstairs, woke him up, and we all went for a long morning walk. It was a handful. Three or so miles of pulling craziness in dog form that obviously not used to walking on a leash. We started to see the work we’d have ahead of us in terms of training, consistency, and routine.
When we got home from the walk I caught Lulu silently staring across the room at him. She was glaring, fuming even. She started to puff out her chest and circle him, then she attacked. She’d had so much fun with him in her house just 12 hours earlier but now she realized this unwanted guest was apparently a more permanent fixture in her home than she’d preferred, and she wanted him to know this was not okay with her. With a glance and a flinch Lulu was instantly barking and trying to fight with the new little pup. He responded with timid barking and confusion, not knowing why this new friend of his was now out to kill him. We quickly separated them with no actual contact, but were confused as to what Lulu was thinking. Sadly, these were shades of what we’d worried about and even expected. We hated seeing it, but we also weren’t surprised.
Over the next 36 hours we watched these two pups like hawks, but we worried this might not work out. They seemed perfectly fine one second, then Lulu would start staring him down. Though he may have initially tried to show dominance on day one, after their first altercation, Truman was showing how submissive he was. He’d roll onto his back giving yo his belly, he’d check where she was before entering a room to make sure he wasn’t walking into a trap, and he’d only play with his own toys, no longer even attempting to play with Lulu.
It was sad to watch them, almost like watching defeat. Truman had thought he’d made a fast friend the day before, but now she was just being a jerk. A lot of people would say that Lulu was showing dominance and letting Truman know she was in charge, but it was more than that. Lulu was not backing off when Truman was accepting his role and asking for peace, she was just being a bit of a bully.
Truman, as a result of Lulu’s bullying, even started acting out. At one point he was walking through the family room with Lulu in the kitchen. Wendy glanced over to see Truman peeing on the floor right in front of Lulu’s dog bed. He didn’t have to pee, had his own bed, and knew Lulu wasn’t nearby, so he was letting his displeasure with the whole situation be known.
The altercations and stare downs continued, and midway through day three in the house one of our and Lulu’s favorite people, Amy, came to visit and meet Truman. Amy and Lulu have a true bond. We’re pretty sure Lulu likes her as much, if not more than she likes us. When Amy arrived, as usual, Lulu was completely excited. Amy met Truman but also gave Lulu the attention and love she wanted.
A few minutes after Amy left it was like a switch flipped and suddenly Lulu no longer hated or was threatened by Truman’s presence in the house. Within the hour Lulu was once again initiating play flighting with Truman like they’d had on day one. It was almost as if Amy’s visit reassured Lulu that her life was still intact, that her people were still her people, and she didn’t need to fear the addition of Truman to her pack.
We moved forward with cautious optimism. Truman started to lose some of his fear of Lulu, but still consistently let her know that she was in charge. They continued to play almost non stop and we started to settle into our new routines as a two dog child house. It was touch and go there for a few days, but Truman was able to cement his place as a new member for our family.
We have a lot of work to do with Truman. We need to leash train him, help him with commands like come and stay (though he’s mastered sit and shake/paw), and help get him used to encountering other dogs on our walks. But at the same time, his energy is great, he loves Lulu, and he’s a very sweet dog that really wants to be by us whenever possible.
And for those of you that have been around for a long time and might notice the resemblance that Truman bears to our first dog, Ollie, it's a little bit crazy for us. We have a photo of Ollie from 2010 when he was in the middle of chemo for lymphoma and we were home cooking his food. This is one of those quintessential memories we have of Ollie, in spite of his too brief time with us.
In the first few days we had Truman I was making some lunch at the stove. I looked down and seeing him begging for food pretty much took my breath away. They look similar, certainly not the same, but close enough that it made me pause for a moment.
So like I said, let’s use the 8th anniversary of our blogging lives to welcome Truman as a new contributing member of Old Town Home. You’ll likely see him in many photos here and on Instagram, looking oh so snaggle-toothed.
If you’ve been following along since the early days, or if you’re relatively new to our blog, thank you for interacting and supporting our endeavors. We can’t wait to share more projects, fun, and adventures as we continue on our many ongoing efforts.
]]>Well, we have. We spent the last five years or so looking for the perfect sideboard for our dining room, but we had a case of sentimentality combined with utility that kept getting in our way. As a result, the hulking buffet/sideboard from the photo below remained in our dining room, in spite of its scale.
Shortly after we bought our row house in 2003, we discovered the amazing antique and salvage row of Cleveland's Lorain Ave. Nestled just a stone's throw from downtown Cleveland you could find yourself smack in the middle of shop after shop of affordable vintage finds. Whether you were looking for a little architectural salvage or a full room of vintage furniture, you were bound to find something your heart desired.
Today, as Cleveland has undergone an urban revival, many of these shops have shuttered. Victims of the rejuvenation of the trendy Ohio City area and the rising rents, their closure ultimately means progress for a city that had fallen on hard times in the late 1990s and early 2000s. But at the same time, the amazing antique resource that was Lorain Avenue, is a dwindling memory from our newlywed and first home honeymoon days.
more]]>Well, we have. We spent the last five years or so looking for the perfect sideboard for our dining room, but we had a case of sentimentality combined with utility that kept getting in our way. As a result, the hulking buffet/sideboard from the photo below remained in our dining room, in spite of its scale.
Shortly after we bought our row house in 2003, we discovered the amazing antique and salvage row of Cleveland's Lorain Ave. Nestled just a stone's throw from downtown Cleveland you could find yourself smack in the middle of shop after shop of affordable vintage finds. Whether you were looking for a little architectural salvage or a full room of vintage furniture, you were bound to find something your heart desired.
Today, as Cleveland has undergone an urban revival, many of these shops have shuttered. Victims of the rejuvenation of the trendy Ohio City area and the rising rents, their closure ultimately means progress for a city that had fallen on hard times in the late 1990s and early 2000s. But at the same time, the amazing antique resource that was Lorain Avenue, is a dwindling memory from our newlywed and first home honeymoon days.
During one of our visits to Cleveland in the early 2000s, after we'd owned our home for just a short time, we found ourselves a vintage dining room set for only about $1,100. A beautiful table, six chairs, china cabinet, and a large buffet. A matching set, they were all from the 1940s, built by a furniture maker in Youngstown, Ohio, and in pretty decent shape overall! The whole set's scale was large for our 15' wide row house, but it was a great price and has moved from room to room as we set up our dining room in a few different areas of the house.
In addition to antique shopping during those early days of old home ownership, we were also welcomed into our neighborhood by many of the wonderful neighbors we'd get to know. Whether attending gatherings in neighbor's homes, or enjoying their company around our Cleveland dining room table, getting to know our neighbors, many of whom have become lifelong friends, was the unexpected element of homeownership that we were fortunate enough to find ourselves amidst.
Sometime during the last six or so years, we looked at our vintage dining room set and said, "You know what, as great as this set has been, it's not quite right for our house. I think we need to make a change. And that change needs to start with the buffet...It's always been way too big for our house, so what about getting something new?"
Yes, the large buffet has been the workhorse of our dining room for years. The amount of storage it offered allowed us to look beyond its clear and ever present flaws. Its gargantuan width somehow fit between the window and door casings with only millimeters to spare, as if it were divined to live in our dining room. It even doubled as a storage area during our dining room renovation.
Much like a beloved car with 200k miles, that smells a little off and is always a quart low on oil, but has always successfully shuttled you from point A to B with little fanfare, our buffet could only be replaced with a piece of furniture that's juuuuuuust right! It's not that there aren't better buffets, it's just that this buffet was "good enough" and we had developed a bond.
From antique store to auction house, every piece we'd ever found had some inherent flaw. Too fancy. Too big. Too delicate. Too small. Too modern. Too rustic. We knew we wanted something smaller that would fit well in the space, but we still needed storage. Beyond all of that, Wendy had it in her head that whatever we chose needed to have a white and gray marble top.
We'd literally searched for years, and were starting to give up hopes of finding the right piece. Our sentimental attachment to the oversized buffet, not to mention the plethora of utilitarian storage it offered, seemed to be thwarting our efforts as much as our exacting desire to find that perfect piece. This may sound corny, but we had what seemed an unrealistic need for our eventual find to fill the storage and sentimentality void giving up our buffet would mean. A pretty impossible task when the search is more or less scrolling eBay, FirstDibs, or auction websites.
About a year and a half ago, one of those neighbors that we'd mentioned, whom made us feel so welcomed in our new home, and that we'd become lifelong friends with, passed away. He was elderly and in failing health, but it still felt sudden and unexpected. He was one of the first people who'd invited us to a party at his home after we'd moved into the neighborhood, and we'd always enjoyed chatting with him and catching up.
After our friend's passing, we had the opportunity to get to know some of his wonderful family, including his nephew who was handling the estate. During this time, and after his family had selected the items they wanted to keep as mementos, our friend's nephew asked if there was anything from the estate that we'd like to purchase before it went to auction.
Hoping to find something that would be meaningful and would remind us of our friend and neighbor, we looked over his remaining belongings, hoping to find something to remember him by. To our surprise, we found several wonderful items. He had owned a mid-sized antique marble topped cabinet that he kept in his dining room. It was really lovely, and we were very surprised nobody in his family had wanted it. After speaking with his family, measuring the piece, and deciding it seemed about right right, we realized we'd maybe found our unicorn. Wendy snapped this photo and we decided it might be perfect, but even if it wasn't, it would be perfect for us.
The piece not only looked great, had a marble top, and offered some needed open storage, but it also had the sentimental connection we'd hoped for. We'd always be able to think about our departed friend and neighbor when we looked at it nestled in our dining room.
In anticipation of the new piece we had to clean out the old buffet. With four large drawers, two cabinets, and two smaller drawers, all completely full, to say we were shocked at the amount it held is an understatement.
We had napkins, candles, tea lights, and placemats galore...
...Bags of table linens, runners, and pillow cases...
...And More liquor than we can ever reasonably drink. After removing and re-homing a majority of those items, and reserving the new cabinet as more of a napkin and liquor home, we moved the old buffet from its longstanding location and wished it well. The location for our new sideboard was ready, and looking quite empty.
After gingerly carrying it from its prior home into our home, we placed it to get a sense of scale. It was a shock, as we'd grown used to the monolithic monster completely covering the wall between the window and door, but this was a breath of fresh air. The size seemed to be ideal for the room.
We rejuvenated the dried and cracked finish a bit by using a little Howard's Feed-n-Wax, an placed the marble top. It really was perfect!
The cabinet is a solid antique with dovetail joinery, and what I believe is a mahogany or walnut veneer.
The finish isn't perfect, but the small chips and dings do nothing to detract from the piece.
At first it felt small, especially while we got used to the scale in comparison with the old piece. But before we knew it, it felt just right, ideal for the room.
If you're wondering what happened to the old buffet, don't worry, it's not gone and separated from its set for good. Wendy's parents needed a larger piece for their dining room, so they took it off of our hands. It's now right at home in their dining room. Like our Mustang that they bought off of us back in 2012, we get to visit it every time we're back visiting Cleveland.
We'd nearly given up, but stumbled into the right piece that not only met our needs in what we'd hoped to find, but also provided us with a tangible connection to a dear friend.
We like to think that our friend, in lieu of his family taking the cabinet, would be happy to know that it's sitting in our home just a few yards from the home he lived in and loved for so many years. At the very least, we like knowing that we'll always have something in our home to remember him by.
]]>Yes folks, this blog post isn't a joke, so don't worry, you're not going to be had in the last line or two. However, this post is a bit out of character, as it largely involves how closely we worked with a great contractor to accomplish what we wanted to accomplish.
If you'll recall, back in November we told y'all about working on a major basement overhaul in our Old Town row house. It was about the time of our last blog post that we somehow reverted to the ways of our 20 year old selves and went full bore on renovation work.
Here's the #1 April Fool
I'm talking 8 hour day job work, 8 hour house work, a break or two to eat, some long days, late nights, raw hands, and lots of sore muscles. And though we hired out a good amount of the work we were doing, that certainly didn't stop us from participating as much as if we were doing it all ourselves.
more]]>Yes folks, this blog post isn't a joke, so don't worry, you're not going to be had in the last line or two. However, this post is a bit out of character, as it largely involves how closely we worked with a great contractor to accomplish what we wanted to accomplish.
If you'll recall, back in November we told y'all about working on a major basement overhaul in our Old Town row house. It was about the time of our last blog post that we somehow reverted to the ways of our 20 year old selves and went full bore on renovation work.
Here's the #1 April Fool
I'm talking 8 hour day job work, 8 hour house work, a break or two to eat, some long days, late nights, raw hands, and lots of sore muscles. And though we hired out a good amount of the work we were doing, that certainly didn't stop us from participating as much as if we were doing it all ourselves.
The goal of our basement work is to turn the space into a wood shop. Everyone on HGTV talks about a basement "man cave," but I'm sorry, that's just too cliché. In our house we're far more interested in a unisex and utilitarian space that will work as a separate shop and laundry. Let's collectively get over the idea of "man cave" and instead go for "gender neutral room where necessary, productive, and cool shit happens." Deal?
For our project and working with our mason, Sean Moore of Moore Stone LLC, we had to devise a plan of attack. Our basement walls had been covered in thick and failing waterproofing paint. We wanted to remove the paint and have Sean and his guys repoint everything. This meant we had a good amount to get done before Sean and his guys could start work. Naturally, we went ahead and set a start date as encouragement to get everything done.
Since we bought our home in 2003 until now, that old waterproofing paint had gone from bad to worse. But I'll tell you one thing, removing waterproof paint is not an easy task. While removing the paint, we noticed it had adhered with an especially strong bond to any of the cement mortar that had been used, so we also wanted to undo some of the cement mortar repointing that had been done years ago before it began destroying the brick.
If you're a fellow old house enthusiast, a casual reader of old home magazines, or even a viewer of historic home renovation shows, you know that using the right mortar is about the most important thing you can do when it comes to caring for historic masonry. This is due to the fact that historic bricks are inherently soft, and the mortar that cushions the bricks from one another needs to be softer than the brick, lest you end up forcing the microscopic natural movement of the brick to cause deterioration.
We talked about proper mortar selection as far back as 2013 when we were trying our hands at repointing some of our brick ourselves. The idea is simple, user proper historic mortar and DON'T use any Portland Cement when it comes to mortar with old bricks. There are several options on the market, but all involve using a lime based mortar rather than cement mortar. Since cement mortars cure harder than the brick itself, and the brick moves naturally during the normal freeze/thaw and expansion/contraction cycles of the seasons, cement mortar can cause soft bricks to be destroyed from within...and there's no coming back from that.
When working with old masonry, Sean typically works with type S lime mortar in a color that will look good with the brick. However, in working with us we'd hoped to use one of the specific mix of colors that you can get from DeGruchy's LimeWorks.us. We got ourselves a sample pack of their Ecologic mortar colors and chose one that we felt looked best.
The standard colors are fine, but too consistent for our taste. Old mortar was mixed with sand that had plenty of natural color variations from stones and other elements. LimeWorks has a few options that mimic with look by mixing a few colors and then adding in flecks of coloring. The final color we ended up choosing was their 90%/10% mix of DGM 050/SGM 250 with XF slag flecks (3rd from the bottom I believe).
Okay, I'm getting too far away from what we were accomplishing, back on track.
Quite a bit of the paint came off relatively easily wherever the wall is below grade and on an exterior wall. This is proof that the brick absorbs and releases moisture and moves enough to fracture the paint's bond. But the area where the brick had been repointed with cement mortar, and it wasn't exposed to mortar (party wall with our neighbor), that damn paint was like a friggen rock! I started by trying every different type of paint stripper. Peel Away, SmartStrip, Soy, Caustic, steam, heat, Infrared (Speed Heater), nothing worked!
The strippers just make a mess at best, and I swear the heat and steam are just absorbed by the brick, making it so the paint never heats to the point it needs to release or soften.
Eventually I just ended up using a good old hammer and 5-in-1 tool as a chisel along with the pull scrapers.
Then I added a tool that worked really well to my arsenal. At the advice of several people on Instagram, including the guy who invented the tool itself, I picked up a Porter Cable Restorer. It's basically a handheld drum sander with different attachments and dust collection.
Once I got the paint removal started, I grabbed this sander with the paint removal wheels to grind down/burn off any remaining paint. It worked really well, and is a tool I'm very glad to own now. They're also coming out with a Craftsman version of the tool with a new styling and more powerful motor, so be sure to keep your eyes open for it if you think it might work well for you.
As projects in our house tend to go, paint removal was slower than I expected. Our buckets of dry mortar arrived and Sean and his two other guys were slated to begin. I told them I wasn't as far along as I'd hoped, and if they didn't mind my working in their space while they worked, I was just going to keep moving along.
The next several days I worked on one side of the basement on paint and cement mortar removal, while they worked on the other walls on the repointing process.
On my side of the equation I was using a Dewalt Rotary Hammer like a surgeon to carefully chisel away the solidly adhered cement mortar, which was fracturing the paint in large swaths. It was the best tool for the job by far, and beat the pants off of a brick hammer and pointing chisel. But it was loud and grueling work. I would cut a channel with the grinder and then chisel out the cement mortar with the hammer.
On the other side the guys were using various scraping tools as well as an angle grinder to cut away the old soft lime mortar. They were experts with the tool and there's little if any evidence of an errant grinder wheel hitting one of the bricks. Meanwhile, I kept working on my paint horror.
While I had repointed previously using a pointing trowel, it's slow work. The masons preferred to use a mortar bag to squeeze the mortar into the joint, and then strike the joint using a tool to give it the classic look of a concave joint.
During the work, I introduced Sean's guys to an angle grinder repointer's dust shroud for the DeWalt angle grinders that facilitates dust collection and prevents the level of dust that's usually associated with messy repointing work. This is the shroud in action, where you'd normally see a spray is dust!
The shroud, coupled with a dust extractor vacuum, cuts down on a good 70%-90% of dust you'd normally see. I also figured out that the shroud, through not really meant to fit the smaller grinders, fits nicely if you remove one of the set screws on the grinder's locking collar.
Sean and his guys worked fast, and then caught up to me pretty quickly. the last day we were all working on the final wall at the same time. They were above me raking out the joints, raining a shower of lime mortar down on my head and hair while I was trying to remove the last of the paint I'd be able to get off. I'd long since given up on perfection and decided to embrace the remaining white paint as a level of character that will tell the story of our house for many years to come.
I can't tell you how much I appreciated their willingness to let me be in their way and work with me on this project. They said they didn't mind, and even picked up a few ideas for tools they wanted to add to their approach to repointing, so that was cool as well.
Most people want to hire someone because they want to have the job done for them. For me, I want to do the job myself, but it's all about time. When I hire someone I want to be involved in the process to learn and experience. I know a lot of contractors don't like this and feel like they are being watched or slowed down. I also know that we sometimes pay a premium or "involved homeowner tax" for being involved, but I personally get so much more out of the process by being involved that it's well worth it to me. We'll eventually repoint something else in the future, and there's a good chance I'll use what I learned by working alongside Sean's guys, and I appreciate that.
After the repointing was done I had to keep the mortar wet, especially on the party wall, to ensure it didn't suck all of the moisture out of the mortar and cure too quickly. To keep water on the mortar I used a garden sprayer and walked the basement walls every hour spraying them all down. I did this as I could over the next two days and watched as the mortar slowly took on the light gray color we were expecting.
The end result of our effort to remove the old paint and cement mortar, and Sean's team to repoint everything, is pretty spectacular. It may still be a basement, but I'd say it's a basement with some walls that have rather breathtaking character.
We no longer have mortar crumbling and falling on the floor. Paint is no longer crumbling into our belongings. I look around this basement now and I see a space that will be an amazing space where we will create a lot of very cool things!
Now we just need to take care of everything else that's needed before we can call this project done. What's that you say? Oh, how about...move plumbing, install boiler, radiant heat, insulate, move stuff five thousand times, laundry room, storage, work benches, tool storage, more work benches, omg we have so much to do! More in our next blog post...that will be in fewer than four months. :-)
We've been keeping people updated on a lot of our progress real time over on Instagram, so if you're on Instagram and don't follow us, be sure to add us to see all we're working on. We've also been adding a lot of tips and tricks via Instagram Stories.
Also, this is not a paid advertisement or partnership or any sort. If you're in the DC area and are looking for a good mason, give Sean Moore at Moore Stone LLC a call. We can definitely recommend them.
And here are some links to the tools that we mentioned in this post that really helped the whole process.
Many people near and far come to Old Town this weekend to enjoy the festivities, and I like the exterior of our home to be ready for the occasion.
This year's Scottish Christmas Walk Weekend kicked off on November 30 (the parade is always the first Saturday in December), so it felt super early to be buying our trees. But it also served as a great deadline to get us motivated since we also throw a formal scotch tasting and dinner party on the Friday night of this weekend! With all of the work on our basement project it's been tough to divide our time between fun and function, but by our party that night we were in pretty good shape as far as holiday decor goes.
Just like with our fall decorations this year, I tried to make use of as many fresh greens as possible. Our home in Maryland is a great source for fresh greenery, so I made a quick trip there to snip some evergreens and boxwoods, and cut a few berry-lined twigs.
I'm not sure what the berry branches are exactly (my guess is some kind of invasive plant that while choking out surrounding vegetation, happens to look pretty this time of year). With my stash from the other house, the branches we trimmed off our live Fraser firs, and two dozen roses and a bunch of berries from the grocery store, I was ready to start making fresh arrangements.
more]]>Many people near and far come to Old Town this weekend to enjoy the festivities, and I like the exterior of our home to be ready for the occasion.
This year's Scottish Christmas Walk Weekend kicked off on November 30 (the parade is always the first Saturday in December), so it felt super early to be buying our trees. But it also served as a great deadline to get us motivated since we also throw a formal scotch tasting and dinner party on the Friday night of this weekend! With all of the work on our basement project it's been tough to divide our time between fun and function, but by our party that night we were in pretty good shape as far as holiday decor goes.
Just like with our fall decorations this year, I tried to make use of as many fresh greens as possible. Our home in Maryland is a great source for fresh greenery, so I made a quick trip there to snip some evergreens and boxwoods, and cut a few berry-lined twigs.
I'm not sure what the berry branches are exactly (my guess is some kind of invasive plant that while choking out surrounding vegetation, happens to look pretty this time of year). With my stash from the other house, the branches we trimmed off our live Fraser firs, and two dozen roses and a bunch of berries from the grocery store, I was ready to start making fresh arrangements.
Out front I added some of the fresh greens and red berries to our two urns, adding a colorful, festive feel. It was as easy as sticking the branches into the dirt. No wire, no tape, just a little elbow grease.
I put a little more effort into decoration for the front door. Using a two foot long piece of scrap wood, I wrapped it in a red ribbon (affixing it with hot glue), and then using our staple gun tacked on pieces of fresh greenery and fresh berries.
I had intended to make two of these, one for each French door out front. But time was short before the party so I made just one for our interior door. A few years ago I picked up an antique horn in a junk shop, so I added this to the greenery to give it a little more visual weight and interest, topped it with a homemade plaid bow, and called it done.
But back to the flowers I bought from the grocery store. I divided the two dozen roses and sprig of berries among three vases.
I created a low, densely packed arrangement for our dining room table.
For the living room I made a slightly taller arrangement adorned with the same plaid ribbon I used on the front door.
I also created a tiny arrangement for the family room, but in a total blogger fail, forgot to snap a photo of it. I can assure you it was lovely. (Sigh.)
I also created a small natural arrangement for the kitchen. It sits behind our sink, next to the framed Christmas ornament box that was passed down to my grandparents.
Like we've done in years past, we put up a smaller live tree in our sun porch that features clear and mercury glass ornaments and white lights.
And while we were able to put up our main tree, we simply ran out of time to decorate it before guests arrived. In an effort to make it look nice for our dinner party, we adorned it with lights, garland, our tartan topper, and a simple skirt made from a few yards of rough burlap.
As long as we've owned our homes we've always had a project list a mile long. Some of those projects are things we are going to work on in the near term, and some of those projects are things we dream about eventually tackling, but have no real concept if we'll actually get to that point. But if there's one thing you need to know about Wendy and me, when we set our minds to something, we don't like to stop driving toward that goal until we can make it happen.
Over the course of the summer, and now into this fall and winter, we've been planning and working on one of those projects we've always really wanted to take on, but weren't sure would ever happen. That project? A complete overhaul of our row house's dark, musty, dirty, crowded, and inefficient basement. You remember this gross space, right? The room in our house that could most easily pass for that of a hoarder's hideaway.
Back when we purchased our home we didn't have any sort of budget to put into the unfinished basement. The walls were covered in failing waterproofing paint, portions of exposed mortar were crumbling, and the ceiling height of the basement ranged from 6'11" at its tallest point in the center, to 6'3" at its shortest at the back wall.
more]]>
As long as we've owned our homes we've always had a project list a mile long. Some of those projects are things we are going to work on in the near term, and some of those projects are things we dream about eventually tackling, but have no real concept if we'll actually get to that point. But if there's one thing you need to know about Wendy and me, when we set our minds to something, we don't like to stop driving toward that goal until we can make it happen.
Over the course of the summer, and now into this fall and winter, we've been planning and working on one of those projects we've always really wanted to take on, but weren't sure would ever happen. That project? A complete overhaul of our row house's dark, musty, dirty, crowded, and inefficient basement. You remember this gross space, right? The room in our house that could most easily pass for that of a hoarder's hideaway.
Back when we purchased our home we didn't have any sort of budget to put into the unfinished basement. The walls were covered in failing waterproofing paint, portions of exposed mortar were crumbling, and the ceiling height of the basement ranged from 6'11" at its tallest point in the center, to 6'3" at its shortest at the back wall.
In order to get ourselves set up and working, we quickly built some shelves out of plywood and two by fours, and a workbench out of the same. Ever since, our basement has played triple duty as a storage area, laundry area, and our workshop. This triple play was less than ideal, essentially making the space fight over all three, doing none of the three particularly well. Not to mention that due to the shared space with the workshop, the storage and laundry areas were perpetually covered in a layer of saw dust. Needless to say, it was less than ideal.
Over this summer we needed to address some of the issues that have been impacting our basement, which included installing a French drain and sump pump to resolve periodic water infiltration following heavy rains, and correcting the out of level floor by working with a contractor to remove the old slab and pour the new.
While we're at it, we're also removing the old and horribly inefficient forced air furnace. We're replacing it with a high efficiency boiler that will heat the first floor of our house with below floor radiant heat, and the second floor with a hydronic coil on our attic heat pump. We're looking forward to having a more efficient heating system, and the bonus is that switching over to radiant heat will free up a lot of space in the basement because the bulky ductwork is no longer needed. This is another project I've wanted to take on for about 10 years or so, and we're finally doing it!
If you've been following us on Instagram, you've seen a few of our in progress shots that involve the restoration and repointing of the 130+ year old beautiful masonry walls. This is a tall task that involves stripping old Drylok waterproofing paint, removing some cement mortar from an old (and bad) repointing job, removing what appears to be plaster from other attempts at repointing, and generally trying to clean up all of the masonry.
Basement wall in 2003
This whole project has been a tremendously time consuming and exhausting undertaking. This, coupled with other projects and a very busy work schedule, have kept us pretty quiet on the blog the last several months. We're also working with a few contractors on this project, which is a bit outside of our norm. But if we want to get this done in a semi-reasonable amount of time, we've had to figure out what we should hire out vs. what we should take on ourselves. It wasn't an easy decision by any means, but working with a few good contractors that we know and trust certainly makes things much easier.
So, what's the plan? We're turning the basement into two truly separate areas. One third of the space will be a laundry and storage area for bulk grocery and cleaning supplies, a few of Wendy's real estate staging items and signs, and other household items that we want to keep clean. It will be separate from the workshop, away from the dust and grime that is unavoidable when working on projects. The other two thirds of the basement will be a real, actual workshop. The workshop space will be about 20'x14' and will house several moveable cabinet and workbench components that I plan on building over the next several months.
The whole project is major and will take a good while to complete. Our goal is to keep you all updated as portions of the project progress. So, are you ready for the fun? While it's not your typical fancy Pinterest-worthy before and after kitchen or bath makeover, we can't wait for this project to come together. After all, this is a project we weren't sure would ever actually happen, so seeing it in the middle of the chaos is truly exciting!
]]>After what has felt like an endless summer of intense rain and humidity here on the east coast, fall's cool, crisp days are more welcome than ever. And while I'm not quite ready to drape our home in the traditional orange and black of Halloween (give me another week for that), several seasonal touches of autumn have begun to make their appearance in our home.
Given all of our rain this summer, our gardens are looking remarkably lush this year. As a result, my pre-Halloween decorating approach has been to bring the outdoors in, and to celebrate the change in seasons with cuttings from my garden and small pumpkins purchased from a local farm stand.
When hatching my decor plan I took a few minutes to walk around my garden to snip florals and leaves that I thought would make an interesting statement. This included a few stalks of pink sedum and branches of deep purple weigela.
more]]>
After what has felt like an endless summer of intense rain and humidity here on the east coast, fall's cool, crisp days are more welcome than ever. And while I'm not quite ready to drape our home in the traditional orange and black of Halloween (give me another week for that), several seasonal touches of autumn have begun to make their appearance in our home.
Given all of our rain this summer, our gardens are looking remarkably lush this year. As a result, my pre-Halloween decorating approach has been to bring the outdoors in, and to celebrate the change in seasons with cuttings from my garden and small pumpkins purchased from a local farm stand.
When hatching my decor plan I took a few minutes to walk around my garden to snip florals and leaves that I thought would make an interesting statement. This included a few stalks of pink sedum and branches of deep purple weigela.
I also nabbed a couple stems and leaves as well as a couple dried blooms from our giant hydrangeas, which grew like crazy this year (but failed to produce more than a handful of blooms). I rounded out my picking with a few pieces of fern leaves, dried Black-eyed Susans, and a little ivy.
Using the garden cuttings, I created a small arrangement that hangs on the side porch, next to the door we use as our primary entrance to our home.
I picked up this metal container in a shop last summer during a visit to Morrison, Colorado just outside of Denver, and I love how I can change out the contents based on the season.
I carried this same natural approach Inside our house. our fireplace mantel also received some attention.
Making just a few slight modifications transformed the look from summer to fall in just a few minutes. In our home I much prefer this look to an over-the-top display that covers the entire mantel. It's easier to assemble, we tend not to tire of it over time, and it doesn't cause a big mess when it's time to clean up.
I'm looking forward to creating a full-blown Halloween look later this month, but will be appreciating a softer approach to celebrating autumn these next few weeks. It's such a simple way to augment our decor with a little touch of autumn, and a great way to begin appreciating the change in season. Who knows, maybe next year we'll be using more of our own natural elements? I'm thinking planting a small pumpkin patch of our own is in order!
If you too are thinking ahead to Halloween, check out our Halloween Page for more details on past projects, party favors, and costume ideas for my favorite holiday.
]]>First, not to worry, we're here, and we're all fine. Second, wow have we had a lot going on! Over the last month we've wanted to write several blog posts but it has been so crazy the last little while we've just not had the time. Don't know if you know this, but it turns out topical blog posts require some inordinate level of time and concentration that we just haven't had the last few weeks.
Rather than trying to do a topical blog post about window glazing, a project that took months but we creatively make it look like a weekend, or a new recipe that we can't get enough of, we're going to get back on track by kicking it old school blogging style. "What's that" you say? We're going way back to the chronological journaling style roots of blogging, back before blogs were all shooting for compelling linkable content angling for pins and shares. Yes, we're going to look back over our last six weeks or so and summarize some of our highlights. If you follow us on Instagram there's a chance some of this may be familiar, but it will certainly have a bit more detail and far fewer hashtags. One thing's for sure, we haven't just been sitting around doing nothing the last several weeks. More on where these guys fit into the story in a bit.
Our last blog post was back near the end of July, when we did a little video home tour of our foursquare. Since then we've continued on several projects, experienced a few cool events, and we went on a handful of small trips.
more]]>First, not to worry, we're here, and we're all fine. Second, wow have we had a lot going on! Over the last month we've wanted to write several blog posts but it has been so crazy the last little while we've just not had the time. Don't know if you know this, but it turns out topical blog posts require some inordinate level of time and concentration that we just haven't had the last few weeks.
Rather than trying to do a topical blog post about window glazing, a project that took months but we creatively make it look like a weekend, or a new recipe that we can't get enough of, we're going to get back on track by kicking it old school blogging style. "What's that" you say? We're going way back to the chronological journaling style roots of blogging, back before blogs were all shooting for compelling linkable content angling for pins and shares. Yes, we're going to look back over our last six weeks or so and summarize some of our highlights. If you follow us on Instagram there's a chance some of this may be familiar, but it will certainly have a bit more detail and far fewer hashtags. One thing's for sure, we haven't just been sitting around doing nothing the last several weeks. More on where these guys fit into the story in a bit.
Our last blog post was back near the end of July, when we did a little video home tour of our foursquare. Since then we've continued on several projects, experienced a few cool events, and we went on a handful of small trips.
The whirlwind started when a friend of mine invited me to attend the opening of DC United's Audi Field downtown. As a lifelong soccer fan I've been anxiously awaiting the new stadium's opening for many years now, so the experience was a ton of fun, in spite of the torrential rains that greeted us upon our arrival at the stadium.
If you're a DC area local, and/or a DC United fan, you should definitely make a point to get to a game. It's a great stadium with wonderful crowd noise and energy, and it seems like there's really not a bad seat in the house.
Right at the end of July, Wendy and I loaded Lulu up in the car and we headed out on the first of our small weekend vacations. Our destination was to visit one of our closest friends, Katie, down near Morehead City, North Carolina.
Katie's parents have had a cottage down on Bogue Sound for her whole life, and this was our chance to experience the place we'd heard much about for so many years.
This was both Wendy's and my first time visiting the North Carolina coast, and what an amazing time we had. Katie and her husband Colin used to be neighbors of ours in Old Town, and we've been friends with them through several of their deployments, at least three moves, two kids, and more bottles of wine than we can count. Having the unique opportunity to experience Katie's childhood getaway through the eyes of a local was a true treat.
From local fare (the shrimp burgers are not to be missed), to great antique shops...
...to some beach time with Lulu just behind Fort Macon, this little trip was just a few days long but was incredibly fun and relaxing.
While visiting we had the chance to stop by the historic town of Beaufort where we walked around town gawking at the amazing historic homes.
It seemed like everywhere we turned there was a new place we liked better than the last.
Everything happening with Hurricane Florence and how it is impacting the coast and nearby inland cities has us heartbroken and worried. We had such a wonderful time while visiting and simply dread how significantly the people in that area are being impacted. A 10' storm surge will have an extreme impact on those area that we enjoyed so much, and this is simply terrible.
As we left town we drove through the city of New Bern, North Carolina and loved every minute of it. We took a half hour or so to drive around town and quickly tour the historic district.
Some of the homes of New Bern date to the mid 18th century and the architecture as a whole is absolutely impressive.
Wendy and I both want to make a longer trip and stay in New Bern the next time we head down there just to get to know the city a little better. It certainly seems worth the time.
Once we returned home we used our relaxation as re-energization and turned it into progress on some of our projects. Most notably, we've continued to move ahead on the main hallway of the Foursquare. We learned one very unfortunate (for us) fact. The underside of the 3rd floor staircase, above our main staircase, is beadboard. Well wouldn't you know it, someone decided it would be a good idea to wallpaper the beadboard. Then someone else thought it would be a good idea to paint over the wallpapered beadboard. None of this was a good idea.
So now we're taking care of that by slowly stripping all of the paint and paper off of the underside of the stairs.
Beyond that absolute mess, one of the aspects we've covered at length in the past was the built-in bench build to disguise the new HVAC return duct and our crawlspace access. After hanging our antique Galway "Fishing" sign we still had the large opening for the air return. A while back we'd found an antique cast iron grate to fit the opening on eBay and previously spent a bunch of time cleaning it up and spraying it white. So I finally got around to mounting it in the opening to finish off the under stair project.
We still need to put a final coat of the trim color on the grate, as well as on the large screw heads holding it in place, but this felt wonderful to finally have this checked off of the list.
We also made some major lighting decisions in the hallway (like the fact we don't need any recessed lights in this room), and test hung the new light fixture Wendy found for the space some time ago. This step made the whole project start to feel real.
It's important to remember that we're covering the summer in this description, so we did many of those wonderful things we like to do in the summer. We took in Nationals games...
...we went for walks around Old Town...
...we watched classic movies projected on our neighbor's garage (North by Northwest and Sabrina)...
...and I got a bad case of poison ivy that tortured me from the day before we left for North Carolina for the next three weeks. I have no idea where I got it and I apparently react somewhat terribly to the plant's oils. Oh summer traditions of prednisone.
In the middle of August we got to do something that was a ton of fun. We headed up to Baltimore for the Stanley Black & Decker launch of the Craftsman brand. Stanley Black & Decker bought the Craftsman brand from Sears in 2017 and have been working on their overhaul ever since.
We were covering the event for Popular Mechanics, Charles & Hudson, and ToolCrave.com and wrote up a summary of our #CraftsmanLaunch experience over on Charles & Hudson. If you're a tool fanatic like me, or have some memories of Craftsman from your past, you should definitely check out the article. If you've noticed, this is also why you've been seeing Craftsman pop up a lot more in Lowe's, Ace Hardware, and on Amazon lately.
Aside from the tools, this turned out to be a chance for me to live out one of my childhood dreams. Craftsman is sponsoring a few cars in NASCAR on the Joe Gibbs Racing team. As a result of this sponsorship several JGR drivers were in attendance, including Erik Jones and Ryan Preece.
Now I don't know if you know this about me, but I am a lifelong NASCAR fan. I've been attending races and watching on TV for as long as I can remember. Part of this Craftsman launch event involved a stop the Autobahn Indoor Speedway all electric indoor go kart track.
Not only were we able to have a little fun racing go karts, we had the chance to race against NASCAR drivers on the track!!
The outcome of our races? Well, I am not bashful in telling you that I beat Erik Jones in my race with him, and my time for our morning session was 2nd fastest out of all event attendees. I was only bested by Ryan Preece in top lap times for the morning session, and that was only by 0.1 seconds. Based on this, I think my best and only course of action is to immediately quit my job and begin pursuing my dreams of driving NASCAR in a professional and full time capacity. (Kidding not kidding.)
I could go on and on about the Craftsman launch as it was both a lot of fun from start to finish, and a ton of great information. One of the best parts of any event of this type is the opportunity to get to see old friends and meet new friends from all over the world that we normally only get to talk to on the Internet. The YouTube, Instagram, and online tool/maker/diy community is a wonderful one to be a part of. Best of all we got to do all of this up in Baltimore, which allowed us to bring Lulu up to the event, which allowed some people who only know her from Instagram the opportunity to meet her. How weird is that?
A litter later in August we took a day trip out to the Shenandoah Valley area in Virginia. Some of Wendy's wonderful clients were looking at a great house in the country on some land, so I tagged along and we decided to make a whole day of the outing, rather than just driving there and back. Boy did we have a great time! We found so many great places to stop and explore by taking a less direct route home. We stopped in antique stores in Berryville, VA...
...explored 18th century graveyards...
...had lunch at an 18th century pub...
...and found an amazing antique store called Red Schoolhouse Antiques. This place is not your typical antique store where you have so much stuff sitting on top of other stuff that you can barely see what you're searching for. This store is in an amazing old schoolhouse and is full of European antiques brought over by the owner's of the store, who live in Scotland full time.
If you find yourself nearby, it's an excellent place to stop. The prices are extremely reasonable, especially given how high end the pieces in the shop are.
Over labor day weekend Wendy, Lulu, and I took our final trip of the summer when we piled into the car and headed to Cincinnati. We were going for two reasons, the wedding of Wendy's cousin, and to visit the Cincinnati Zoo for an animal encounter I had given to Wendy for her birthday earlier in the year.
The wedding was held at the Cincinnati Nature Center's Krippendorf Lodge. The historic lodge from the early 1900s was a perfect wedding setting and allowed us to take in the wonderfully preserved building in addition to enjoying the celebration with friends and family. Not to mention the fact that the wedding had an open Graeter's Ice Cream Truck in the driveway!
In addition to the wedding we took a trip to the Cincinnati Zoo for a chance to do something really special. We enjoyed an interactive experience with some of their Penguins and their two toed sloth named Moe.
Back when I was trying to figure out what to get Wendy for her birthday, I was wracking my brain for something unique, fun, and memorable. Wendy is a huge fan of the Cincinnati Zoo (and Fiona the hippo), penguins, and sloths, so I figured, why not get a chance to actually meet them in person. It's a great way to give a unique gift that's also benefiting zoo and animal programs.
Buddy the Magellanic Penguin even gave Wendy a gift of a completely custom painting! Unfortunately, Buddy did lay down with his chest in the paint at one point. Nothing a quick swim won't take care of.
Our giant whirlwind of the end of our summer wouldn't be complete without a little more work on the main hallway project. For that we launched into finishing up the plaster work throughout the hallway.
We've spent the last several weekends we've been in town applying coat after coat of plaster in hopes of having this hallway project completed before we're solidly into fall. While it's slow going only getting to work a day or two per weekend, we're making some solid progress and it feels like we're moving along.
While the last month and a half has been a blur, we anticipate much of the same over the next two months. We'll be doing our best to keep you all updated on our latest goings on, but our apologies if it's not as regular as we would like. We also have a few big projects on the horizon that we can't wait to share more about. Until then, we're just enjoying our finished dining room project every chance we get.
So that's what we've been up to. What did you do to close out the summer? Anything fun? Any big projects?
]]>We've been in our 1908 Foursquare for just shy of four years now. Throughout our time in the house we've completed projects, both large and small, hatched plans, and had a lot of wonderful opportunities to enjoy our time in the house either on our own or with friends and family.
Now that we're a few years into the project, we wanted to give you a little glimpse into our home with a video home tour. Seeing the flow of walking room to room, how the spaces work together, and where we are in the process should give you a good idea of how far we've come, and how much we still have ahead of us.
This home tour video gives a pretty complete picture of our house. The only rooms not in the tour are the utility and laundry rooms off of the office. We have a ton we hope to accomplish in the near future and hope our video gives you an idea of the direction we're heading.
If you have any questions about our home's layout, our plans, or anything else, be sure to ask below and we'll do our best to answer. We hope you enjoyed our video and found it to be interesting (thought it was admittedly a little long). And we hope you have fun following along on our progress as we keep moving through our giant list of projects.
more]]>We've been in our 1908 Foursquare for just shy of four years now. Throughout our time in the house we've completed projects, both large and small, hatched plans, and had a lot of wonderful opportunities to enjoy our time in the house either on our own or with friends and family.
Now that we're a few years into the project, we wanted to give you a little glimpse into our home with a video home tour. Seeing the flow of walking room to room, how the spaces work together, and where we are in the process should give you a good idea of how far we've come, and how much we still have ahead of us.
This home tour video gives a pretty complete picture of our house. The only rooms not in the tour are the utility and laundry rooms off of the office. We have a ton we hope to accomplish in the near future and hope our video gives you an idea of the direction we're heading.
If you have any questions about our home's layout, our plans, or anything else, be sure to ask below and we'll do our best to answer. We hope you enjoyed our video and found it to be interesting (thought it was admittedly a little long). And we hope you have fun following along on our progress as we keep moving through our giant list of projects.
]]>This project officially kicked off back on December 10, a short seven months ago. At the outset, the dining room had yellow drywall on the walls hastily covering original plaster, a 25 plus year old fruit and floral wallpaper border, outlets falling out of the walls, a weird section of repainted ceiling, haphazardly applied molding, and a collection of holes in the ceiling and walls where things like ceiling fans, lights, and thermostats once lived. This is what the room looked like on the day we moved in, October 2014.
Since 2014 this has been our living room then our dining room. And though we were using the room as a dining room with all of our furniture, every time we were in the room the only things my eye could see were the border, missing fixtures, or problems with the room. I was thrilled when we decided to finally move forward on our renovation of the room!
more]]>
This project officially kicked off back on December 10, a short seven months ago. At the outset, the dining room had yellow drywall on the walls hastily covering original plaster, a 25 plus year old fruit and floral wallpaper border, outlets falling out of the walls, a weird section of repainted ceiling, haphazardly applied molding, and a collection of holes in the ceiling and walls where things like ceiling fans, lights, and thermostats once lived. This is what the room looked like on the day we moved in, October 2014.
Since 2014 this has been our living room then our dining room. And though we were using the room as a dining room with all of our furniture, every time we were in the room the only things my eye could see were the border, missing fixtures, or problems with the room. I was thrilled when we decided to finally move forward on our renovation of the room!
Before: December 9, 2017
We counted it up and our seven months of effort actually spanned about 35 actual whole or partial days of working on the project. Seven months may sound and feel like a long time, but when you look at the number of days we were actually working on the room, we took just over a month of time start to finish. The end result is a room that not only makes me smile, it makes me downright emotional!
Yes, December 10 was the day that we decided to lay down some flooring protection and launch into the dining room renovation, removing the yellow layer of drywall.
Over the subsequent months we took care of the residual problems in the room. We repaired and skimmed the original walls with a fresh coat of lime based plaster...
...either restored or installed historically accurate door, window, and baseboard trim...
...installed two part crown molding...
...and searched for many one-of-a-kind pieces of furniture and accessories for the room. Like this antique machine shop cart that will make the perfect drink cart.
After all of our effort it's been wonderful to see the whole room come together over the last several weeks.
When we take a step back to look at the room as a whole, it's easy to lose perspective when considering everything that goes into an overhaul like this. At first glance we just have different color paint, new lighting, different furniture, and items hung on the walls. But when we really get down to the effort and detail that goes into a room like this, my heart starts to smile at how everything has come together.
One of my favorite accessories in the room is the boat painting hanging on the wall by the kitchen. This artwork was a gift from my mom several years ago. She painted it for us back in 2014 as a housewarming gift and I've been looking for the perfect frame and the perfect spot in our home since we received it.
We ended up ordering a weathered grey wood frame to embrace the waterfront theme I'm going for in the house. The frame is meant for canvas paintings and it was very each to mount the painting in the frame.
When it comes to hanging anything on these plaster walls, we don't want to leave anything to chance. Driving nails into plaster can easily cause cracks due to the pressure the nails tend to put on the wood lath behind the plaster. As a result, Alex likes to mark our holes for hooks and then drills a pilot hole for each nail (all the while ignoring basic common sense when it comes to ladder safety).
On the other side of the space we hung two antique broom drying racks from a broom factory. These both came from Forge Industrial Works in Old Town Alexandria, and were an anniversary gift from Alex. We'd been looking for champagne riddling racks for this section of wall, but when Alex saw these they seemed so much more unique and he thought they might work well in the room.
These drying racks are old, cracked, crusty, and have a beautifully worn patina about them. To hang them we simply attached a picture wire to the back and hung it on hooks rated for up to 30 pounds.
Since this is a dining room, the focal point of the space is also one of our most favorite new pieces of furniture. We'd been searching for the perfect antique table for some time. In the interim we'd been using a table given to us by Alex's parents, that was used in their home throughout Alex's childhood. As you can see, when we had it temporarily in the room it was a little too small for the space.
Though we'd been expecting to search for our perfect table for months more, we lucked out and found our new table at European Country Living in Springfield, Virginia. This store used to be on King Street in Alexandria, but it recently opened in a new warehouse space in Springfield. The store's owner makes several trips per year to Europe and sends back containers full of amazing antiques. Our particular table is about eight feet long, was built around 1910, and is from a Monastery in Antwerp, Belgium.
We'd initially thought we would cut the table down slightly, reducing the overall length by about a foot. However, once we had it in place, we changed our seating plan and bought ourselves four new X back chairs, forgoing the seats at either end of the table. This makes the table's current long length work really well in the space.
The other corner of the room is home to an antique cabinet given to us years ago by Alex's parents, and a mirror we scored at a yard sale in Alexandria last summer.
We softened the space up with a few inexpensive white IKEA drapery panels hung on black metal rods from Target. These are the same rods that we used in the living room, and the hardware for these rods work well with the metal accents on the hanging light fixture in the center of the room. We hung the curtains at 96" high and then used our wallpaper steamer to steam out the wrinkles.
When I look at this relaxing dining space I ignore the items in the nearby rooms that are unfinished, such as the plastic hanging in the doorway to the hallway (our ongoing project), or the kitchen just behind (that we hope to tackle later this year). Instead I just appreciate how far this room has come in a relatively short amount of time. And we can't ignore the thing that really makes this dining room amazing. The view out the French doors over the back porch and onto the water.
This view, no matter the season, is a stunner! The setting for a meal is so wonderfully picturesque and I feel like we've done a good job of embracing the calm and nautical feel of the setting with the decor of the room. We've attempted to layer in antiques, personal items, and eclectic accessories give the space a very relaxed and comfortable vibe.
Most of all, the dining room, along with our living room renovation on the other side of the house, and our light office and bathroom renovation at the back of the house, have me excited for what the entire first floor will eventually be. If we're able to finish the main hallway and the kitchen later this year, as we're planning, we will have finished all of the first floor living areas.
What do you think of our overall renovation? How about the table and its length, does not having a chair at either end of the table work for you, or are you a head of the table person?
Here's a brief summary on our sources and selections for the items in this project.
If you've missed some of our other posts on this project and want to get caught up:
All of the prior posts are summarized and linked at the bottom of this post, so if you need to get caught up (because in true Old Town Home fashion, this is a super ridiculous long running thing) you're all set.
Our last post on this subject covered the various options we had, and the one we chose, to source and cut some antique wavy glass as replacement for our broken panes. With our glass selected and sized for fit, we were just about ready to start glazing!
Now I don't know if you've ever done any window work, or if you generally get excited at the prospect of applying glazing putty...but you should, you most definitely should! Applying glazing putty is a wonderfully soothing and fulfilling prospect that provides an immediate sense of gratification and discernible progress. As a DIYer, there are few things that make my heart grow three sizes like that of a sense of gratification and progress.
But before we could begin our glazing process, there's a little glazing product selection and prep that we're going to cover today (the actual glazing post will be up next).
more]]>All of the prior posts are summarized and linked at the bottom of this post, so if you need to get caught up (because in true Old Town Home fashion, this is a super ridiculous long running thing) you're all set.
Our last post on this subject covered the various options we had, and the one we chose, to source and cut some antique wavy glass as replacement for our broken panes. With our glass selected and sized for fit, we were just about ready to start glazing!
Now I don't know if you've ever done any window work, or if you generally get excited at the prospect of applying glazing putty...but you should, you most definitely should! Applying glazing putty is a wonderfully soothing and fulfilling prospect that provides an immediate sense of gratification and discernible progress. As a DIYer, there are few things that make my heart grow three sizes like that of a sense of gratification and progress.
But before we could begin our glazing process, there's a little glazing product selection and prep that we're going to cover today (the actual glazing post will be up next).
You have a ton of options when selecting glazing putty. From DAP '33' to "Glazing in a caulk tube," there are a lot of products out there that you'll want to stay away from. (Here's a hint, don't use glazing in a caulk tube...no matter what the person who swears by it says.) Many of these products are difficult to work with, prone to failure, or generally don't work the way old windows need them to work.
When I'm glazing I like to use one of the products from Sarco Sash glazing putty. There are two types to choose from, either the "Dual Glaze" or the "Type M" putties.
Both putties are soybean and linseed oil based elastic putties that improve on the difficult to use calcium carbonate putties of the olden days. You can still find these old linseed based calcium carbonate putties on the market, but they don't offer the elasticity that works much better in the expansion/contraction process of wood windows.
The Dual Glaze type is a slower setting glazing putty that can be used in wood or metal sash, and can also be applied to sash that remains in it's opening. Think of it as more of an all weather glazing putty for when you need to fix a broken pane in place. Duel Glaze can take weeks to skin before painting. It's a very user friendly putty, but you certainly have to be patient with the cure.
The Type M product is a faster setting and far less oily version of the putty. It's meant for glazing in the shop/workspace where you can let your sash set up and skin before painting and reinstall. It's pretty easy to work with and I really don't notice a difference in user friendliness between the Dual Glaze and Type M. The real advantage is that the sash are ready for paint just three days after applying the putty.
For our first window I used the Dual Glaze on the lower sash and the Type M on the upper sash. This way I'll be able to compare over time once it's reinstalled. But for all future sash, I'm definitely going to be using the Type M.
Okay! With the glazing putty of choice selected, there's something I like to do to keep my putties fresh. Since glazing putty isn't cheap, and there will be lulls between when we use them, there's a little trick to make your putty live a much longer life in its bucket. These Sarco glazing putties will live indefinitely in their bucket as long as you keep air away from them. Air will allow them to skin and cure, so even if you have them in a bucket with the lid on, the small bit of air in contact with them will eventually ruin your bucket. I've had it happen, and you don't realize your putty is ruined until you go to use it...which is sure to ruin your day.
To solve this problem I protect it all with water and I create three buckets. These buckets are for use "Now," "Later," and "WAY Later."
To do this I grab a few additional smaller container buckets with lids, then grab several handfuls of putty and form them into both small and large balls. The idea here is separate out the putty among these several containers. From a 1 gallon bucket of putty I'll split about 1/3 to 1/2 out into balls in these other buckets. The balls should be somewhere between the size of eggs and baseballs.
Once the balls are all split into the buckets I flatten out the main gallon container by pushing the putty down. This gives a good surface on the top that is devoid os major cracks and crevices. Next I add enough water to the bucket to give me about 1" of water sitting on top of the glazing putty. This water barrier will keep the air away from the putty and will keep the putty fresh in the bucket until the next time I need to use it.
I can put the lid back on the bucket and then put it on my shelf and leave it undisturbed until I need it again. When that time comes all I need to do is open the bucket and pour the water off of the surface, then grab my next handful.
For the smaller buckets with the balls of putty I can do pretty much the same. I just fill the buckets with water until all of the balls are completely covered. With these buckets of smaller balls of material the advantage is that I can just grab individual balls of putty as I need to use them. All you need to do it blot them dry with a paper towel and you're ready to glaze.
Since I have both Dual Glaze and Type M putty, I made sure to clearly label my buckets with marker. This will surely make it easier when I need to go grab my bucket off of the shelf.
This is the most effective way that I've found to keep our glazing putty fresh and ready for the next sash. Since the putty is oil based the water doesn't hurt it in storage and simply keeps the air away from the surface, keeping it fresh and pliable.
As I mentioned, we'll give more detail on the actual glazing process in our next post. I'll be sure to cover the tools and techniques that have worked well for us. Most importantly, it should be right around the corner, not weeks away. Getting the glazing putty figured out is just the first major step in doing glazing the right way.
Have any horror stories of your own working with glazing in a caulk tube or something similar? Would love to hear.
If you'd like to go back through our window restoration series, here's our complete list of posts.
Personally, I'm a self proclaimed bargain hunter. My friends know as me as shrewd negotiator, always on the hunt for a deal, and never wavering in my desire to achieve big budget looks at bottom dollar pricing. I understand that there may be a time and place to pay full price, but that time and place usually isn't one where I'll be found!
Over the last several years, as we've been establishing our decor style and preferred aesthetic in our Foursquare on the water, I've been deal hunting and stock piling. Whether we're talking antiques, light fixtures, textiles, art work, or accessories, I have a mental plan for our home and I'm always looking for items that would fill the gaps in this style.
In a nutshell, we're going for a "coastal farmhouse with antique accents" vibe, primarily because our home is an historic coastal farmhouse (go figure, embracing both the age and style of the house in its decor). As I've found decor items that fit with this style, and they happen to be a good price, either by happenstance or shrewd negotiating will, I pick them up for later use.
This tactic is precisely how we've ended up with several hanging fixtures for our home, all occupying space in their boxes in the attic. The themes of each are consistent with the others. Lots of light browns with natural wood, some with a gray weathered appearance, textured fabric like burlap, glass globes or domes with plenty of imperfections, and rough traditionally nautical rope accents. Here are just a few examples of my hoard.
more]]>Personally, I'm a self proclaimed bargain hunter. My friends know as me as shrewd negotiator, always on the hunt for a deal, and never wavering in my desire to achieve big budget looks at bottom dollar pricing. I understand that there may be a time and place to pay full price, but that time and place usually isn't one where I'll be found!
Over the last several years, as we've been establishing our decor style and preferred aesthetic in our Foursquare on the water, I've been deal hunting and stock piling. Whether we're talking antiques, light fixtures, textiles, art work, or accessories, I have a mental plan for our home and I'm always looking for items that would fill the gaps in this style.
In a nutshell, we're going for a "coastal farmhouse with antique accents" vibe, primarily because our home is an historic coastal farmhouse (go figure, embracing both the age and style of the house in its decor). As I've found decor items that fit with this style, and they happen to be a good price, either by happenstance or shrewd negotiating will, I pick them up for later use.
This tactic is precisely how we've ended up with several hanging fixtures for our home, all occupying space in their boxes in the attic. The themes of each are consistent with the others. Lots of light browns with natural wood, some with a gray weathered appearance, textured fabric like burlap, glass globes or domes with plenty of imperfections, and rough traditionally nautical rope accents. Here are just a few examples of my hoard.
Once such instance in which a lonely low cost but beachingly charming light fixture looking for a good home found me was on a trip to the Restoration Hardware Outlet in Leesburg, Virginia. It's actually in the box at the bottom of this photo. Yes, that says "BASURA" on the box, but I could see this fixture was far from trash!
Within the box was an apparently perfect looking Cruz Burlap Pendant fixture from RH Teen. Not only is it a burlap covered drum shade, the black metal accents and the large twisted nautical style rope was perfect for our house. While the regular price, still available on the website today, is $249, the outlet price for this light, an amazing $45!! It would have been a tragedy to NOT buy it!
So I purchased it, tucked it away in the attic, and began planning for the day we'd be able to install it as our dining room chandelier, even though our dining room renovation was still a ways off. I'd be remiss if I didn't mention the fact that this new light bumped the large glass light from the earlier photo in this post. This is a case where deals give you options.
Fast forward a little over one year, our dining room renovation began in late 2017 and has progressed to the point where the plaster is restored, everything is painted, and we're ready to install our light fixture. We excitedly pulled the box marked Basura from the attic and began the glorious unboxing process. We knew the rope that supported the fixture was a bit too long and would need to be reduced in length, but that didn't seem like that big of a deal.
We figured we'd pop the box open, adjust the length, and then install the light. Much to our chagrin, when we broke this light out and looked over the assembly, there wasn't an obvious option to adjust the length of the rope. The shade itself is 14", the rope comes standard at 36", and when you include all of the mounting hardware you're looking at a total fixture height of about 56". When you have a normal height ceiling, say 9' like in our home, that puts the mounting height of this fixture at a solid 4' off the ground.
We hunted around the RH website and eventually determined that the length of this rope, and the light fixture as a whole, was intentionally not adjustable. How dumb is that? You basically needed to have a vaulted ceiling or something similar that offers about 13'-14' ceiling height. No wonder it was so cheap at the outlet (but doesn't explain why it's still for sale full price on the website).
As we dug into our options we decided the only acceptable path forward for our needs was to alter the light's rope length. Alex was confident we'd be able to figure it out, so we started doing one of the things we know best, taking it apart.
The rope assembly is pretty simple. It consists of about a dozen or so small cotton strings twisted into three pairs of thicker ropes, that are then twisted together around a central black plastic wire. The wire is essentially what holds the weight of the fixture, and the rope is more decorative than anything. As you can see in the above photo, the wire is pinched in place by a set screw within the mounting hardware. But once the set screw was loosened, we couldn't remove the rope from the metal housing. Undeterred, we started hacking at it, cutting the rope but being careful not to cut the wire.
Once we'd begun freeing the rope from the housing we slowly started to see how it was put together.
The interior of the metal housing has three screws mounted towards the center that act as a sort of cleat around the rope. There's also a metal wire that wraps around the top of the rope that holds onto the metal screws and keeps the rope in place.
While we tried to figure out how to handle reassembly we wrapped some duct tape around the top of the rope to make sure the twist stayed in place. I certainly didn't want the whole thing falling apart while we were fooling around with a plan, and this twisted rope tends to want to unravel when nothing is holding it.
At first glance, it seemed like this should be easy. The housing and hook at the top are obviously two pieces, one that threads into the other. Alex took his tools to the mounting loop and tried to loosen up the two pieces. If we could get them apart, we'd just need to trim to length, slide the housing over the end of the rope, wrap the end of the rope in a new piece of wire, and thread it all back together again. But things are rarely that easy. It seemed like there was a bunch of super glue adhesive on the two pieces that essentially cemented them together within the threads. At the very least, we had ourselves a broken disassembled light fixture.
Alex tried to soften the adhesive by allowing it to sit in a cup of mineral spirits for a while. Unfortunately, that did nothing.
After we made several valiant attempts at separating the two pieces we decided to go back to the drawing board. Since we couldn't get the pieces apart, I suggested shortening the whole thing and then trying to fit the rope back into the housing. Alex noted that the whole fixture is actually supported by the wire more than it is the rope, so this might be able to work if we could get the wire past the three screws.
Before we could shorten things we needed to figure out the correct height based on our table. Without shortening anything the light was practically on the table.
Obviously, this wouldn't work. The ideal height of a chandelier above your dining table is supposed to be 30"-34" for an 8' ceiling, with an additional 3" per one foot of ceiling height. So that means 33"-37" for our table.
After we broke out the tape measure, Alex held the fixture at the desired height while I viewed things from the table to make sure it looked good while seated and while standing in the next room.
Once we had what we felt was an ideal height we quickly marked the cut line with some painters tape, then with some sharpie.
Before we actually made the cut we started to unravel the rope. With nothing holding it together the rope was almost trying to unravel itself.
When we got close to the cut mark, but before cutting, we placed a few pieces of duct tape on the pieces of rope just above and below the cutline to hold things together, then Alex cut each section of rope individually.
After removing the necessary length of rope and setting it aside, Alex trimmed the wire's length to also work better with the new height. He left the wire about 12" longer than the end of the rope to give enough length into the electrical box.
Reassembly was actually pretty simple. We made sure to wrap the rope tightly around the central wire, then ran the wire up through the center of the upper housing.
Now the somewhat tricky part, getting the rope back into the housing. Alex took the length of wire and wrapped it tightly around the top of the rope. We also left the duct tape on the very top of the rope twists just to keep everything together. The second ring of duct tape was just holding everything in place and was positioned to be removed after the rope was firmly in the housing.
Inserting the rope into the housing was a matter of twisting the housing onto the rope in a counter clockwise manner. While Alex twisted, the metal wire was able to move over the screws and then securely seat within the housing.
Once fully seated Alex pulled the remainder of the wire through the collar and then secured the set screw to hold everything in place.
Following a bit of nervousness where we worried we possibly wouldn't get it back together, we were in business and ready to mount the chandelier in the dining room. We test fit by hanging it in place and admired our handy work. We'd conquered the "fixed length" chandelier rope, take that RH Teen!
Everything was looking good so we went ahead and hooked up the wiring. My bargain find of only $45 did end up taking us about two extra hours to install due to the need to hack it apart a little. Ultimately we both feel like this should have been an adjustable height fixture. It wouldn't have been difficult to make changes if RH hadn't glued the threads on the housing. For whatever reason, they did, which meant we needed to do a little adjusting. The end result is exactly the look we were hoping for, and for pretty much exactly the amount of money I was interested in paying.
Seriously, $45, you can't beat that bargain! I feel like I've been getting pretty good at finding deals, especially on lighting and rugs. From HomeGoods to true outlet shopping and antique shops, there are many deals to be found out there. What do you think? Do you have a few places in mind that are your absolute go to locations for scoring great decor deals? Have any secrets you want to share? We'd love to hear!
]]>If you've ever had a chance to see the undulations of light cast by a ray of sun through imperfect included glass, or enjoyed the subtle dance of fractured and warped reflections caused by true divided light windows with subtly bubbled and wrinkled glass, you know exactly what I'm talking about.
In our window restoration we've gone to great lengths to build a steam box in order to remove and protect the unbroken original glass from our window sash. We consider ourselves extremely fortunate to have many panes of our original 130 plus year old glass. Even though many of the pieces are scratched from years of use, we will certainly protect, restore, and reinstall these original panes whenever possible. However, some of the panes of glass are cracked or have been replaced with modern glass over the years.
Of the four panes of glass I had removed from the first set of two over two window sash we're restoring, one was a more modern replacement, one was broken in the corner, and two were still usable and in good shape.
We planned to replace the broken and modern pieces of glass, so the hunt for the replacement began. I set the two that I was going to use off to the side to glaze them, and set out to find my replacement glass for the other two pieces.
more]]>If you've ever had a chance to see the undulations of light cast by a ray of sun through imperfect included glass, or enjoyed the subtle dance of fractured and warped reflections caused by true divided light windows with subtly bubbled and wrinkled glass, you know exactly what I'm talking about.
In our window restoration we've gone to great lengths to build a steam box in order to remove and protect the unbroken original glass from our window sash. We consider ourselves extremely fortunate to have many panes of our original 130 plus year old glass. Even though many of the pieces are scratched from years of use, we will certainly protect, restore, and reinstall these original panes whenever possible. However, some of the panes of glass are cracked or have been replaced with modern glass over the years.
Of the four panes of glass I had removed from the first set of two over two window sash we're restoring, one was a more modern replacement, one was broken in the corner, and two were still usable and in good shape.
We planned to replace the broken and modern pieces of glass, so the hunt for the replacement began. I set the two that I was going to use off to the side to glaze them, and set out to find my replacement glass for the other two pieces.
For replacement wavy glass we really have three options.
1. Buy New Wavy Glass - We can source the glass from a vendor the reproduces "handmade" glass using modern techniques to create the historic look. There are a few popular places that sell new old style wavy glass, Artisan Glass Works (AGW), Hollander Historic Glass, and Bendheim Glass. Of these two, Bendheim tends to be pretty expensive, and their glass is intended for cabinets. AGW produces wavy safety and energy efficient glass, and they are actually less than an hour from us, so that may be a good option for us in the future.
2. Order Old Wavy Glass - We can order salvaged wavy glass from a variety of locations, such as salvage yards. There used to be a guy that would advertise in Old House Journal, and he was located in Frederick, Maryland, so we ordered some old wavy glass from him about 14 years ago. In these cases we specify the exact size and style (level of imperfections) we're looking for, and the service will find glass that meets our needs and cut to our specifications. This certainly takes a fair amount of the guess work out of getting old glass, and the glass you're getting is truly antique, not a reproduction. However, the service comes at a premium and you'll likely pay double or more than what you'll pay if you do it yourself.
3. Salvage Wavy Glass Yourself - We can go to the salvage yard and find ourselves an old sash that has glass with the look and size we need, buy the whole sash, and then take it home to pull the glass and cut to size ourselves. This certainly takes the most time, and is also the most risk as you can run into issues whenever you're cutting old glass, but you get to pick exactly what you want. This is often a very important aspect of selecting the glass that's right for you. Iron levels in old glass impact how green they tend to look, and if you're trying to match the glass you select to some existing glass, getting the right tint can be critical.
Can you guess which approach we decided to go with? Don't worry, we won't keep you in any suspense.
We decided on option #3, "Salvage Wavy Glass Yourself." Our search took me to one or our favorite local salvage and re-use yards, Community Forklift.
Aside from finding a whole ton of amazing stuff that I really wanted to take home, including this whole door in jamb assembly with intact transom, rim lock, knobs, rosettes, escutcheon, and hinges for just $90!!!!...
I also found a great window for our purpose. The trick here is finding sash that has large enough pieces of wavy glass that it will be easy to trim it to the the correct size after freeing it from its existing sash.
If the glass is only a little larger than what we need, it will be near impossible to cut it to the correct size due to the limited leverage we can establish for the cut. If you've ever cut glass, you know what I'm talking about. I always look for glass that is either exactly the right size or at least 4" or more larger than what we need.
The sash I found was fairly large, and had two really nice pieces of wavy glass in it. Total cost was $86, and I decided to live dangerously, tempting fate by only purchasing this single sash with just enough glass. This meant the window restoration gods had to look kindly upon me and not allow me to screw up the cuts.
Wavy Glass Shopping Pro Tip - Bring Glass Cleaner and Paper Towels to the Salvage Yard!
When shopping for salvaged glass it's important to remember that these old sash are usually very dirty! When the glass is extremely dirty, it's very hard to see whether the glass you're getting is actually wavy to the degree you need it to be or not. So if you have some cleaner on hand you can give it a quick rinse to check the adequacy of the imperfections.
After a tenuous trip home over what I swear are some of the roughest and most pothole filled roads in the DC metro area, I successfully transferred the sash into our basement without breaking any glass! A minor miracle, I assure you.
Beyond the size of the glass, one of the best parts about this sash is the fact that the glazing putty had been so poorly maintained that it almost fell out without effort. It simultaneously made me feel sad for the house it came from, and happy I had to do a little less work. Freeing the glass from the sash was only a matter of removing a few glazing point triangles and loving when a plan comes together.
With the glass free from the sash I could see just how much larger the pieces were than the sash it was destined to go into.
I gave both pieces a thorough cleaning with a foaming glass cleaner and a razor to get any residual gunk off. This is an important step to as it allows you to see any glaring imperfections you may want to avoid when cutting to size.
Things like scratches or scoring lines that could end in an easier fracture can often be eliminated from the final piece of glass with a little bit of careful planning.
When it comes to cutting wavy glass, it's often an intimidating project that, in reality and execution, is actually very easy. First of all, it's extremely important that you have a handful of inexpensive tools and supplies.
Glass Cutting Tools (and a few glazing tools)
The following are the invaluable tools and supplies you'll want to pick up if you're looking to do a little glass cutting.
Cutting glass is methodic and not particularly difficult endeavor, but certainly has a process. The key is to measure carefully, really carefully, and then just cut once. When I cut I measure the opening size of the glass needed and deduct 1/8" from the measurement. This will allow for a little wiggle room for movement and contraction that could occur, as well as a possibly imperfect opening where you're placing the glass.
I like to measure and mark the glass using a sharpie so I know right where I'm going to be cutting. The sharpie line is simply a point of reference than anything I'm really trying to follow on straight cuts, and it washes off easily after I'm all done. After marking with the sharpie I gently clamp the straight edge just off of the line so that my glass cutter can ride the straight edge the whole length of the cut.
If you're doing a curved cut you'll probably need to free hand things a little, but straight cuts almost always go easier if you're using a straight edge.
After the glass has been marked it's time to score using the glass cutter. A sharp cutting wheel is paramount to a successful cut. It's debatable whether cutting oil is useful or not, but I've always had better luck with cutters that incorporate auto fed oil as part of the cutting process.
Actually, calling this tool a "glass cutter" is a bit misleading. This is really a glass scorer. It's job is simply to score the glass on a line that will give the glass a predictable line where it wants to cut. The slight relief the score makes in the surface of the glass should be just enough encouragement the glass needs to break along the line you want it to break on. When scoring the glass the single most important tip is to make a single slow pass with even and not too hard of downward pressure on the scoring wheel. Remember, you're not trying to cut the glass with the wheel, you're just trying to score it enough to encourage it to break on that line.
Notice that I'm wearing the cut resistant gloves? This isn't just to protect me in the event I accidentally shatter the glass, it's also because freshly cut class is often very very sharp. It can slice your skin before you know it and it's a nasty type of cut that's painful and takes a long time to heal. So at the risk of sounding like a "The more you know" campaign, be sure to wear your safety gloves when cutting wavy glass.
Once you have your glass scored on its first line, grab your pair of running pliers. These pliers are mostly flat but have a very slight flair on either side of the center line. The pliers are also usually covered at the end with a rubber sleeve that will protect the glass. When you line the pliers up with your score line you apply subtle pressure that's just enough to start the glass breaking along the score line. When it works well you can see the glass snap and start to crack along the line.
After you start the break on one side of the glass move over and repeat it on the other side. Then use the back of your glass cutter tool to tap along the line to encourage the crack to continue. When all goes well, you can apply a little downward pressure on the glass and the piece will cleanly break off for you. Sometime, when that's not working, it works well to hang the glass over the side of your work surface, supporting it on either side with both hands. Then, with the line sitting right at the edge of your surface, let gravity do its thing and put a little pressure on the glass. It should crack right along the line.
Now, don't expect every single cut to be flawless. In fact, plan for it to not be particularly flawless! In my case the glass pieces were large enough that they allowed me to situate my cut lines to accommodate a little mistake. Lucky for me I was thinking ahead, because a mistake was certainly made.
As you can see from the photo, even though the entire rest of the cut was perfect, the last 8" or so of the cut unexpectedly skewed off to the side by about 1/2". Luckily the break didn't suddenly jump across the glass (which happens). I was able to setup my straight edge and score it over 3" to the left, which broke exactly where I wanted it to break. I breathed a sigh of relief after the last cut and thanked the wavy glass gods for their support.
At this point we had ourselves four pieces of wavy glass waiting for reinstall among the two repaired, prepared, and ready to be restored original window sash.
Next time I'll fill you all in on the tedious, sometimes frustrating, but often fulfilling process of glazing old window sash. When you have the right tools, materials, and a little experience, applying glazing putty can be an oddly relaxing process.
Do you have any experience cutting or sourcing wavy glass? Do you find cutting glass to be a soothing or intimidating proposition? Also, I think I'm going to be headed back to Community Forklift this month to pick up a bunch more glass that I'll need. I just saw on their website that all of their window sash are 40% off for the month of June! I love a good wavy glass bargain!
]]>In our last few posts about this project we covered old putty removal in a DIY steam box, paint stripping, repairing the broken sections, and applying Blopentine (Boiled Linseed Oil + Tupentine) to the stripped antique window sash to rehydrate and protect the sash. We also detailed how we used a bath of water and linseed oil soap to protect raw cast iron hardware. That linseed oil is a little bit of liquid magic y'all!
The next steps in our restoration of the 130+ year old original window sash for our home are critical. With everything repaired and stabilized, beyond putting glass back in, from here on out the whole process is all about steps to turn these sash into a window, and to keep water and weather from infiltrating the window and the house.
Allowing plenty of time for the blopentine to dry and fully cure, I applied a coat of oil based primer over the entire sash. I like to start priming at this stage of the game, before placing the glass, for several reasons. First of all, it’s far easier to prime without concern of getting it on the glass. Second, I worry that the sash wood will suck the moisture/oil out of the glazing putty before it skins and cures, causing it to wrinkle and crack. Ultimately, priming it first gives another protective barrier that will let the putty set up as it should. Third, it allows us to ensure paint covers the sections of the sash that will ultimately be covered by other things, like weather stripping and sash lifts.
more]]>
In our last few posts about this project we covered old putty removal in a DIY steam box, paint stripping, repairing the broken sections, and applying Blopentine (Boiled Linseed Oil + Tupentine) to the stripped antique window sash to rehydrate and protect the sash. We also detailed how we used a bath of water and linseed oil soap to protect raw cast iron hardware. That linseed oil is a little bit of liquid magic y'all!
The next steps in our restoration of the 130+ year old original window sash for our home are critical. With everything repaired and stabilized, beyond putting glass back in, from here on out the whole process is all about steps to turn these sash into a window, and to keep water and weather from infiltrating the window and the house.
Allowing plenty of time for the blopentine to dry and fully cure, I applied a coat of oil based primer over the entire sash. I like to start priming at this stage of the game, before placing the glass, for several reasons. First of all, it’s far easier to prime without concern of getting it on the glass. Second, I worry that the sash wood will suck the moisture/oil out of the glazing putty before it skins and cures, causing it to wrinkle and crack. Ultimately, priming it first gives another protective barrier that will let the putty set up as it should. Third, it allows us to ensure paint covers the sections of the sash that will ultimately be covered by other things, like weather stripping and sash lifts.
The oil based primer we use is from Sherwin Williams. It’s a traditional stinky slow drying oil primer, and it might not be the best for us. But I’m going to justify things by saying I’m saving the environment by restoring the windows and riding my bike to work every day. That works, right?
After applying a coat of primer over the entire sash and allowing it to cure, it was time to weather strip.
One thing to note in the photo below is that I primed the sides of the sash. There's a debate as to whether this is preferred or not. Old windows are supposed to "breathe," and some pros prefer to leave the protected sides exposed to the air. Other pros I've talked with say to prime the sides but leave them unpainted to allow for smoother operation. I may leave the sides exposed on future windows, but this one is primed.
While most of the weather stripping for old windows goes in the jamb, there’s one piece, well, make that two pieces of weather stripping that gets applied directly to the sash’s meeting rails. Looking back at the sash before stripping you can see one half of the original interlocking zinc weather stripping still in place.
This meeting rail interlocking two piece weather stripping is meant to keep air infiltration from sneaking between the upper and lower sash when the window is closed. However, this old weather stripping was so caked with paint, beat up, and damaged that it was more a barrier to good window operation than it was to promoting a weather seal. I carefully removed it and all of its nails from the sash.
I can tell you first hand that a failed meeting rail weather stripping not only allows hot or cold right through the separation in the sash, but when the wind really gets going outside you'll even get a good high pitched whistle going. Needless to say, we're really looking forward to weather stripping that will truly work.
I ordered several lengths of the M4B and Hemmed Hook Meeting Rail Bronze two part weather stripping from Killian Hardware. Well packaged, it arrived bubbled wrapped and bundled in a rigid cardboard tube to be sure it wasn’t damaged in shipping. Not by coincidence, it’s the same bronze material as the spring bronze we already installed in the jambs.
Luckily, this product is nearly the exact same dimensions as the original weather stripping, so all I had to do was to cut it to length and nail it in place.
Before I got into placing the weatherstripping I went ahead and pre-painted the parts of the sash that the bronze will cover. This way we get good protection behind the bronze, and we don't have to deal with trying to paint around it later. We used our normal custom trim color on the upper sash piece since it will face into the house, and our new exterior trim color, Sherwin William Pure White, on the lower sash.
Next up I cut the metal using a simple pair of straight tin snips, being careful to cut without bending or pinching the metal to deform it.
Once cut to length it was just a matter of nailing it in place. I decided to place nails every 2”, which is a little closer than what was there before, but works a little better for the window width and consistency. You can see the old nail locations for reference below.
I marked the weather stripping at 2" intervals using a pencil, dimpled each mark using a nail and one swift hammer strike, then pre drilled holes to facilitate a much easier process for placing the small 1" copper nails.
When the holes are drilled they do tend to push through to the back of the bronze leaving some high spots. To prevent these high spots from interfering in the application, I just flip it over and tap the crown out with a small hammer.
Just like applying the weather stripping in the jamb, it's best to work from one end of the piece to the other to ensure there are no ridges, kinks, or bends. I like to start the nails over the whole sash before coming back through and setting them all flush once I'm sure everything looks good. A tiny hammer and nail set help ensure you don't do any damage to the bronze while nailing.
Apply the weather stripping before placing the glass is a little bit of peace of mind for the paranoid. There's a lot of rattling when nailing these tiny nails in place, and I wouldn't want something to slip or flex enough to break the old glass, regardless of how unlikely it may be.
With the weather stripping in place the sash are ready to truly turn into windows again with the placement of glass. In our case we have some original and need some replacement. Next time I'll fill you all in on the tedious, sometimes frustrating, but often fulfilling process of sourcing wavy glass, cutting wavy glass, and glazing old window sash. When you have the right tools, materials, and a little experience, applying glazing putty can be an almost therapeutic process.
What do you think so far? We may be taking far longer than originally planned, but the window is really starting to take shape. I've banked a ton of tips and tricks for the next window and expect it to not only go much faster, but to also turn out way better. I guess this is why we're starting with one of our second floor windows.
]]>After years of having a guest room that was "good enough," a string of planned visits from guests in the upcoming months had me taking stock of our little guest room. This is the same room we gave a light makeover to some seven years ago, but since has been largely unimproved. Well, I recently looked around the room I realized that it may have been close to good, but wasn't what I wanted it to be. Besides not looking how I wanted from a decor perspective, we've been using it to store rugs we've moved from their prior rooms, the central vacuum attachments, and various miscellany that had been misplaced from other locations in our home. It was time for an upgrade.
This all started pretty innocently. Besides the accumulation of junk, the bed and box spring were sitting directly on the floor, where it's been since our last update in 2011. There it sat, still waiting for the bed that Alex will eventually build (but hasn't yet). I had grown sick of the bed on the floor look. When a neighbor gave us a metal bed frame he was planning to throw away, I figured it was a good chance to overcome this single annoyance with our room.
Having the bed at a normal height made me realize we needed a proper bed skirt. Simple enough, right? And while we're at it, it was spring, so time to swap the heavy comforter for the lighter white matelasse coverlet. Here's how the room looked as we tried to prep it with what we had.
Besides missing a skirt, the problem I ran into is that the white coverlet we put on the bed from Spring to Fall has a large brown stain on it, courtesy Mel and a cat vomit incident last year. Now, I don't know about you, but as a guest staying, well, anywhere, I'd prefer to not have cat vomit stains on my bedding. Beyond the stained bedding, I felt like the red stool and recycled wicker baskets as night stands, both "rescued" from the curb, were far from ideally functional.
more]]>After years of having a guest room that was "good enough," a string of planned visits from guests in the upcoming months had me taking stock of our little guest room. This is the same room we gave a light makeover to some seven years ago, but since has been largely unimproved. Well, I recently looked around the room I realized that it may have been close to good, but wasn't what I wanted it to be. Besides not looking how I wanted from a decor perspective, we've been using it to store rugs we've moved from their prior rooms, the central vacuum attachments, and various miscellany that had been misplaced from other locations in our home. It was time for an upgrade.
This all started pretty innocently. Besides the accumulation of junk, the bed and box spring were sitting directly on the floor, where it's been since our last update in 2011. There it sat, still waiting for the bed that Alex will eventually build (but hasn't yet). I had grown sick of the bed on the floor look. When a neighbor gave us a metal bed frame he was planning to throw away, I figured it was a good chance to overcome this single annoyance with our room.
Having the bed at a normal height made me realize we needed a proper bed skirt. Simple enough, right? And while we're at it, it was spring, so time to swap the heavy comforter for the lighter white matelasse coverlet. Here's how the room looked as we tried to prep it with what we had.
Besides missing a skirt, the problem I ran into is that the white coverlet we put on the bed from Spring to Fall has a large brown stain on it, courtesy Mel and a cat vomit incident last year. Now, I don't know about you, but as a guest staying, well, anywhere, I'd prefer to not have cat vomit stains on my bedding. Beyond the stained bedding, I felt like the red stool and recycled wicker baskets as night stands, both "rescued" from the curb, were far from ideally functional.
In order to make this a truly inviting space, I felt it was a pretty good time to make a few minor decor updates.
I headed to HomeGoods to pick up a new bed skirt and quilt, and that's where the decor monster grabbed hold of me. As I wandered the aisles of HomeGoods the effort quickly began to escalate. What started as a trip for just a couple items quickly turned into new bed pillows, a crisp white coverlet (preferably without cat vomit stains) and matching shams that would work well for the summer, and a long grey bolster pillow that I simply couldn't leave without. This pillow was my gateway drug, and before I knew it my habit had quickly spilled over into the lamp section of the store.
The mismatched brown holy ball lamp and silver Restoration Hardware lamps in the room were okay, but how much better would a matching set of white ceramic lamps look? So much better, that's how! Before I knew it I was wandering into the rug section of the store.
Stark geometric patterns were whispering in my ear beckoned me to the selection, double dog daring me to replace the rug in the guest room. Yes, the rug which was once on our family room floor and had found a second life in our misfit hand-me-down guest room, had to go, or at least that's what the decor monster told me. It was shockingly easy to justify this purchase to myself, as the new rugs I'd somehow found myself admiring would work much better with the look I really wanted. White and grey are more in line with my aesthetic, are calm and inviting, and the old rug not only wasn't what I really wanted in the room, it was also faded, (surprise) also stained, and has a hole in it from a nervous digging incident courtesy of Lulu.
Before I even knew what was happening I'd selected a 5' x 7' rug and seemed to almost be levitating, carried by some unknown force -- perhaps the carpet I'd selected was magic -- over to where I'd find two matching grey tables that would work perfectly as bedside tables.
This was all some sort of crazy HomeGoods fate that had a hold of me. I was in the decor zone, I couldn't be stopped!! And how rare it is to find a matching set of lamps and tables at this fabulous discount store. It must be fate.
I gleefully skipped to the car carrying all of my HomeGoods bounty. The guest room was not only destined to no longer exist as a tired excuse for a guest room, I was going to make it so dang cute that I might even want to start sleeping there after our guests have left.
When Alex got home from work we launched in to our light decor refresh. Though I'd gone to HomeGoods to find a bedskirt, I'd failed in that endeavor (turns out I had more pressing matters to fulfill). We have a partially fitted sheet that was intended as a skirt for an inflatable mattress, so we decided to make it work as the skirt until we can find one that's better suited...or Alex builds the bed, you know, whichever comes first.
We stupidly did much of this in the wrong order. We put the new bedding on the bed, then put on the makeshift bedskirt. I think we were just excited to have the new coverlet without a stain. As you can see, we're sticking with the headboard that we made from our old bathroom door.
Once that was done we realized we needed to take up the old rug, which required us to move/lift the bed. It was truly a series of poor choices that caused us to take much longer to get this done. And in typical Lulu form, she helped by standing on most of what we were trying to put in place.
But as we progressed, the room slowly started to come together. Bedding, end tables, lamps, the rug, it was all looking wonderful! I was so excited! I loaded in a few interesting books on the end tables (including "Ghosts of Virginia" for a little fun late night reading), arranged a few fresh flowers, and placed a few small grey accessories we had on hand in other rooms of our house.
Beyond the decor, getting all of the extra stuff out of the room felt liberating. The house started to feel less junky and more how I wanted it to feel for our guest's arrival.
After all was said and done our guest room is now the fresh and welcoming space we wanted it to be.
In order to make it just a tad more inviting, I added a bottle of water and glass on the dresser, and a chocolate bar in the event a snack is necessary. This will have to make do for now, but Alex thinks we should add a stocked mini-bar to round out the experience.
We're far from done with this room, as we have plans to completely overhaul it, complete with windows that open, correct moulding, repaired plaster, refinished and repaired floors, and a large exposed brick wall. But as far as the room is concerned today, it's exactly what I wanted it to be for our guests. The major overhaul to the room can wait, we have a perfectly pleasant and enjoyable guest room today.
Throughout the remainder of the spring and summer we'll have a long list of visitors that will be coming to stay in the Old Town Home B&B, and we really hope they enjoy the little updates we've made to this room. This was by no means a difficult or time consuming update, but it's one that I feel has really refreshed and improved the room. All told it was about $380 for everything, and I think it was money well spent.
Have you ever been in the situation where you feel you need to quickly get your guest accommodations in shape before someone's arrival? Were you successful in your endeavor? Did you every get a little beyond your intended scope when you went to HomeGoods for something small? Would love to hear your experiences.
]]>Since we're talking dog years, it is very appropriate that our blog is seven (or one in dog years), and the topic of today's blog post just happens to involve one particular dog of ours. Our favorite female canine, Lulu, has been a member of our family for just a little longer than we've been blogging. She'll be celebrating her ninth birthday in a few months, and we've had her as a member of our family for just about seven and a half years.
Lulu has an affinity for climbing trees while chasing squirrels, throwing herself against the door when packages are delivered or a friend comes knocking, and generally guarding our home.
Like a seasoned veteran of the body-guarding business, she's honed her skills over the years. She covertly lurks, often appearing to nap, but her senses are always heightened and she's perpetually ready to spring into action to save the day. Evils such as letter delivery, or another dog barking a block or more away don't have a chance when Lulu is on duty. It doesn't even matter if she's upstairs, she'll make the mad dash down our wood stairs and leap towards the door at full speed!
Unfortunately, for our wood stairs, Lulu's skill as a guard dog has taken its toll. Lulu's nails apparently act as razor sharp talons when she's on the job, and years of her relentless pursuit of ensuring a danger free home have left their mark. Some might say she's neurotic, perhaps a bit over-zealous. Those people would be correct. But we love her nonetheless.
more]]>Since we're talking dog years, it is very appropriate that our blog is seven (or one in dog years), and the topic of today's blog post just happens to involve one particular dog of ours. Our favorite female canine, Lulu, has been a member of our family for just a little longer than we've been blogging. She'll be celebrating her ninth birthday in a few months, and we've had her as a member of our family for just about seven and a half years.
Lulu has an affinity for climbing trees while chasing squirrels, throwing herself against the door when packages are delivered or a friend comes knocking, and generally guarding our home.
Like a seasoned veteran of the body-guarding business, she's honed her skills over the years. She covertly lurks, often appearing to nap, but her senses are always heightened and she's perpetually ready to spring into action to save the day. Evils such as letter delivery, or another dog barking a block or more away don't have a chance when Lulu is on duty. It doesn't even matter if she's upstairs, she'll make the mad dash down our wood stairs and leap towards the door at full speed!
Unfortunately, for our wood stairs, Lulu's skill as a guard dog has taken its toll. Lulu's nails apparently act as razor sharp talons when she's on the job, and years of her relentless pursuit of ensuring a danger free home have left their mark. Some might say she's neurotic, perhaps a bit over-zealous. Those people would be correct. But we love her nonetheless.
Back on January 31, 2003, just days after the stairs were refinished, before we'd even completed stripping the risers, our old home loving hearts were a flutter!
A short time later (okay, maybe a long time later, like late 2004) we proudly proclaimed our stair and wainscoting project DONE!
But after seven and a half years of watching our stairs slowly transform from beautiful and pristine to clawed and chipped, we decided to do something about it.
Yep, that's what an overzealous 30 pound doggo will do to soft pine stair treads.
We spoke with our favorite flooring expert (Roland from Royal Oaks Flooring) and he pointed out that the damage done wasn't as much to the wood, save for some scratches, but more to the finish. Her nails caused the poly to fracture and lift the stain finish right off of the treads, leaving exposed bare wood.
Since these stairs have been worn and sanded somewhat thin several times over the 130 years they've been in place, he advised not sanding them again, and instead staining the bare sections and top coating with poly to protect them. Then we can just call all of the scratches and issues a little bit of "character."
Armed with a plan, over the last week we've slowly taken care of this little issue of unsightly damage in an attempt to give Lulu a repaired launch pad for protecting our home. She anxiously observed our progress.
We started by lightly sanding all of the stairs to rough up the existing poly a bit. We also took the opportunity to lightly sand any of the exposed wood where the poly and stain had fractures. This was a quick hand sanding and I used some 400 grit paper, as I wasn't trying to take anything down to the grain and didn't want to leave any major scratches.
We started this process on just one of the stair treads to test the process, but ended up continuing it across the entire staircase once we knew it would work.
After sanding the poly and sufficiently roughing it up, we applied a coat of the Early American oil based stain to fill in any of the bare and scratches spots in the wood. Any totally exposed wood received direct application from a small application brush.
I made a mistake and went a little heavy, leaving it on a bit too long with the first step. That made the bare spots a little darker than they needed to be. After giving a shot on the first tread, I adjusted our approach and went a little lighter on the rest, which turned out better in the end.
Once the spot applications had been applied, we then spread the stain over each and every stair. This allowed us to get all of the nooks and crannies of anything missing.
After wiping away the stain and giving it an adequate chance to dry (we left it for 24 hours while we were out of town)...
...we started the long process of applying the poly. We used the same Bona semi-gloss oil based poly the floor was originally finished with back in January 2003. Luckily we took photos back then of the stain and poly the refinishers used. Today we were able to use that photo to ensure we used the exact same product, without any concern about conflict of recipe.
When it came to applying the poly we had to do a bit of a dance. Since we're living in the house the whole time we're doing this, we decided to poly every other stair with each coat. This would allow us to apply one coat of poly to half of the staircase each night.
We wanted to apply three coats (since it's such a high Lulu traffic area) to offer a bit more protection from fracture in the future. As a result, the whole poly adventure would take six days total.
This allowed us to precariously walk up and down the stairs for six days, skipping every other stair. Since Lulu doesn't know how to walk like this, it meant we had to carry her up and down, and barricade the stairs during the day. She didn't take too kindly to this setup (nobody puts Lulu in a corner).
Now that all is said and done our stairs look tremendously better than they did prior to our attempt at a quick fix. They certainly look far from perfect, but in many ways, that's perfectly fine with us. Our stairs tell a story. Lulu has lived in our home and has been part of our family for nearly half of the time we've been in this home. And while we've gone to great lengths to restore and care for our home, we've also enjoyed many wonderful moments living our lives in this home, and this just adds to the history.
We will likely add a runner to the stairs in the coming years, but this is a good temporary fix in the interim. We love the look of the wood stairs, but realize it may not be the most practical as Lulu gets a little older.
Looking back on our years in this home, and on our seven years of blogging, we've shared our projects and neighborhood with you and have truly enjoyed giving you all a glimpse into what makes DIY and Alexandria so very rewarding. Don't worry, we're not wrapping things up any time soon, and we look forward to sharing our various projects with you for many years to come. Some projects take a weekend, some take years to complete, but all are done with a level of care, enthusiasm, and enjoyment that add to the story of our family.
As we continue to gain experience and confidence in our projects, we'll continue to share the journey here on our blog. We may not post as frequently as we once did, but we hope the things we share offer some insight, encouragement, guidance, or just a little bit of fun that you can enjoy. Whether you've been reading along for many years, or just stumbled on some random post, thank you and we look forward to keeping you updated!
]]>Okay, so I may be exaggerating a little, but it wasn't pretty. The first time we tried to install two part crown was in our living room project, and it was ugly. I'm talking ugly on both the initial work on the install, and our frustrated communication with each other.
At one point in the process Wendy got so frustrated with me (which was likely well deserved as I had gotten very frustrated with the crown moulding) that she had to walk away and cool off, lest she end up maiming me with my own nail gun. The problem was that she chose to walk away to take a walk around the yard (and out of ear shot) without realizing I was standing on a ladder and holding the crown in place above my head...with one end already nailed...and my nail gun out of reach. I ended up holding that piece in place for nearly 20 minutes until Wendy returned. Upon her return, I politely asked her to hand me my nail gun before my arms fell asleep.
Though we really love how the crown turned out in the living room, the strife it caused during the process had us a little gun shy when it came to doing the same in our dining room project. Two part crown helps mask wavy plaster walls, and provides a great nailing backer for crown when studs aren't predictable or available, but the difficulty of install when your ceiling and walls are not consistent (because you live in an old house), certainly makes it tricky. But alas, we want to be cohesive on the first floor, so two part crown it is!
One thing is for sure, our dining room project is humming right along! We last gave you an update on our Master of Plaster base coat. The next time we were back at the house we followed the base coat up with a quick finish coat of plaster to complete the room. The finish coat goes on smooth and easy, and is very thin. The best part is that you can work really fast with the finish coat, so the whole room only took a few hours.
more]]>Okay, so I may be exaggerating a little, but it wasn't pretty. The first time we tried to install two part crown was in our living room project, and it was ugly. I'm talking ugly on both the initial work on the install, and our frustrated communication with each other.
At one point in the process Wendy got so frustrated with me (which was likely well deserved as I had gotten very frustrated with the crown moulding) that she had to walk away and cool off, lest she end up maiming me with my own nail gun. The problem was that she chose to walk away to take a walk around the yard (and out of ear shot) without realizing I was standing on a ladder and holding the crown in place above my head...with one end already nailed...and my nail gun out of reach. I ended up holding that piece in place for nearly 20 minutes until Wendy returned. Upon her return, I politely asked her to hand me my nail gun before my arms fell asleep.
Though we really love how the crown turned out in the living room, the strife it caused during the process had us a little gun shy when it came to doing the same in our dining room project. Two part crown helps mask wavy plaster walls, and provides a great nailing backer for crown when studs aren't predictable or available, but the difficulty of install when your ceiling and walls are not consistent (because you live in an old house), certainly makes it tricky. But alas, we want to be cohesive on the first floor, so two part crown it is!
One thing is for sure, our dining room project is humming right along! We last gave you an update on our Master of Plaster base coat. The next time we were back at the house we followed the base coat up with a quick finish coat of plaster to complete the room. The finish coat goes on smooth and easy, and is very thin. The best part is that you can work really fast with the finish coat, so the whole room only took a few hours.
Applying some light at a very harsh angle showed us just how smooth and great the wall was looking.
After giving enough time to fully cure, Wendy and I moved into the daunting phase of hanging crown. We'd hoped for the best but prepared for the worst. We had a pre-game pep talk to remind ourselves to be patient with the other if things went sideways, and tried to come up with a better game plan than the first time around.
Our first attempt at the two part crown had an underlying failure that was based on the simple assumption that the ceiling was level around the room. When we installed three pieces of backer and then tried to put the crown on that backer, and it was all completely off, we were shocked. "Fool me once, shame on you...fool me twice...uhhhh...you ain't gonna fool me again."
This time around we decided to do things a little differently. The first step in our process was to create a few templates or jigs that would help us identify issues *before* nailing pieces of trim in place, rather than after. This would hopefully prevent the need to pull installed pieces off of the wall as we had to do previously.
The first template was a representation of the two part crown itself. This would allow me to hold it in place around the room in sections and mark the bottom line on the wall with pencil. The line represents where the bottom of the backer would fall if it more or less followed the ceiling all of the way around the room.
The second template was a reveal representation. Its job was to allow us to set a pencil line on the installed backer that indicates where the bottom of the crown piece should fall on the backer to provide a consistent reveal. This would allow us to force the crown up or down in order to make sure we didn't have an exposer of backer that was either too large or small, even if the ceiling dipped or rolled around the room.
Equipped with the bottom pencil line from the first template, the other critical piece of this install was the use of a laser line that would show us where the bottom of the backer would sit if the room were level, ceiling wasn't wavy, and walls were all square and plumb....HAHAHAHAHA! Good one, right?
No expensive tripods needed here. I just screwed a piece of metal from some leftover duct to the beam and then used the magnets from the laser level housing to position it where it needed to be.
The laser line ultimately let us see where we needed to fudge the backer up or down in an attempt to split the difference if the ceiling was too out of whack. When it came to installing the backer piece we wanted to hit as close as we could to the pencil line, but the laser allowed us to also make sure we were not making the gap between the ceiling and the line too small or too tall.
Armed with our pencil and laser lines, we got to installing. Our install process for two part crown isn't what I first imagined back before we'd first tried installing it. I assumed we'd install all backer pieces, then we'd install all crown on the backer. The reality of what works best for us is far different.
When doing crown I prefer to work from left to right, in a clockwise motion around the room (if you think of the room as the face of the clock seen from above). This lets me cope my joints in the room on the left, which tends to work best for my preferences and moderate preference to left handedness.
The first step in our process is to install the first length of backer. We're coping all of the joints, so this first piece should be the easiest from a cut perspective since you don't need to worry about any corners. You just cut the two ends flat and to the right length of the room.
Now here's a key tool improvement this time around. We used a little 30' pocket laser distance measurer to get our cut lengths. The first install we did we tried to use a tape measure. Most of the lengths are more than 12', you need someone standing at either end holding the tape, you need to worry about sag in the middle, stand out, accurate measurements, adding on 3" to your measurement to account for the tape etc. It's a pain! With the laser measurer you get a dead nuts measurement every time and it's clear, quick, and easy. For only about $30, you can't go wrong adding this to your list of tools.
We cut our first backer piece to length and nailed it in place, trying our best to hit the pencil line on the bottom. The backer can flex slightly, so I like to tack it in place with a nail on one end, then move to the other end and tack it there. At that point the whole backer is on the wall, but can be flexed up or down to hit the pencil line.
Before nailing anything else on the backer I use the reveal jig to provide a consistent line where the crown will be installed. Most importantly this shows me where I can nail to be sure the crown will cover the nail hole. This way we can shoot as many nails as needed without worrying about filling those holes since they'll all be covered. We're shooting for roughly 1" of reveal on the bottom of each piece of backer.
When it comes to nailing all of the backer piece in place we were able to flex it slightly up or down to match the pencil line.The flat piece of backer flexes far easier than crown. I used 2-1/2" 16ga nails on the backer and tried to hit studs wherever possible.
After the first backer piece was installed we then moved onto the next backer piece. The idea here is to stay one backer piece ahead of each crown piece. So the order in this room is:
This order lets us ensure the crown and backer work well together without getting out too far ahead of the crown, which can lead to the whole thing being out of whack, which results in needing to take down sections to rework, which results in spousal spats and abandonment while holding pieces of moulding above your head. The other important piece is to not fully nail the next piece of backer into place until you finish up the prior crown piece. This lets you test fit the next crown piece before moving forward with nailing. We just tack the two ends of the backer and then move back to installing the crown.
Before installing the first piece of crown on the first piece of backer, you need to accommodate for the fact that a final backer piece will butt up against the first end of the first backer piece. In other words, you can't install the crown from wall to wall or it will get in the way of the last backer piece. (Trust me, I made this mistake the first time and had to cope the last backer piece to the crown profile like a schmo.) To account for the final backer piece I just held a scrap of backer against the first backer piece and gave myself a pencil line not to exceed with the crown.
Much like the first piece of backer, the first piece of crown is easiest because there is no need to cope either end. Again, using the laser distance measurer we grabbed our length and cut it flat on the saw. When it came to putting this piece in place we first held it up to be sure it would hit our reveal pencil line nicely, then proceeded with nailing. We used 1-1/2" 18ga nails at the bottom of the crown to nail it into the backer, and 2-1/2" 16ga nails to attach it to the ceiling joists.
One trick I learned to deal with situations where the crown would nail well above the reveal pencil line was to pull the backer piece away from the wall slightly. Usually, in these situations, this was due to the fact that the plaster wall is a little wavy and the backer was nailed too snug against the wall. This would leave a gap between the crown and the backer, and then you push the crown back to nail it in place, the flex of the crown would force it up, leaving too large of a reveal. Prying the backer away from the wall and then nailing again with some shims behind the backer lets the crown nail with a good reveal, and you can easily fill any gaps created at the bottom of the backer with caulk, which will look far better than filling crown and backer gaps with caulk. Here's an example of just how wonky some old walls can be.
When it comes to coping, we're using a combination of a jigsaw with a special "Coping Foot" installed on its base, a scroll saw, and a set of wood rasps. Coping is not nearly as difficult as I once thought it was, it just takes a little patience. The most important part is to cut the piece you're coping as if you're mitering the joint. The angled cut gives you a good vision into the material you ultimately need to remove when you're cutting away the cope.
Cutting from the back of the moulding while watching what you're cutting from the top works best for me using the jigsaw. I also leave a little extra on the cut area and clean it up with the rasps to make a clean joint.
There are some guys out there that can use a rotary sanding disc on an angle grinder to sand away the area of the board that needs to be coped. I haven't this yet but it looks so wonderful and effortless (through tons and tons of practice) that I really want to give it a shot soon. I know it makes a huge mess of dust through, so you need to do it outside and with a good dust mask. But using the jigsaw method I'm left with a small gap that will caulk/paint closed pretty nicely.
With coping in hand and our process defined, we slowly worked our way around the room until we had most of our crown installed. The best news of all, we had somehow used this improved process and our pre-DIY pep talk promoting civility in the face of adversity to overcome our prior finish carpentry demons. I don't believe we had a single disagreement or even moment of contention during this install.
There's nothing like a good timelapse video to make a long process look like it runs much smoother and faster than in reality, so here are our first few hours working on the crown.
Since we're going to be wrapping the exposed beams in the room, the room does have what amounts to four "walls" for moulding, so we left one end of the room uninstalled. The 4th piece of backer and 3rd and 4th piece of crown will need to wait until the beam wrapping is done, so there's still room for a little squabble or two, but I'd say our results this time around, both from a finish carpentry, and a healthy marriage aspect, are greatly improved.
Wrapping the beam and posts with wood will be difficult as there are a lot of bows and issues to deal with. We're also not going to finish the backs of them yet since what we ultimately do in the kitchen will dictate how we finish that work. But we'll get it to a point where you won't be able to tell the back isn't finished when you're in the dining room.
Since we really only get to work on this project one or two days per week, we have a few weeks left before we're 100% complete. At this point it's starting to look really good and like a true room, so that has us both really excited! We're still looking for that perfect antique farmhouse table with just the right amount of rustic patina to look great in the room. We know we could build one from reclaimed lumber, but there's something about sitting around a dinner table that has seen its share of stories that you'll never know that is so romantic that we'll be patient until we find one.
As far as the two part crown goes, now that we've installed it in a second room and have a good system down, it's far less daunting for the rest of the first floor. We're both really happy with how it's looking and the profiles we've chosen work really well with our old home.
]]>A little while ago we gave you all an update on the plaster restoration progress on our Foursquare's dining room walls. We'd successfully patched missing sections, rolled on the Plaster Weld bonding agent, and applied the base coat of Structo-Lite plaster with embedded fiberglass screen. In short, we had a solid foundation on which to launch our Master of Plaster restoration process.
We last used Master of Plaster's restoration plaster in our living room renovation project a few years ago, and we loved it back then. Now, a few years later, we are giving it a go again to see if we still feel the same.
We ordered and had all of the product delivered to our local Old Town Alexandria Ace Hardware. Since they are a commercial location that regularly receives large shipments, this saved us a good amount of money on shipping. The whole pallet came in at about 600 pounds, so we drove down and loaded everything up in the back of our car to get it to our project.
The order was for more product than we'd need for the dining room, as we also plan to use it on the hallway walls later this year. For our dining room space we'd really only need about four buckets of the base coat and less then half of the finish coat.
more]]>A little while ago we gave you all an update on the plaster restoration progress on our Foursquare's dining room walls. We'd successfully patched missing sections, rolled on the Plaster Weld bonding agent, and applied the base coat of Structo-Lite plaster with embedded fiberglass screen. In short, we had a solid foundation on which to launch our Master of Plaster restoration process.
We last used Master of Plaster's restoration plaster in our living room renovation project a few years ago, and we loved it back then. Now, a few years later, we are giving it a go again to see if we still feel the same.
We ordered and had all of the product delivered to our local Old Town Alexandria Ace Hardware. Since they are a commercial location that regularly receives large shipments, this saved us a good amount of money on shipping. The whole pallet came in at about 600 pounds, so we drove down and loaded everything up in the back of our car to get it to our project.
The order was for more product than we'd need for the dining room, as we also plan to use it on the hallway walls later this year. For our dining room space we'd really only need about four buckets of the base coat and less then half of the finish coat.
When we were ready to go we actually started with a leftover partial bucket from our last project. That's one of the really nice things about the MoP product, as long as you put a little water on the top of the material, it can sit for a very long time without drying out. When it comes time to finally use it, you just need to give it a quick mix and it's good to go, even if you are picking up a partial bucket you last used long ago.
The really interesting thing about using Master of Plaster this time around is that I started by applying the old partial bucket of base plaster first. It felt familiar, the same as it had previously. No problems with it sitting for more than a year, it mixed right up and was going on just as it had in the prior room.
I quickly ran out of the old partial bucket of plaster and moved onto using the new buckets. As soon as I started to apply the new plaster to the wall I noticed a crazy thing. The old plaster felt like it had larger pieces of aggregate mixed in. I could feel it when the trowel skimmed across the old plaster with a bit of a coarse crunch. But when I was using the new plaster it all felt so perfectly smooth.
After I started with the new bucket I wrote the unbelievably knowledgeable Lauren at Master of Plaster to let her know everything was going well (they have excellent customer support and advice), and asked if the recipe had changed from the first time I'd used the product. She told me that the recipe hadn't changed, but the manufacturing process had a little change. Master of Plaster has started screening the limestone to eliminate the larger pieces from the mix.
Applying the new plaster is even more straight forward than it was a few years ago. The finer limestone makes it far easier to apply the base coat plaster in a smooth and even manner. There's no longer a concern that some of the aggregate could catch on the trowel and drag through the coat of plaster.
I worked my way around the room with the base coat, trying to lay the first coat in as smooth of a manner as I could, but not worrying too much. One of my favorite parts of the working with this material is the ability to smooth imperfections once it's begun to set. All you need to do is spray the slightly setup material with water and smooth with the trowel. This will allow you to force any imperfections out of the surface, leaving a nice and smooth polished based coat, ready for the finish coat. Here's a little video that describes the whole process.
Let me tell you, there's really not much better of a feeling when working on plaster than to see a wonderfully smooth and crisp wall taking shape. To be totally honest, the base coat is nearly good enough for paint, and would probably look perfect if you were going for a slightly more rustic or raw plaster look.
We will still apply the finish coat to make the walls absolutely smooth, but this step alone left the walls looking pretty damn great compared to where we were just a few weeks before. We did have a strange issue in one small section of our wall where air bubbles formed beneath the plaster. This was easily resolved by going over the portion of the wall with the trowel to force the air out, but it was important to take care of it before it totally set up.
We've been working on a ton of projects over the last little while, but wanted to give you all an update on our progress, as things have been a little quiet on the blog of late. We're really moving along on the dining room project and can't wait for it to be done!
]]>The more ubiquitous modern home technology becomes, we're seeing two very distinct styles and integration approaches from the manufacturers.
On one hand, as components shrink and become more low profile, some companies are attempting to make their products essentially disappear, designing them to seamlessly blend with their surroundings. Digital assistant microphones/speakers like the Echo Dot and Google Home Mini jump to mind.
On the other hand, much has been the tendency for cutting edge technology in homes for centuries, these cool modern devices are apparently intended to be put on display (just look at visible heating and plumbing lines in Victorian homes). All too often, the current trend is to embrace the tech in a utility meets modern art hybrid, the design of which is meant to resemble sleek monolithic cubes of digital sculpture on a stage for all to see.
While this might be the look you're going for in a modern loft space, or geometric minimalist environment, this tends to simply look out of place when it comes to trying to integrate it with an older home. It's tough to mix an upscale and comfortable yet antique aesthetic with a sterile glossy white or black plastic cube.
But all of this being said, the solution isn't just to forgo the modern tech in your home. I mean, I'm certain there's almost always a solution that can be found. Take for example the Sonos home theater package, with sound bar and subwoofer.
more]]>The more ubiquitous modern home technology becomes, we're seeing two very distinct styles and integration approaches from the manufacturers.
On one hand, as components shrink and become more low profile, some companies are attempting to make their products essentially disappear, designing them to seamlessly blend with their surroundings. Digital assistant microphones/speakers like the Echo Dot and Google Home Mini jump to mind.
On the other hand, much has been the tendency for cutting edge technology in homes for centuries, these cool modern devices are apparently intended to be put on display (just look at visible heating and plumbing lines in Victorian homes). All too often, the current trend is to embrace the tech in a utility meets modern art hybrid, the design of which is meant to resemble sleek monolithic cubes of digital sculpture on a stage for all to see.
While this might be the look you're going for in a modern loft space, or geometric minimalist environment, this tends to simply look out of place when it comes to trying to integrate it with an older home. It's tough to mix an upscale and comfortable yet antique aesthetic with a sterile glossy white or black plastic cube.
But all of this being said, the solution isn't just to forgo the modern tech in your home. I mean, I'm certain there's almost always a solution that can be found. Take for example the Sonos home theater package, with sound bar and subwoofer.
Ever since it debuted, I'd had my heart set on this Sonos home theater package. You could even say that I'm a total fan boy of Sonos and maybe just a tad bit too obsessed. I've been a huge fan of the Sonos streaming music components for years, and the idea of an almost wireless home theater system with 5.1 channels, including a television mounted sound bar and a massive couch shaking subwoofer, that also plays all of our favorite streaming music sources, was exactly what I had long dreamed of.
Now, for all you home theater enthusiasts out there shaking your head and judging me, I know the 5.1 channels is simulated since there are not true front speakers, and I'm okay with that. The Playbar simulates the front speakers with side mounted end firing speakers. It's science, physics to be exact, and it sounds good in the right room. That being said, we're not trying to achieve an IMAX or THX experience in our living room, so you don't need to lecture us on the drawbacks.
So after much planning, convincing, and promising that we'd be able to effectively conceal the system, Wendy agreed to go forward with installing the Sonos home theater system in our home. But once I had the buy in, I had to figure out just how we'd make the whole install look acceptable from a skeptical spouse perspective.
The first component that we needed to figure out was the Sonos Sub. This room shaking sub-woofer packs the punch needed to give some serious oompf to any movie or music we're listening to. But this sub-woofer is also one of those monolithic modern art cubes I mentioned earlier. Not only that, it's also sort of huge.
Sonos intends this block to be on full display, like the photo above, looking sleek and awesome in your room. But for us, how sleek and awesome could a plastic cube look next to 100 year old moulding, a grandfather clock, and a wood burning stove? Rather than putting this whole thing on display, we decided to hide it completely.
Just behind the couch we built the shiplap wall to hide a support column. This meant that we had a little bit of room to play with, so we took advantage of it by including a perfectly sized little nook into the shiplap wall behind our couch.
We trimmed it out and ended up with very little room to spare, but the Sonos Sub slid right into place. We included a single outlet within the nook, so there are no wires to be seen anywhere.
As it turns out, this install is pretty much idea. The deep bass fires into the back of the couch and is completely out of view of anyone in the room. Concealed and completely acceptable as far as Wendy is concerned. And the performance of the sub woofer behind the couch is even better than I initially expected. This little setup and really quite the win win!
While the design and intent of a subwoofer lends itself to being relatively easy to completely conceal, the Playbar is a different matter. This speaker is responsible for the primary sound from the television, and is meant to deliver the dialog from the television in a manner that is supposed to seem as if it's coming directly from the TV itself. There are plenty of examples online for how you can mount a Sonos Playbar, but pretty much all of them do not meet the concealment requirements of my lovely wife. Here's a beautiful example of putting the Playbar on display...and it would look rather terrible in our home.
When it came to our Playbar, it all started with my original intent (completely in my head) to mount it like the photo above, just below our television hanging above our fireplace mantel. The planning for this television hanging took a fair amount of time. We didn't want any wires or components visible, so our goal was to conceal everything behind the television.
Before I could even put the Playbar on the mounting bracket on the TV, Wendy took one look at the "monstrosity" and slowly shook her head, giving me a firm and decidedly disapproving, "nuh-uh, try again." After I held it in place for a minute I think she said something along the lines of "NO WAY ARE YOU HANGING THAT BIG BLACK BOX BELOW OR EVEN ABOVE THE TV!!!"
I was blinded by the technology, but she was absolutely right. We had a hard enough time coming to grips with hanging the TV above the mantel and making it an unfortunate focal point in the room, but adding a large black cube either below or above the TV was simply not acceptable. Our TV is 46", and this Playbar speaker is only slightly narrower. The low profile bezel of the TV is an attempt to minimize its impact as much as possible, so adding big 6" protrusion was borderline offensive. Ultimately, I had to go back to the drawing board.
As it turns out, given the height we mounted the TV, the optimal viewing angle requires the television to be tilted down a bit toward the couch/viewer. This gave me an idea. To allow a little extra tilt I ended up placing the television mount on two small strips of wood to essentially fur out the mount by 3/4".
This not only allowed the television to tilt down the necessary amount, but it also increased the gap between the top of the TV and the wall just enough! This was my true light bulb moment. Even though Sonos doesn't recommend mounting the Playbar in the manner that we're using it, it was either this way or no way. When it comes down to it, I'll take "slightly less than optimal" over "not at all."
I was able to turn the Sonos Playbar on it's back and slide it in above the television. Similar to laying the Playbar flat on the mantel below the TV (another non-starter for Wendy), the Playbar now sits partially concealed behind the top of the TV. Only about an inch and a half of the Playbar is visible and when you're seated you can barely even see it.
But the real test is in the sound. I was preparing myself to be disgusted by a muffled and partially blocked center channel, obscured by the television. But to be completely honest, neither of us can tell a difference between the Playbar mounted in this manner compared to how it sounded when mounted on an approved bracket based on Sonos guidance above the TV.
The only drawback of this configuration is that the IR receiver on the speaker is blocked by the TV, so volume control doesn't work out of the box with the Apple TV remote. We were able to resolve this issue with a simple IR repeater that we mounted inconspicuously on the bottom left of the TV bezel. The IR repeater's other end just mounts to the top of the Playbar and the problem was solved.
With everything in place, we added two Play One speakers for surround sound on the ground behind either side of the couch and our Sonos home theater setup is complete and sounding great.
This is a case where a little creativity and an attempt to break from manufacturer guidance on optimal setup allowed us to solve our problems with aesthetics. I absolutely love the Sonos system as a whole, and a wireless 5.1 channel home theater (sure, it's simulated 5.1) that also streams our favorite music and synchronizes with music throughout the house is pretty great.
If you're considering the Sonos home theater system but are worried about how it will look when fully mounted and installed, rest assured that we were able to make it work for our purposes with only minor alterations. And in our case, it still sounds absolutely excellent. Personally, I think my greatest happiness in this outcome is that we were both able to achieve our independent goals on this project. I got to install the home theater package I had my technology nerd heart set on for several years, and Wendy isn't staring at a giant set of plastic cubes strategically placed around the room.
What do you think? Is this an aesthetically pleasing approach to integrating technology in our older home? Or are you getting a twitch simply by seeing the television mounted prominently above the mantel? Have you had any of these form over function style debates with your partner, only to realize there's a nice form meets function middle ground of blissful coexistence? Would love to hear your experiences.
]]>Ever since we bought our house in 2003, we've been fighting a bit of a losing battle in our basement. This narrow but long space plays quintuple duty on a daily basis. Storage, laundry, utility room, server closet, and shop. Oh how we long for the early days of a nearly empty basement area.
Though it may have been virtually empty when we bought our home, we quickly took care of that quality of the space and built some shelving for storage and a little work bench from plywood and 2x4s.
In the years that followed we've ended up with so much stuff down there that, at times, we can't effectively get around without having to act like we're on American Ninja Warrior! Wendy accuses me of treating it as my hoarder's lair. At times, she's not entirely wrong.
more]]>Ever since we bought our house in 2003, we've been fighting a bit of a losing battle in our basement. This narrow but long space plays quintuple duty on a daily basis. Storage, laundry, utility room, server closet, and shop. Oh how we long for the early days of a nearly empty basement area.
Though it may have been virtually empty when we bought our home, we quickly took care of that quality of the space and built some shelving for storage and a little work bench from plywood and 2x4s.
In the years that followed we've ended up with so much stuff down there that, at times, we can't effectively get around without having to act like we're on American Ninja Warrior! Wendy accuses me of treating it as my hoarder's lair. At times, she's not entirely wrong.
Aside from all of the crap, the thing about this basement is that it's always been pretty dark. There are a few random bulbs and four mismatched 4' fluorescent tube lights that are run from two different switches. These switches are also inconveniently located at either end of the basement. It's a set up that's less than ideal, and the lights have this horribly annoying buzz that just.never.stops.
After we grew tired of the old school glass tubes flickering and dying, and then inevitably breaking them because I procrastinated taking them to the store for recycling (it happened twice, and was horrible both times), we wanted to upgrade things by adding some LED replacements.
Unfortunately, these LED bulbs caused the transformers in two of the lights to constantly overheat and shut themselves off as a protective measure. Add to it that the LED bulbs I was using seemed to have a high failure rate...which means the pins broke after less than a year of use and threw me into a fit of irrational rage yelling. "THEY WERE SUPPOSED TO LAST FOR 30,000 HOURS!!! THIS IS SO MANY LESS HOURS THAN THAT!!!!"
Rather than continue to be frustrated by our dank basement with insufficient lighting, we determined it was about time for a little upgrade. We decided to buy eight 4' LED low profile lights from Hyperikon to replace the four fixtures already in place.
We ordered the lights we're installing from Amazon, and all in we spent about $240 on the eight fixtures, which are all non-linking plugin models. There are a ton of options available on Amazon, but we went with these lights for several reasons. These were affordable models and the light output is more than sufficient at 100 watt equivalent, 3800 lumens, and a relatively warm color temperature of 4000K.
We chose the plugin style fixtures knowing that it would allow us to move lights around in the future without much effort. Using wire ties to make sure any wires are nicely bundled and out of the way and we have a flexible and future-proof solution no matter what we do with the basement.
The lights themselves are LED strips protected by round plastic coverings.
The whole fixture can be either hung form the ceiling or surface mounted with low profile clips.
The first step in our new lighting game was to mount two of them in place so we wouldn't be working completely in the dark when we removed the old lights. For our purposes, we're mounting them directly to the underside of the exposed floor joists in the ceiling above, so it only required us to screw in the two clips and snap them in place.
Install of these lights could not be easier. They snap right into the clips and all you have to do is to plug them in to fire them up.
With adequate partial lighting, the next step in our task was removing those old terrible florescent lights so we could install the six remaining new lights. These old lights were all poorly hung at various heights.
Besides the fact they were absolutely filthy, they also were either close to failure or had completely failed.
The old lights ran from the front to the back of the house, mounted across floor joists. With these new lights in place along the joists, the basement actually feels a little larger, and like the ceiling is higher.
As I mentioned, the lights are 35 watts each and come in at 4000K, so their color temperature is pleasing and not too blue. I feel like any higher than 4000K just ends up feeling way too cold and unnatural. They're also rated for 50,000+ hours and come with a 5 year warranty. That sounds great and all, but the risk with LED lighting isn't that the LEDs will last, but that the circuitry will last. I'm hopeful that these lights will be the last we'll ever need to buy for the basement. With regular use, we're looking at about 20 years or so of life in these lights.
As part of the install process we also changed up the outlets in the ceiling that the lights plug into so that they're all on the same switch. Wait, one switch to turn all of the lights in the basement on and off? So I don't end up all of the way upstairs when I realize that the switch at the other end of the basement is still on and needs to be turned off? What a crazy idea!
We've had these lights in place for a little more than a week now and I can't believe how much it has improved the basement's usefulness. I can see the projects I'm working on so much better now and really look forward to spending time getting things done, even when it's completely dark outside. Honestly, I can't believe it took us this long to make this relatively simple improvement.
I do have to say, having this much light in the basement has me looking around and contemplating a major reorganization and rebuild to make this space a true shop. I'll have to convince Wendy, but maybe moving the washer & dryer, shrinking the storage, and finally removing the old and unused oil drum would give us the functional space I've wanted for a very long time.
We've talked for a long time about finishing the basement, but I would hate to lose our very functional workspace. Maybe an update that's not quite a finish? The total space of the basement is 15' x 30', which would make a very functional (albeit narrow) shop space. What do you think?
At any rate, these new lights are a breath of fresh air here in the basement, and I'm so glad we made this relatively inexpensive change. It's probably a 2 out of 10 on the DIY difficulty scale, so if you've been procrastinating additional task/work lighting in your work space, the technology and price point is in the right place for you to finally take the plunge.
]]>
I picked up this method of treating cast iron many years ago while working in a window restoration shop. It's a tried and true method for protecting cast iron from rust, but there isn't a whole lot of information about it on the Internet. So it's our hope this will go a long way to helping others looking to restore their windows or other cast iron hardware in a classic and lasting manner.
We're very fortunate to have several of our original windows almost completely intact. This means that our original cast iron sash pulleys are also in place and fully functional. However, they were all creatively disguised by many layers of paint, hiding their utilitarian beauty.
As beautiful as these original architectural details may be once stripped, they're also made of cast iron and are prone to rust. A few years ago we stripped and reinstalled several of our pulleys without protecting them from the elements. Even though they aren't directly exposed to water, the humidity in the air and blowing rain or snow is enough to leave surface rust on exposed portions of the iron. The end result after a few years in the window frame is a fine coating of the orange-brown patina we'd like to avoid, especially since it begins to stain the sash ropes.
more]]>
I picked up this method of treating cast iron many years ago while working in a window restoration shop. It's a tried and true method for protecting cast iron from rust, but there isn't a whole lot of information about it on the Internet. So it's our hope this will go a long way to helping others looking to restore their windows or other cast iron hardware in a classic and lasting manner.
We're very fortunate to have several of our original windows almost completely intact. This means that our original cast iron sash pulleys are also in place and fully functional. However, they were all creatively disguised by many layers of paint, hiding their utilitarian beauty.
As beautiful as these original architectural details may be once stripped, they're also made of cast iron and are prone to rust. A few years ago we stripped and reinstalled several of our pulleys without protecting them from the elements. Even though they aren't directly exposed to water, the humidity in the air and blowing rain or snow is enough to leave surface rust on exposed portions of the iron. The end result after a few years in the window frame is a fine coating of the orange-brown patina we'd like to avoid, especially since it begins to stain the sash ropes.
In the past we've coated some of our cast iron hardware, like rim locks and hinges, or other ferrous metal that may get wet (like outdoor chairs), with low luster poly or Penetrol, but neither of those are very good options for these sash pulleys. The fact that the pulleys have moving parts and the sash ropes cause friction through use means that coating this hardware with something that can fracture and flake off isn't a great solution.
Last week we touted the rejuvenating characteristics of boiled linseed oil and turpentine (or Blopentine) for breathing life into our old window sash, but what can linseed oil do for ferrous metal? Turns out, it can be a great option for keeping cast iron from rusting.
If you've ever tried seasoning cast iron (like what you might do to cast iron cookware) you might be familiar with using oil to keep it from rusting. The idea in what we're doing is very similar. Heating the pan and allowing the oil (often flaxseed oil for cast iron pots) to coat and protect the cast iron helps prevent the cast iron from rusting by keeping water away from direct contact with the metal. It essentially forms a thin protective film over the iron's pitted and porous surface.
In our case we're using some Linseed Oil Soap from Allback, and we're giving our sash pulleys a linseed oil bath. The linseed oil soap is a mixture of organic linseed oil (not boiled linseed oil) and water, and can be diluted by adding it to the water in our "bath."
For us the first step is to clean the sash pulleys of their rush with a little steel wool. We previously used a wire wheel to completely clean the paint, but this thin layer of rust was no match for a #1 and #00 steel wool pad.
Once clean we moved onto the bath. We're using the vintage Crock-Pot I scored for free, coincidentally on the day after it was revealed on This Is Us (*SPOILER ALERT*) that Jack was killed by a vintage slow cooker, some crazy irony there, right?
I added enough water to fully cover the sash pulleys and then put in a few squirts of the linseed oil soap.
The soap is slightly clouding the water to start...
...but mixes easily with the water to fully disperse.
I went ahead and put the Crock-Pot on high to warm the soapy water up, and dropped the pulleys into the cloud.
Allowing them to soak in the hot mixture for several hours gives the linseed oil a chance to heat and fully coat and protect the cast iron. Also, this gives the mixture a chance to smell a little bit like hot gross fish. If you're into hot gross smelling fish, you'll really love this whole process!
While they cooked the water started to turn a bit brown. I periodically spun the pulleys around to make sure there was no trapped air or areas not fully exposed to the bath. As you can see from the photos, the case iron did slightly darken from the water and oil, but that's expected.
After three hours or so I checked on the progress. Removing the pulleys from the hot oil bath revealed a great looking piece of hardware that's ready for another 100 years of service.
The pulleys are slightly tacky right after they've been removed from the bath, but allowing them to dry overnight yielded a smooth and fully dried end result. The final finish is very matte and there is not a plastic film look to it at all, as you'd expect from a traditional poly.
Our sash pulleys, with patent date of Feb 1879, are once again ready for reinstall. These one screw Norris style pulleys (based on their shape and the specialized mortise necessary for the window frame) should no longer be prone to rust if they encounter a little bit of moisture. After the linseed oil bath they now have that classic cast iron dark grey patina. There is no film left following the bath and the coating is more or less baked in over the entire pulley.
This linseed oil bath is a great option for hardware with movable parts that may be exposed to moisture. At the same time, it's even a great option if you want that raw cast iron look without the need for maintenance or a glossy coating of poly. We'll probably be using this method for future restoration of our rim locks after we're done cleaning off all of the rust.
Have you ever heard of using a linseed oil bath on cast iron hardware? Or maybe you're a fan of linseed oil soap as an organic and environmentally friendly method to cleanse difficult to clean surfaces? Would love to know if you found this tip useful and if you think you'll try it out some day.
]]>This is the way of our home blogging and DIYing since the beginning. We start projects and then other projects take priority, so we stop projects. And sometimes we stop them for a long time. A really long time. And it makes Wendy angry with me. She doesn't understand why I stop them for so long, even though she does understand, but it doesn't mean she has to like it.
Our entire lives as DIYers has been a series of overlapping projects and priorities. Some projects are really important, until another one is more important. In the case of our windows, I started them and then we started our dining room, and then we started stripping a bathroom closet door, and then I started cleaning the basement, and then we started our foursquare's dining room, and then I started working on some clocks. SO MANY PROJECTS!
But before we get too derailed, let's circle back on that project that has been put off for so long that even once it's in progress, it gets put off again...the restoration of our original double hung windows. We left off in November by describing how we'd been able to successfully deglaze, strip, reinforce, and repair the first of five sash.
more]]>
This is the way of our home blogging and DIYing since the beginning. We start projects and then other projects take priority, so we stop projects. And sometimes we stop them for a long time. A really long time. And it makes Wendy angry with me. She doesn't understand why I stop them for so long, even though she does understand, but it doesn't mean she has to like it.
Our entire lives as DIYers has been a series of overlapping projects and priorities. Some projects are really important, until another one is more important. In the case of our windows, I started them and then we started our dining room, and then we started stripping a bathroom closet door, and then I started cleaning the basement, and then we started our foursquare's dining room, and then I started working on some clocks. SO MANY PROJECTS!
But before we get too derailed, let's circle back on that project that has been put off for so long that even once it's in progress, it gets put off again...the restoration of our original double hung windows. We left off in November by describing how we'd been able to successfully deglaze, strip, reinforce, and repair the first of five sash.
The window that had been close to "toast," as they like to say on This Old House, had a new lease on life. That's the term they lovingly give to the things they could probably save and preserve, but it's not in the interest of their time or budget to try. Our "hobby" time is a large portion of our budget, so in our case, bringing it back from toast is what we love to do. After a good amount of work, the joints were once again solid, pegs reinforced and re-glued, and old growth lumber was used to patch in missing portions of the structure.
But now that the sash was back to being respectable, what should be done to protect it and make sure it can last another 100 or more years (with proper maintenance)? The answer, a little thing I learned about on the Internets years ago called "Blopentine."
If you've noticed in the photos we've shared of the sash so far, the wood is somewhat to very weathered and grey. After the paint began the fail, the sun continued to bake the windows and the water from rain and snow penetrated all of the way to the wood. This left the wood dehydrated, and dehydrated wood is wood that's ready for rot and complete failure.
The next step in our restoration is a relatively simple but extremely important one. The old growth, tight grain pine lumber used to build these sash is amazingly resilient. Much like many of our neglected DIY projects, they can bounce back from ages of disregard, resulting in something wonderful if given the proper attention and care. But the key to this ability to properly bounce back and provide years more functional satisfaction is to properly hydrate and protect the wood against its most natural enemy, water. The best way to accomplish this is to hydrate and seal with wood with something that repels water...which is, naturally, oil.
BLO-Pentine, a word which I will use incessantly, is a made up concatenation of an acronym and partial word that I first heard from a window restoration specialist, "Jade," on the Old House Web restoration forums probably a dozen or so years ago. The word represents a 50/50 mixture of Boiled Linseed Oil (or BLO) and Turpentine. At some point it was even shortened to BLOP, I guess because of Boiled Linseed Oil + turPentine?
The idea here is simple. The boiled linseed oil, which is a favorite of woodworkers and restorationists for its protective power (and somewhat pleasant acquired smell) when it comes to protecting unfinished wood. But when dealing with dry wood, applying the linseed oil alone will often leave the oil simply sitting on the surface of the wood, never actually penetrating into the thirsty wood fibers.
By combing the linseed oil with the turpentine as a 50/50 mixture causes the turpentine to act as a delivery mechanism for the oil into the wood fibers. The thirsty wood will essentially drink in the mixture, rehydrating the weathered wood. Then, as the turpentine begins to evaporate as the mixture dries, it leaves behind the linseed oil, both on the surface and impregnated in the wood. The linseed oil then slowly cures, leaving behind quenched wood that now has natural protection against the elements.
Sounds easy enough, right? But it's very important to use extremely high quality products with this process. The turpentine you're probably most familiar with is a dirty, cloudy, and awful smelling product. If you're looking to create yourself some Blopentine, it's best to source yourself some linseed oil and turpentine that's essentially top of the line.
We bought our linseed oil and turpentine from American Rope & Tar. (TarSmell.com, what an amazing domain name.) Both are imported from Sweden and the turpentine is crystal clear and actually has a scent that I find pretty pleasant (but Wendy dislikes). It truly smells like it's straight from the tree.
When I mix up my Blopentine I like to mix a little at a time. I prefer the use of clear plastic cups to eyeball the amount, and then mix it by stirring and gentle shake/swirling in a mason jar. That way if I don't use it all, I can set aside what's left for later use as it does have some decent shelf life when stored.
You can apply the Blopentine in many ways, but I like using a foam brush. This lets me load the brush up with a good amount of liquid, then I can apply liberally.
When the mixture is applied to thirsty and weathered wood, you will see it quickly absorbing the Blopentine and just drinking it in almost as quickly as you can apply it.
In our case I ended up doing three coats of Blopentine, allowing it to dry thoroughly between coats. My first coat was heavy and I kept applying more while I could see the wood easily slurping it up. But once I noticed it was sitting on the surface more than being absorbed, I gave it a break to begin drying. This meant leaving the sash to dry for a good 12 hours between coats.
I left the sash slightly elevated and put a fan on it to keep the air moving around the sash. I know it's oil, and it will cure on its own time, but keeping the air moving will help the process just enough.
Once the mixture was fully cured, which can take a week or so, by hand I lightly went over the whole sash with a 400 grit piece of sandpaper.
At this point our sash was fully hydrated and ready for our next steps in restoration. We'll share more about the next steps in the coming weeks, but I really wanted to dedicate a whole post to Blopentine, the boiled linseed oil and turpentine mixture. It's such a critical and important part of this whole weathered wood restoration process and it what I hope will result in a wonderful end product once the windows are done.
Are you sick of reading "Blopentine" yet? Have you ever used boiled linseed oil to restore or finish antique wood? And do you have strong feelings about turpentine, its smell, or the quality of turpentine that you've used? It's not too likely I guess, because I tend to be sort of a nut about things like this. I hope this post is informative and useful for you in your window (or general wood) restoration endeavors.
Though Old Town Alexandria is full of stately historic homes that leave many visitors impressed, one of the most famous, or perhaps infamous home's in Old Town's historic district is well known for its demure size. At just over seven feet wide, Old Town's "Spite House" has been featured in magazines, books, newspapers, and on TV shows as the "narrowest home in America."
As well known as this home is, even by Oprah, would it shock you to learn that it's really not that uncommon in Old Town Alexandria?
Yes, it's true. While most assume there's just a single "Spite House," in reality there are at least four historic houses in Old Town that fit the bill as a spite house, or alley house. The story behind these homes may actually be far more related to practical usage of space than they are centered around an owner's spite. You just have to remember that old alleys of Alexandria often looked like the few originals that remain.
more]]>
Though Old Town Alexandria is full of stately historic homes that leave many visitors impressed, one of the most famous, or perhaps infamous home's in Old Town's historic district is well known for its demure size. At just over seven feet wide, Old Town's "Spite House" has been featured in magazines, books, newspapers, and on TV shows as the "narrowest home in America."
As well known as this home is, even by Oprah, would it shock you to learn that it's really not that uncommon in Old Town Alexandria?
Yes, it's true. While most assume there's just a single "Spite House," in reality there are at least four historic houses in Old Town that fit the bill as a spite house, or alley house. The story behind these homes may actually be far more related to practical usage of space than they are centered around an owner's spite. You just have to remember that old alleys of Alexandria often looked like the few originals that remain.
So when you have an alley with two sturdy brick walls of one or two neighboring structures flanking it, and you want to save some money on materials and supplies, it was likely far easier to use those two walls and just build the front, back, and roof of the house. When you have space's in alleys that are pretty small...
..it just seems like a great lesson in efficient construction if you ask me. But the spitefulness of the owners does make a much more intriguing story.
In our due diligence in covering Old Town's lesser known details, we went out armed with our laser distance measurer to see how each of these houses apparently built out of "spite" stacks up in the width department. Most importantly, is the most well known of the houses truly the narrowest in town, or is there another that should be the true claim to this fame? The main thing that you have to remember, this scientific assessment is surely 100% accurate...because we used "lasers."
Let's take a quick look at all of the spite houses we've discovered in Old Town, and how you can see them yourself if you're in the area or visiting.
This first building we'll look at is believed to actually be the oldest of the bunch, built in the late 1700s or early 1800s. It's rare since alley houses were more typical of the late 19th century. But it's also one that you can easily go visit inside if you'd like, and it happens to be the widest of all of Old Town's spite houses, at a whopping 11' 9". (Our house is only 15' wide, so it's essentially our home without the hallway.) At that width, there are other area homes narrower, but what makes this house suitable is that it was built in the alley between two structures, even though the timber frame building on the corner was replaced by the current masonry building in the 1850s.
Today this building is one of the well trafficked shops in the 200 block of King Street, so if you are eager to get an inside look at one of the houses in person, this is your chance. But in the past it has served many other purposes, from a family's home to a cobbler's shop around 1912.
1912 Sanborn Fire Map of the building as a cobbler's shop.
This is also the last of the four spite houses we discovered in Alexandria. We'd lived here for many years and heard that there were four alley houses, but we'd only been able to find three. One day, while eating some ice cream at the shop across the street, it occurred to me that this store that we'd seen a thousand times before was actually likely built in the alley of two buildings.
Today it's difficult to tell the history as the same company owns the neighboring property and it's been lumped together, but this structure fits the bill of an early alley house with a door and window on the first floor, a single window on the second floor, and a dormer in the attic.
The next home we'll look at is the one that most surprised us when we discovered it. Painted in the same color as the neighboring building, the tiny one story brick building with a small fish scale mansard roof is adorable with a ton of potential.
It was likely built shortly after 1912 (though the tax record suggests 1900) and mimics the style of the row of six houses built immediately to its left. Given the similarities in design and masonry, this single story variant of these Victorian homes was likely built all at the same time, almost as a "Mini-Me" representation of the others.
Today it has become a part of the neighboring building that was built much earlier, but it doesn't defeat the fact that it originated as an alley house addition to the neighboring building. By 1921 it was listed as an office of the building on the corner with a doorway between.
1921 Sanborn Fire Map of the house.
1912 Sandborn Fire Map of the house.
At just one story, and with a small space between it and the house to the left, it's by far the most unique of the alley houses in town. But its most important measurement in the Spite House battle is its width.
At just 8' 2" wide it is rather small, but it is not the smallest of them all. I would love to get a look inside this little building to see if it stands on its own or if it's now a part of the neighboring building. My guess it that it's used for storage, but it could easily be part of today's tiny house revolution given it's stature. Personally, I think it would be cool to open it as a small walk-up ice cream or coffee shop called "The Other Spite House."
This little house just in from the corner of Prince and Royal Streets was easily missed for many years, as it shared the same paint color and general look with its much large neighbor on the corner. But over the last year this narrow little house has undergone an outstanding transformation. It started as an inconspicuous light blue with peeling paint...
...until large scaffolding was erected in front of the home. Over the next several months masonry specialists worked to strip the home of its paint and repoint the old mortar.
Recently completed, the home now sports natural brick, white trim, black shutters, a red door, and beautiful copper accents by way of the downspout and new Bevolo light.
With a whole lot of effort I'd go as fas as to say it's not only a star of its block, but it's also officially my favorite spite house. According to city records it was built around 1800, but this isn't believed to be correct. It was likely built shortly before 1883 when there's record of the owner, Samuel H Janney bequeathing the neighboring three story house and the two story brick house to his son, Henry.
1912 Sanborn Fire Map of the house.
1912 Sandborn Fire Map of the house.
But how does it measure up with the other spite houses? The tale of the tape, errr, laser is just 7' 9".
It's pretty impressive that this home at only 7' 9" wide still boasts just over 600 square feet of living space and a 240 square foot unfinished basement. When it comes to spite houses, I'd say this one is the most surprising for how spacious it is on the inside, given its outside presentation.
Tourists gawk in front of this home and use it for photo ops, arms held out wide to show just how narrow the home is. It's known at the "Spite House" due to the legend that it was built out of spite to prevent loiterers, neighbors, or carriage traffic. But the true story for why it was built is actually unknown.
The Spite House in the January 2016 Snowstorm
We wrote at length about the tales we've learned over the years regarding the construction of this home and shared them in a blog post dedicated to this individual Spite House. Our favorite story is that the owner of the neighboring house, John Hollensbury, a mason, built the home as a sort of playhouse for his daughter to fill in land that he owned.
Built by the owner of the neighboring property in 1830, over the years this house has stood alone and has been a part of the home to its left. In the 1912 fire map a doorway is clearly shown between the two houses, and they are all located on a single property parcel. When it was finally separated as a home of its own, it required the house's address on the corner to change from 523 to 525.
1912 Sandborn Fire Map of the house.
So what does the tale of the tape look like for the house given the title of "Narrowest Home in America" but Ripley's Believe it or Not?
Measuring the Spite House, covertly under the cover of darkness.
We took our fire measurement at night but then followed it up during the day to get good photo evidence of the tally. We measured from the change in paint color on the left, to the side of the blue downspout on the right (since the downspout is actually leaned onto the neighboring house). We wanted to be absolutely sure we were getting the right measurement.
Our laser distance measurement came in at 7' 6", a full three inches narrower than the little house on Prince Street. But on the inside it's much smaller, just two stories, 480 square feet, and no basement. Talk about close quarters!
Well, obviously it's us for getting to enjoy a whole bunch of tiny houses from a bygone era.
But as far as the houses go, the Queen Street Spite House legitimately retains the crown as the narrowest house in Alexandria's Spite House battle. From an outside measurement the house is just three inches narrower than the nearest competition. I wasn't able to measure the interior, so the debate is still up in the air on that one.
We've put together a map of Old Town's spite houses in the event you want to check them out for yourself. Would love to see any photos you take of the houses. If you post them on Instagram be sure to use the #oldtownalexandrialleyhouse hashtag.
We hope you've enjoyed our little Spite House recap of Old Town's narrowest houses. We'd love to hear which one is your favorite of the bunch. Even better, which one of the houses could you see yourself living in?
]]>
Today Yogi is with Lost Dog animal rescue and they are working to find him his new family. While that's Yogi's story today, we want to share with you how Yogi's story crossed paths with our story, why we think he's pretty special, and why he might be the perfect addition to your family.
Yogi's story in our lives started on a Saturday back in October when we were on the way to our Foursquare. Driving along a well trafficked two lane country road on a cool and overcast fall afternoon, we saw a little brown dot moving around on the side of the busy road off in the distance.
As frequent travelers of this road we've seen it all. From foxes to deer to possums to skunk, it's a great part of the area to see wildlife but we're always concerned about them getting hit by passing cars. Not knowing what the creature was we slowed as we approached, both interested to see what sort of animal was ambling along the road, and also wanting to be sure we didn't have an animal meets car encounter. But when we got close enough to see who it was, we were shocked to see that the animal we'd been approaching was a very cute dog jogging along the side of the road, apparently looking for food.
more]]>
Today Yogi is with Lost Dog animal rescue and they are working to find him his new family. While that's Yogi's story today, we want to share with you how Yogi's story crossed paths with our story, why we think he's pretty special, and why he might be the perfect addition to your family.
Yogi's story in our lives started on a Saturday back in October when we were on the way to our Foursquare. Driving along a well trafficked two lane country road on a cool and overcast fall afternoon, we saw a little brown dot moving around on the side of the busy road off in the distance.
As frequent travelers of this road we've seen it all. From foxes to deer to possums to skunk, it's a great part of the area to see wildlife but we're always concerned about them getting hit by passing cars. Not knowing what the creature was we slowed as we approached, both interested to see what sort of animal was ambling along the road, and also wanting to be sure we didn't have an animal meets car encounter. But when we got close enough to see who it was, we were shocked to see that the animal we'd been approaching was a very cute dog jogging along the side of the road, apparently looking for food.
Alex and I have a soft spot for animals in general, and seeing this little pup wandering on a busy country road simply broke our hearts. Without a second thought Alex pulled into the next drive to turn our car around and said, "We have to help him, we can't leave him out here like this."
Before I knew it we were stopped on the road, Alex was out of the car, and I was doing my best to make sure traffic coming from either direction was slowing down to make sure nobody got hurt. We both initially assumed this little fellow had perhaps escaped from his yard, and we planned on looking at his tag to take him home. As Alex crouched down on the side of the road, the pup seemed to happily run over to him to see what he had to offer. He wasn't aggressive at all, and seemed to be more curious. We quickly realized this dog didn't have a home, and there was no home that we could return him to. He was emaciated from weeks or months without proper nourishment, as filthy as I've ever seen a short haired dog, nose rubbed raw likely from foraging for food wherever he could find it, and never having his nails trimmed his pads were red and cracked between his toes from walking endlessly along busy roads. To say it broke our hearts is a significant understatement.
While Alex was doing his best to wrangle the surprisingly friendly and jovial dog, another driver in his pickup truck stopped to see what the fuss was about. By this point Alex had befriended our new four legged friend to the point where he had actually picked the dog up to prevent him from running into traffic. After the neighbor graciously shared a box of Chik-Fil-A nuggets with our canine hitchhiker (he gobbled them right up) and confirmed he didn't belong to anyone that lived nearby or along the road, Alex and I decided it was our duty to load the brindle beauty into the back of our car and figure out what to do. No more than five minutes in the car and the exhausted and hungry hitchhiker was fast asleep.
Knowing that we had few options on an Saturday afternoon thanks to typical shelter closing times, we took our new co-traveler in the back of the car to the nearest shelter in Maryland in the hope we could make it before closing. Lulu, who had swapped places with me and was now riding up front with Alex, was thoroughly confused at the prospect of a new dog that was now suddenly in the back of her car. To her credit, she handled the whole situation with more poise than either of us expected.
Unfortunately, we arrived at the shelter after closing time. They had an "overnight drop" cage where we could have left him, but given his seemingly starved state, approaching rain, and the sense that we'd gotten him too far to simply leave him in a cage, we couldn't give up.
We were able to contact local animal control through the county police and arranged to meet an officer at the shelter. She would ultimately be able to let us into the main building and admit our new friend. This would also ensure he would get some food and warmth for the evening, as temperatures were expected to fall drastically that night.
After thanking the officer profusely for taking time out of her day to handle this sweet homeless boy, we drove away from the shelter with only thoughts of this little pooch on our mind. Where did he come from? Why was he wandering alone? How old is he? What's going to happen next? Did we do the right thing dropping him off at the shelter? We certainly felt much better that we knew he was safe, warm, and fed, and would soon be seen by their vet.
From what we could gather he looked like a pit/boxer mix, seems to be somewhat young but mostly full grown, was probably only about 35 pounds but should likely be about 50-60 pounds, and was surprisingly friendly given his situation.
As the next few days went by we kept thinking about this boy in the shelter, and we started to figure out what else we could do for him. Maryland has rules that prevent individuals from adopting pit bulls and pit mixes from shelters due to bully breed restrictions. Though the shelter we surrendered him to is a very good shelter, it is not a no-kill shelter. This didn't sit well with us, so we went to work.
Knowing their reputation locally we contacted Lost Dog & Cat Rescue, a well known rescue organization in Northern Virginia. (If you've heard of the restaurant, Lost Dog Cafe, they're all part of the same group.) After the hold period was up and nobody had claimed our new furry friend from the shelter, we began the process of essentially transferring him to the rescue to ensure he would eventually be placed in a good home no matter how long it took. Though Maryland shelters can't adopt dogs to individuals, they can work with rescue organizations to place dogs, so this seemed to be the best path forward. We figured that if we could get him transferred to Lost Dog, he'd be in a very dog friendly area, and he'd have a better shot at a happy life.
Two weekends after we found him wandering on the road, starving and filthy, we had secured the paperwork for transfer and headed back to the shelter to be his official escort to his new rescue. Lulu tagged along for the ride and made sure to keep him company.
After we picked him up and before we took him back to Virginia, we figured he needed a little bit of pampering to make him feel a little better and to help him in his transition. We took him to our house and had a nice little outdoor spa day. It was a warm day so we game him two very thorough baths in the yard. The water was warm and sudsy, and he seemed to simultaneously love chomping at the stream of hose water, and look in puzzlement as we were drenching him and soaping him up.
The end result, Alex was pretty much as wet as our newly scrubbed companion, but he was, possibly for the first time in his grown life, smelling fresh and clean.
We walked around our yard a little to dry him off and realized that he didn't have a clue when it came to walking on a leash. He was equal parts spastic and euphoric, and kept trying to play with Lulu, who was, once again, rather confused by the whole situation.
After transferring this handsome boy to Lost Dog, he was given the name Yogi, which seems to fit him quite nicely. He's now been with Lost Dog for a few months, and in this time Alex and I have made a habit of visiting him at their pop up kennel to regularly to walk and play with him. He's currently at the Seven Corners Kennel in Fairfax, Virginia, and is doing really well.
Since he became a member of Lost Dog's pack Yogi has been to the vet several times to resolve normal issues you'd expect from a dog that had spent his prior life outside and without veterinary care. He was neutered and has been acclimating to a life where he knows he'll be cared for and fed.
When we go to walk and interact with him we always see that others have taken him out to walk around the Eden Center complex several times per day. But he's always excited when he sees us coming because he knows he gets to get out and play a little.
He's gotten so much better walking on the leash, and he's begun putting on weight as he has been getting healthier. He's a very strong dog, which is far more apparent now that he isn't just skin and bones.
Each visit with him we work on some basic commands like sit and heel, and he tends to be rather food motivated (but not aggressively so), which means he's responding really well when we have some yummy treats to offer.
At this point, Lost Dog is actively trying to adopt him out, but it has taken a while to get to this point. Lost Dog received a large number of rescues from Puerto Rico following the hurricane last summer, and getting all of his veterinary items taken care of while also placing and caring for all of the other dogs has taken quite some time. Nonetheless, he just keeps getting better and simply needs the right family. This is a video from one of our more recent trips to see him. Look at how much better he's doing on the leash.
This is where you come in. We're hoping someone local to the Northern Virginia area might be reading this and would be interested in fostering this pup, or better yet, welcoming him into your home permanently. Unfortunately with his strength and Lulu's general poor aptitude to be aware of her surroundings on walks, it would be impossible for me to walk them together, so our fostering Yogi isn't a realistic possibility. But we want to do anything in our power to make sure this sweet guy has a chance at the happy life he deserves, that he so clearly didn't have for the first part of his life.
From our experience he's really very sweet, somewhat shy, and still a little unsure of new surroundings. But when he has a bond with you, you can feel it. When we walk together and he gets uneasy around too much traffic on a nearby road, he'll lean his face into my leg to feel more secure. He loves getting his back and butt scratched, and his tail moves a mile a minute when he can see one of us coming towards his enclosure.
Yogi, like so many rescues, deserves a a chance to be someone's happy and healthy companion. We're hopeful that someone might be you or someone you know.
If you're interested in fostering or adopting this cute brindle boy with the goofy grin and soulful eyes, here's more information on Yogi and how you can contact Lost Dog.
]]>