While we've been spending a whole lot of time discussing the somewhat long and drawn out process of fixing and skim coating our bathroom walls and ceiling, we haven't just been focusing our attention on the upper half of the walls.
If you'll remember back to what feels like forever ago, the lower half of our bathroom walls will ultimately be the wide beadboard profile that we agonized over multiple times.
A while back we filled you in on the long and drawn out decision making process for selecting the beadboard profile, as well as the initial crushing blow of buyers remorse we experienced when the beadboard arrived. After a bit of house induced hyperventilation, a heated spousal debate, and ultimately an airing of our grievances in a blog post, you kind and level headed readers pointed us back in the general direction of sanity. We primed a section of beadboard and decided it would work in our bathroom, even if it wasn't the perfect beadboard we'd been dreaming about in our minds.
Since those initial test boards of primed panelling, we've not been a pair of slouches when it comes to bathroom projects. After all, we've been hard at work on the window, the skim coating, material selection, the closet, and best of all, the wainscoting!
The meat of the project all kicked off a few weekends back when we began installation in an unsuspecting corner of the room near the window. The beadboard is a tongue and groove pattern so the direction of the initial board is important. The tongue is on the bead side, and the groove opposite (duh), so we wanted to install in a clockwise fashion around the room with the bead to the right on each board.
It is important to choose the right orientation when setting up any tongue and groove configuration. Whether you're doing flooring, beadboard, or anything tongue and groove, it's best to leave the tongue as the leading edge of the pattern. This way, after nailing the board, you can slide the next board in. I know it doesn't sound like a big deal, but when you reach a corner it's much easier to deal with sliding something onto the tongue, rather than trying to somehow give a tongue into a fixed groove. Once you have your direction chosen, and your plan of action in mind, placing that first board (ensuring it's perfectly positioned and plumb) is the first critical step in the right direction.
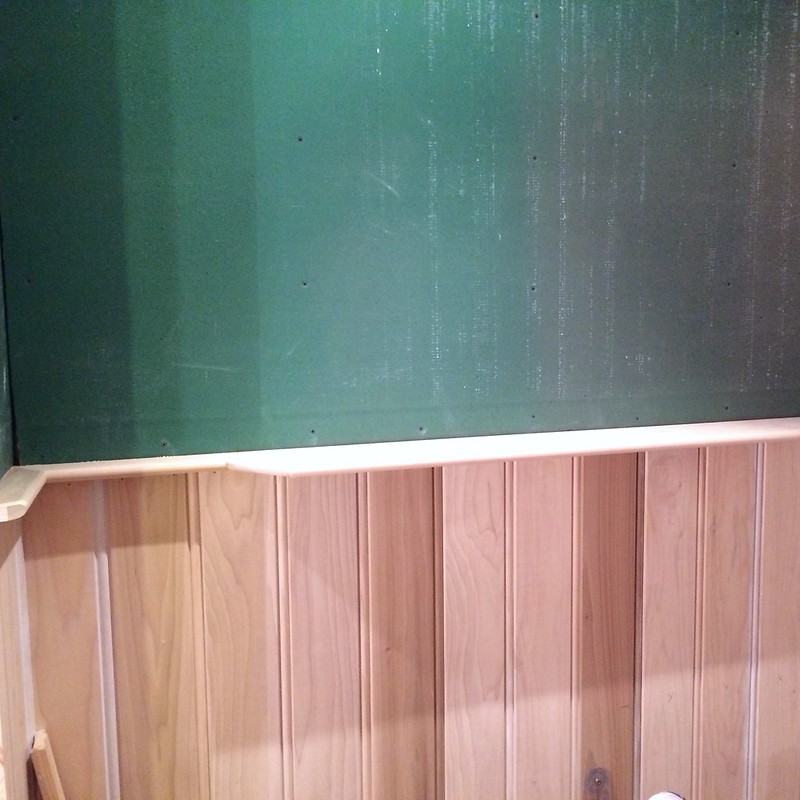
Our beadboard plan is to have about 48" of beadboard showing, a bit higher than the normal 36" you tend to see. We also want a fairly substantial wainscoting cap/molding detail, similar to what we did in our guest bathroom but larger (since the room is so much larger). In order to accommodate this cap I put a band of 3/4" spacer wood around the perimeter to allow the later addition of the cap. I also worked on cutting the cap, a large bullnose piece, out of a length of stock poplar. I used the router table with a round-over bit and just ran the poplar through on each side to give the bullnose effect.
Overall, the install of the beadboard on the walls that had no obstacles, such as outlets, was a fast and smooth install. Just pop the next board up, give it a few whacks with the rubber mallet, and nail the board off at each critical point. Using this technique you can knock out a short wall in no time.
But then you run into stuff that's in the way. This "stuff" can be anything like outlets, windows, doors, plumbing, little mouse doors like in Tom & Jerry, anything. And each of these obstacles need planning, measuring, cutting, checking, more cutting, checking some more, usually more cutting, more checking...you get the idea.
Because I wanted to be as exact and perfect as possible, it seemed that each obstacle took about 20-30 additional minutes. I was probably spending more than I needed, and also delayed by stopping to check Twitter or Instagram, but the process was simple yet tedious.
First, mark the cuts and drill a few holes (the hole on the right is intentionally outside of the line to accommodate an junction box adjustment screw.
Then use the jigsaw to cut along the line.
Finally you have your cutout, ready to slide right over the obstacle...possibly with a little "encouragement" from a hammer or pry bar.
Each obstacle took time and effort, but the end result around the entire room were perfectly cut openings that you'll hopefully never really notice once all is said and done.
The other thing I needed to deal with was the long plaster wall without any real nailing base for the wainscoting. This wall is comprised of a brick wall area below the window, and the house's "wet wall." There's plumbing, electrical, HVAC, network, speaker, and TV lines that go through this wall, and the last thing I wanted to be doing was nai into nothing substantial every few inches and possibly piercing any of our critical pipes or lines. So rather than continuing with the normal method on this wall, I devised a plan. I cut a piece of 1" x 2" poplar to length for both the top and bottom to act as rails. Then I cut a groove along both pieces of poplar, followed by a tongue cut at the top and bottom of each piece of beadboard.
When put together, the tongue and groove of the wainscoting pieces, along with the new tongues at the top of the wainscoting, would hopefully lock the whole thing together on the wall.
Oh, and while I was working to make my plan work the shoddy plaster repair along with years of water damage culminated in the dramatic failure of the entire section of wall below the window. It was a moment of pure awesome.
This is just another justification for why wainscoting is the perfect solution for this room.
Okay, back to the good news. Using this technique I'd be able to affix the bottom piece of poplar directly to the studs and nailing blocks in the wall using screws.
I'd then slide all of the pieces of wainscotting into those support pieces and just leaving them in a "floating" configuration without fasteners. Then I slid the top rail over the tongues and screwed it in place using the same stud locations as the bottom. (The white box in the wall is one of our central vacuum ports.)
Ultimately, the top rail will be covered by the cap and molding detail we've yet to add, so you'll never know it is there. It took a bit of creativity to get this solution in place, but once everything was screwed securely it is completely stable and ready to be our bathroom wainscoting.
The final really tricky section of wainscoting came on our very last piece. The area to the left of the door needed the final piece of wainscoting to be about 1/8" wider than the pieces we had. We didn't want it to look weird with a bead being half way cut off as it terminated into the molding, but we didn't have any way to make any of the pieces wider. Rather than tear anything out and possibly throw off other room proportions I decided to cut a new piece of "beadboard," just without the bead. I grabbed a piece of 1" x 6" poplar and setup the table saw to mimic the angle and cut the edge as exactly as I could.
It took a few minutes, but I had our final piece of wainscoting cut to exactly the size necessary to complete our install in an aesthetically pleasing manner.
Once the wainscoting itself was installed we moved onto the top cap installation. Using the pieces of cap I had cut on the router, I carefully measured and mitered each piece to ensure a tight and accurate fit. Then, using a bit of wood glue on the underside I nailed down from the top of the cap into the pieces of wainscoting.
I repeated this process all around the room with the exception of one length of wall. The area above the future claw foot tub is receiving a little bit different of a treatment. Since this area is potentially dead space we decided to make it a little bit more functional by cutting a shelf with the same bullnose detail. I then installed it centered on the tub wall.
We'll still need to install a few small support brackets to ensure setting things on this ledge won't cause it to fall, but we felt this was an excellent way to make more efficient use of the space. We'll ultimately put some hooks for towels on the underside as well, and I even have an idea for a super functional surprise. We'll see on that though.
Overall our wainscoting install took me about five or six days of on again, off again effort. The obstacles and non-standard areas (like the rail and the custom piece) were obviously the most time consuming. If not for those areas I'm rather sure the whole room would have been knocked out in a day. But then where's the fun in that?
One sort of fun thing is how much we've been noticing other wainscoting profiles now that we've been dealing with our own. We showed you how we found the same profile as ours at Neuschwanstein Castle, but that wasn't the only place we saw it in Germany. We also saw a nearly identical one in a weird little bathroom-looking alcove at the Medieval Crime and Punishment Museum in Rothenburg. I do like that we've seen it in several places now.
Overall we're extremely happy with how everything turned out and we're looking forward to priming and painting the whole thing (remember, only the backs and tongues of each board are primed). I'm also excited to add the detail below the cap (wow, that's so nerdy) because I think it'll really make the whole thing look great. That's going to be a multi piece molding detail, so I need to figure the logistics out on that. But our room is starting to look like a real room!
Wow, I can barely believe it, and I took the photo!
You can see a little collection of the remaining pieces in the right corner of the photo that still need to be installed. When all is said and done I think we'll only have one or two small scrap pieces. It seems, for once in my life, I ordered the precise amount we'd need for the project.
What do you think now that it's installed? I think it looks so much different on the wall than it did when we were taking it out of the boxes and looking at it a single piece at a time. We have the tendency to overreact in some situations, and this was one of those example. Now that it's in place, we're very happy with our decision.