Grout. Such a simple thing. A bit of cement based filler, sometimes mixed with sand, and a little bit of water. It’s a recipe that’s been around for thousands of years in an essentially unchanged format. It’s rather amazing how much something that is so simple can so easily change the look and feeling of an entire room’s tile install.
We last covered the two day effort we invested to virtually transform our kitchen with a simple running bond subway tile backsplash, and we really felt it was looking great. The tiles were even, level, consistent, and had a nice 1/16” spacing. Taking a step back showed us just how far we had come in our quick kitchen upgrade efforts, but the unfinished look from the lack of grout showed us just how far we had left to go.
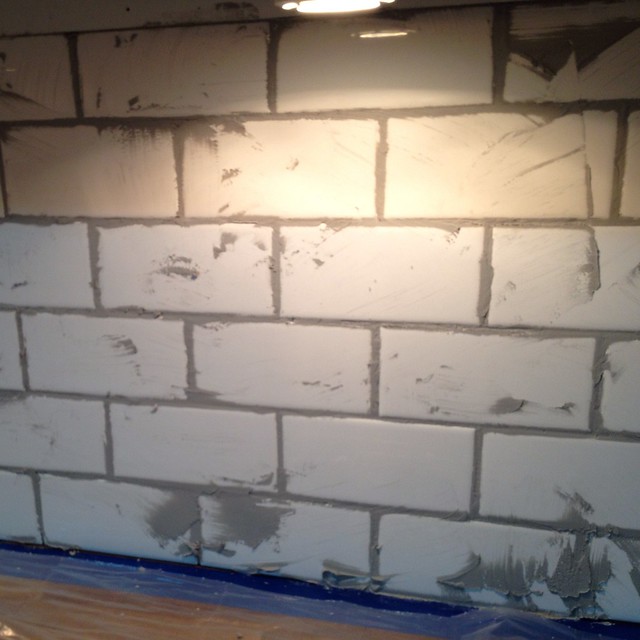
I know it may be a bit difficult to see the lack of grout in the photo above, so here's another shot that shows it a bit better. I assure you, it was somewhat glaring in person.
No sooner than the thinset had passed its recommended cure time than we turned our attention to grouting. However, just getting to the point where we had the grout was a bit of a challenge.
I mentioned in the tiling post that I have a particular brand of cement based grout that I like to use -- Mapei’s Keracolor. This came highly recommended from professional tile setters, and I’ve even used the epoxy version as well (for our guest bath). Here's a little bit of info about me and my personality. I’m one of those people who tends to stick to brands that I like and I have a really hard time switching to something I don't know. The big problem with this aspect of my personality and our hunt for grout is the fact you can only find this particular brand of grout at Lowes.
The Keracolor grout comes in a whole series of colors, and Wendy, on the night we purchased the tile using our London Fog paint chip, picked out the perfect color of grout for our backsplash aptly called “Warm Gray.” Since we were doing 1/16” grout lines, we needed to use the unsanded style grout. When your grout joints are under 1/8”, you must used unsanded grout, otherwise your grout won’t be able to really get between the tiles. We started looking through the aisle for the Warm Gray and quickly found it, but the problem was that we only found the sanded version. After talking with an employee, our enthusiasm quickly waned. Apparently Lowes doesn't stock the unsanded grout in Warm Gray.
Sadly for us, there was simply no other color option, it had to be unsanded, it had to be Warm Gray, and it had to be Keracolor. I wasn’t about to let my brand loyalty stray, and Lowes special order was just too slow and too expensive (about 225% of the cost in store), so we found an online supplier and ordered a 10lb bag of unsanded Karacolor in Warm Gray. The grout arrived about four days later, just after we wrapped up the backer board and tile installation.
Much like tiling, grouting your tiled work requires the right tools, a good amount of setup and prep work, a solid approach to mixing your grout, and (best case) a good and methodical team effort.
The supplies for grouting are pretty straight forward. It’s best to have the following:
- Bucket for Grout
- 2 Buckets for Water
- Trowel
- Hard Rubber Grout Float
- 4 or 5 Sponges of the grouting variety
- Clean Towel/Rags
- Painter’s Tape
- Plastic (optional)
We also have a “grouting system” bucket and sponge combo that we’ll talk about in another post. It’s very involved and I’m not totally sure it’s 100% necessary, but it’s nice to have.
Gather up all of your supplies and place them in your working area so you can get to them all easily when you need to start. Once again, I placed plastic over the counters to protect them as best as I could and also taped the boundaries of the counter and wall with painter’s tape. This lets me put the grout on and really work it into the joint without worrying about getting it all over the areas where it shouldn’t go.
Mixing up grout is similar to mixing up thinset. Follow the directions, mix it up a bit looser than thicker, and follow directions. Luckily, much like the IKEA directions for cabinet assembly, the directions are cartoon based and right on the package.
The main thing with grout is the water to grout ratio. In the case of our mix, the bag recommends 44-48 ounces of water per 10 pounds of grout. Since we were grouting a rather small area we knew we wouldn’t be able to grout it all in one shot. Rather than mix the whole bag, I just figured we could mix by the pound. This meant we’d need to add about 4.5 milliliters of water per pound of mix. Easy enough.
Knowing the speed at which we tend to work, and the area we had to grout, we opted to only mix up what we could use for one wall at a time. While the bag estimated we’d need about one pound of grout for the whole backsplash, I knew better. I decided we’d need to do about two pounds per wall, so our first mix was two pounds worth.
I’ll bet you $10 Wendy yells at me for using our kitchen measuring container and food scale when she edits this part of today's post. Wendy here. Yep, I'm not happy about my dear husband once again snagging kitchen items for basement work. Don't even get me started on how many pairs of kitchen scissors have been lost to the basement hellhole!
When I mixed the grout I slowly added the water while mixing with the drill. I use the same mixing attachment for grout as I do for the thinset, (and also for joint compound) so it ends up looking just about the same from a consistency standpoint. I like doing it this way so I know specifically how it is going to feel when I’m done. The main goal of mixing up grout is to end up with the consistency of soft cake icing (mmmm, cake icing).
Similar to the thinset, I let the mix slake for about five minutes before I give it a final mix and start grouting. As soon as you’re done mixing it’s best to start grouting right away. You don’t have a lot of time until it starts to harden and you, so no lollygagging is allowed.
I actually find grouting to be very relaxing, therapeutic even…until it’s not. Then I start to freak out, get flustered, and my ears turn bright red / almost purple. This is what Wendy likes to call “baboon ear,” because my ears resemble the general tone and coloring of a baboon’s ass. True love I tell you, true love indeed. There’s no hard and fast rule as to when I transform from mellow yellow tile setter grouting guy into purple baboon assed ear dude, and I often can’t even tell you how or when it happens, it just does. It seems to happen in a similar manner to how Bruce Banner transforms into The Hulk, but it’s way less cool and results in far fewer muscles, less ripped clothes, but pretty nice looking tile.
Like Bigfoot, baboon ear is elusive and rarely photographed in the wild. Here's an example from just over five years ago.
I started the grouting job on the right side of the wall, similar to where we started tiling. By putting a large amount on the trowel you allow yourself the most time to really work it into place, and you reduce the need to keep going back to your bucket. As soon as you start applying the grout, the wall becomes your hawk (thing that you put plaster, grout, or other similar stuff on as a staging platform).
Working at various angles I slowly spread the grout around the wall and smoosh it into all of the joints on the wall. I’m not pressing particularly hard, just working the grout all around and filling every void I can. It’s often best to work diagonally while doing this step, as going across the joints or with them often pulls grout out of the joints rather than packing it in.
As I work around, I try not to pay attention to just how bad I think everything is looking, and instead just focus on getting the grout into all of the voids. It doesn’t look at all like the final product at this point, so there’s no sense in worrying (but don’t tell my baboon ear that).
As I said earlier, it’s best to grout with a partner. The lead person puts the grout in, then your partner follows with the sponge after the grout has set up a bit, taking the first pass at removing the excess. The lack of a partner is one of those items that can contribute to a more rapid baboon ear transformation…then again, sometimes the existence of a partner can contribute just as much. What a weird occurrence.
Like working the grout into the joints, it is best to use the sponge to take off the majority of the excess in a diagonal fashion. This keeps the grout you want in place, while removing the grout you don’t want. Once you remove the initial excess, you can move onto working more with the joints to get them looking how you want them to, if necessary.
The key with the excess removal is to wipe the grout with a sponge, then wring the sponge out in the bucket of water very often.
After we removed all of the major excess grout, we moved onto the final cleanup phase using a clean bucket of water. Since the first bucket of water is already full of the excess grout, using a clean bucket allowed us to simply remove a little grout and reduce the chance for dreaded grout haze. The clean water doesn’t place the excess grout back on your tile where you don’t want it to be, and using a second bucket allows you to move right into this phase of the project without having to pause to clean up the first bucket.
This is the stage where you really get to see what the final results will look like. When doing this phase, we wiped diagonally with a clean sponge, then rotate the sponge and wipe diagonally, then flip the sponge and wipe diagonally, then rotate the sponge and wipe diagonally, then rinse and wring the sponge. Using this approach gives you a clean end result without dirtying your tile after you’re already cleaned it.
After we finished the right wall and cleaned it up, we moved right along to the wall behind the stove to the left of the sink. It was just a matter of repeating what we had done, but Wendy was feeling rather tired so I lost my partner for this side of the work. It was midnight after all.
Overall the second side went pretty smoothly. As is usual with this sort of task, I get all freaked out when I start working on it, but I find my groove by the second half. After another couple of hours I had a clean second wall and a good looking collection of tile joints with 1/16” grout lines.
After the grout gets pretty firm, a final once over with a perfectly clean sponge or a few rags to remove any haze is all that’s necessary before we called our grout work complete. We still need to allow a full cure before we seal the grout, but check out these end results of our quick kitchen fix up that has somehow changed into a massive kitchen overhaul.
We couldn’t be more pleased with the results or with the final color of the grout. It was more difficult that it should have been to find the grout given the Lowes stocking issue, but the wait and difficulty was well worth it. Now we're just looking forward to replacing these rickety old appliances with the new ones we scored on a Labor Day sale.
In case you're curious, the total backsplash project cost including tile, backer board, screws, mesh tape, and grout ran us $140. But if you ask us, getting the look of a beautiful and classic backsplash in a kitchen that never had one before is worth way more than $140. But most importantly? The happiness of my wife / grouting partner after finally being able to realize a long standing dream of having a nice looking kitchen with tile backsplash? Yep, that’s priceless.
So what do you think of our new kitchen backsplash? Do you think it ended up as all it could and should be, or have we just spent a little bit too much time, money, and effort putting lipstick on this pig of a kitchen? All I know is I'm having a heck of a time trying to keep Wendy from breaking out the juicer until after we've finished sealing the grout and oiling the counters. There's a lot of excitement around these parts.