We left off on our in-depth "how to fix plaster and skim coat like a boss" series of blog posts after having applied the initial rough coat of joint compound over top of the screen/scratch coat we had applied in the previous steps. And while any wall or ceiling that had been previously cracked, sagging, full of holes, and generally near disaster is undoubtedly looking much better at this stage of the repairs, it's nowhere near finished. However, we're just a few arduous steps from turning that old plaster on its ear and creating a beautifully smooth surface on which to finish the remainder of the room.

I know, I know, I can barely contain my excitement too, I'm right there with you! But hold on just a second. Bottle that exuberance up for just a little longer. There are a few critical items left before we can declare victory over the plaster demons, and these steps can ruin the project if done wrong.

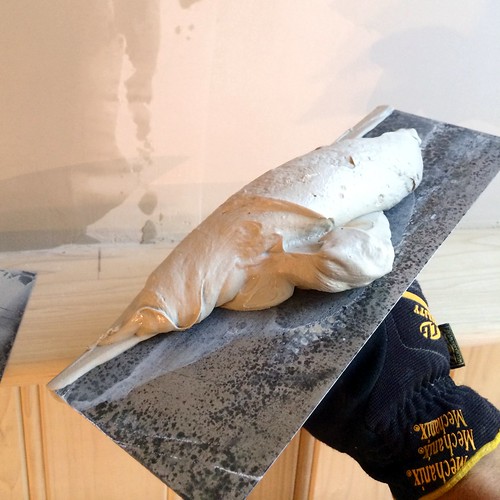
Before we can go on with skim coating we need to prepare the first and fully cured layer of skim coat we had applied. Unless you're a true pro, there's a good chance your first coat has its fair share of bumps and ridges. These can be large or small, but we need to knock them down before going forward.

How do we knock it all down? Sanding. Ugh!!

If you've ever sanded joint compound before you probably know the massive dust bowl it can create. I'm not kidding! The first time I sanded joint compound and wasn't properly prepared it looked like I should have been riding a tauntaun through a blizzard on Hoth looking for Luke Skywalker (and I thought they smelled bad...on the outside).

Joint compound dust seems to quite literally get everywhere. I had closed the doors and taped up plastic, even put a fan in the window blowing the dust all over pedestrians and cars (not my finest DIY moment), but by the time I was finished that damned dust had reached just about every surface of the house, settling like a fine film of filth. Though I couldn't see it, the dust had apparently also encased Wendy's last nerve. I had to come up with a better solution if I ever had hopes of fixing up the rest of our house.

With the simple charge from Wendy of "Don't you ever f@&$ing do that to our house again!!" I was inspired to come up with a new and improved approach that would result in a reduction in dust. While I was at it I also wanted to come up with a method of sanding that was far less manual and labor intensive.

Not sure what I mean? Well, the dust gets all of the glory when people talk about sanding joint compound, while the toll is takes on your neck, shoulders, and back is quickly forgotten, in spite of the massive effort.

I had heard about the possibility of wet sanding joint compound to take off more material with less mess and effort. I gave it a go but really didn't like the results. It doesn't work well on the setting type compound, and it leaves a somewhat rougher surface than I prefer. So I was left with the task of building a better approach to sanding.

The first step to our dust remedy comes by way of a sanding pole with integrated dust collection. There are quite a few options out there for a "dust free" sanding experience, but they all rely on the key of a vacuum connected to a sanding device of some sort. Primarily, the sanding poles rely on the use of joint compound sand paper that's actually a rigid grid of sanding material. This grid allows the joint compound dust to transfer through the paper, and if connected to a vacuum, get sucked right up, rather than falling to the floor or settling on every other damned surface in the house.

I swear, the dust is like the pink tub ring in The Cat in the Hat Comes Back, it just keeps multiplying, and we have no VOOM under our hat!

Once we determined that something needed to connect to the vacuum, it presented a secondary problem, the vacuum filter. If you've ever used a Shop-Vac with very fine particle dust you know one of two things happens (or possibly both).

  1. The dust is too fine to be caught by the filter, which means the vacuum just spews the dust into the air and causes an even bigger mess.
  2. The dust is caught by the filter, clogging the filter, and reducing the suction of the vac, which allows the dust to blow into the air.

Both of these scenarios can be resolved by configuring your Shop-Vac to use a Hepa filter and fine particle "drywall filter bags." 

By using the two of these miracle items, along with your adequately powered vac, and a sanding pole with the right paper connected right up to that vac, you'll have a completely bearable sanding experience that doesn't make you feel like you're stranded in the wilderness in the midst of a massive blizzard, fist fighting wolves just to stay alive.


Liam Neeson just got done sanding joint compound

Now, we could leave the "sanding tools" part at that, but there's one more little trick I use that I've now been so thoroughly spoiled by that I simply can't live without it. Be forewarned, it's not cheap, but now that I have it, it's irreplaceable. 

BEHOLD!!!!! THE PORTER CABLE 7800 4.7 AMP DRYWALL SANDER WITH 13 FOOT HOSE!!!!!!! (Did you hear the angels sing just then? Yeah, me too.)

This thing was the splurge of all splurges back when we bought it in 2003. We barely had two pennies to rub together having just moved into our house, but I feared our marriage would not survive without this tool, and that the weight we might lose having to forgo food in order to save up for this beast was just an added bonus. In retrospect, I was 100% correct and it was undoubtedly the best specialized tool purchase I've ever made. You know how special it is? It's so special that I'm talking about it on a day other than Toolbox Tuesday. Yeah, that special. 

I've been through a lot with this tool. From the hallway, to the dining room -- the kitchen to even the master bedroom, it's stuck with me through thick and thin (joint compound), doing the one thing we purchased it to do: sanding walls and ceilings like a badass mo-fo!

As you can see, it's such a badass tool, I have to grow a mustache and have weird facial expressions just to use it. (Don't worry ladies, buying the tool alone will give you the ability to grow the required mustache. Your hair follicles just know you own it.) I'm pretty sure I'm actually singing to the sander in that photo, siren songs of tool love, I'm sure.

This thing works on ceilings...

...and it works on walls.

My favorite way to sand is to place a work light of some sort below the area I'm sanding. This allows the light to dance across the surface, highlighting any serious area of imperfection where I need to focus. This is actually a good rule of thumb whenever you're trying to create a consistent surface, give the surface harsh light from the side so you can really see what you're working with.

The multi-directional pivot head articulates based on your position and the position of the surface you're sanding, while the variable speed sanding discs (think large random orbit sander pads) leave a consistent and smooth surface. Best of all, it all hooks up to the Shop-Vac to make the dust practically (okay, so there's still a little) nonexistent. 

I actually learned of this sander, and the whole idea of skim coating, while watching an episode of This Old House when they were doing a large Bunker Hill house in Boston many years ago. The homeowner was the one using both the tool and doing the work, so I figured, "Hey, if that person can do it, so can I."

When you're using this sander the most important piece of advice I can give is to place the head in a flat position onto the work surface. Don't ease it on at an angle as this will scar your wall or ceiling. Placing it flat will allow you to begin working and then just move it around as you need. Also, if you're in tight quarters, or the sander head is near your hands, you can actually position yourself to grab the head by the rigid attachment pieces, working the sander around the wall with more precision and force.

Man that Halloween-grown mustache looks horrible!

While this sander is great, it's not light. You really need to put your force behind it and by the end of the work, you're tired and sweaty, but it's still easier than hand or manual pole sanding everything. The sander also can't get into the corners or right to the edges of the wall. This is usually okay since there is crow or baseboard going over the unsanded parts, but in the corners you still need to hand sand with a sanding block. If there's a lot of material to take off, I'll use a flat wide knife to scape it down first, then hit it with the sanding blocks. 

Though "sanding the wall and ceiling" may not sound like a major step, it's such a critical item in the process that I usually break each layer of skimcoat, and each successive sanding out into its own item on our checklists. Not only do I give each step its needed attention by listing it this way, I'm able to feel that great sense of accomplishment when I can complete an important step in bringing the walls and ceilings back to the way they should be looking.

What are your steps for keeping dust down when it comes to sanding joint compound or plaster? Do you have a method, or are you more of a "dust bowl free for all" type of person? And what do you think about this massive overkill but now can't live without it tool? Does it look like something you'd like to add to your tool arsenal? Is anyone else thrilled that this mustache is a thing of the past?

We have a whole series of plaster repair/skim coating posts you should check out if you like this or are trying to tackle the same thing. Here's the whole list for convenience:

  1. Plaster Repair for DIYers - No Need to Rip It Out
  2. Plaster Buttons to Fix Your Crumbling Ceiling
  3. Plaster Repair Part 2: Laying a New Brown Coat
  4. How To Fix Plaster Like a Boss: Sand Baby Sand - this post
  5. DIY Plaster Repair: We Finally Put the Skim in Skim Coat
  6. My Skim Coating Nickname is Mr. Smooth - The Tricks I Use to Earn It
  7. The Final Steps to Perfect Skim Coating
Comments 24

Comments

11/8/2013 at 3:01 PM

I've looked at that sander before, but was a little skittish at the cost since it was a somewhat pricey "toy" and I wasn't sure of what kind of results it would yield. I believe you've just made me decide what I'm going to ask Jada to get me for Christmas!

Alex
11/12/2013

This is a PERFECT Christmas gift idea! It is definitely worth it, I just used it this weekend in the bathroom and the walls look great. I'll have another bit of "review" for a few add on aspects to it, but I just discovered them last weekend and I'm still trying them out.

Andrea
11/8/2013 at 3:25 PM

And to top it all off, that mofo is on SALE on Amazon.

Great post, Alex. Really helpful.

Alex
11/12/2013

That's what I like to call "Tool Serendipity!!"

Leah M.
11/11/2013 at 4:56 PM

I've been lurking for a while but have been avidly following your plaster journey. Our new-to-us 1950 colonial has a lovely combo of rock lathe and plaster...an early drywall/plaster hybrid, sort of. It's all cracking now that we've turned on the heat for the first time in 16 years, and this tool would save our sanity for sure since we'll be mudding and sanding for the next decade or so.
I do have a question about the plaster buttons--can you use them to prevent plaster cracking in spots, say, when removing old baseboards or window trim? There are a few areas of wall that are still intact and I'd like to keep them that way, haha. Thanks!

Alex
11/12/2013

It is possible that you can use the buttons to prevent cracking to some extent, but it's all a matter of how much pressure you put on the plaster. If you have buttons in place and you put too much pressure, the buttons will actually cause the plaster to fail right on the point where the screw goes through. It's all about how careful you are.

The material you have on your wall is the same stuff that was on the ceiling of our kitchen. It's damn heavy, that's for sure!

Dewey
11/11/2013 at 7:03 PM

Hi Alex & Wenday:

I just wanted to let you know that RSS still seems to be broken for me. Alt frowning

I don't know if this will be of any help or not, but I looked at the post links displayed for many of the 277 feeds that I'm subscribed to and they all show either links like:

http://blogname.blogspot.com/2013/08/headline.html

or

http://feedproxy.google.com/~r/blogname/~3/gMfBiEfPgHI/headline.html

or

http://sitename.com/2013/09/30/headline/

your blog on the other hand shows the following for this story:

http://feeds.feedburner.com/oldtownhome/06decc6a-392a-410a-826a-5b130202e524

Your blog feed is the only one that I could find among the many that that I checked that showed a link like that. Hopefully this will mean something to you and you can get the feed fixed.

Also, I don't know if this is connected to RSS issue or not but I also don't get notified when a reply is posted to my comment.

Alex
11/12/2013

Hey Dewey,

I'm at a loss for what's happening. I downloaded your reader software and installed it on my computer and I'm just not seeing the issue. It looks like your reader is interpreting the RSS feed's "guid" node as the link, rather than using the id node or link node. It then appends the guid value on the uri provided by the feed. Is it possible you changed a setting in the application to use the guid instead of the link or id? Are you using a mac or pc? Do you have the latest reader software?

I've checked our feed in a variety of other places, such as feedly, bloglines, blog lovin, etc, and I can't reproduce the situation you're seeing.

Feed items like this can be so frustrating.

Dewey
11/12/2013 at 11:49 PM

Hi Alex:

I'm on a Mac, running OS X 10.6.8 and I'm using NetNewsWire 3.3.2 (version 4 is Beta and requires OS X 10.7.3). Your feed uses the same preferences as all the other feeds I have subscriptions to. If I use the "Open Link" button or double click the headline I get the error, but if I click the "Read Full Post" link in the preview pane it loads the post.

I just tried subscribing with Safari 5.1.10 and if I click the headline or the "Read more..." link I get the error, but like NetNewsWire if I click the "Read Full Post" link it loads the post.

I've managed to work around the errors but others that are less experienced may not know that there are other ways and may give up on your blog's feed that's why I keep bringing it up. If there's anything else I can do to help with figuring this out please don't hesitate to let me know.

Do you have any idea why the email notifications to post replies aren't working either? Do you think it's related?

I keep forgetting to tell you, but I love your blog and what you're doing with your house, keep up the outstanding work!

Dewey
11/13/2013 at 9:09 AM

Hi Alex:

This morning I received 4 email notifications for replies to comments I've made on your blog dating back to 10/28. I don't know why or how they just started showing up, but, it's apparently no longer a problem.

The other thing that I have to report is that I noticed if I right click on your feed with NetNewsWire there's an option for "Validate this Feed", so I did and the first part was:

Sorry

This feed does not validate.

line 13, column 4: Undefined entry element: guid (25 occurrences) [help]

<guid>1d0ef85d-1a81-4947-9655-1e1b0ec5c80b</guid>

Hope this helps.

Alex
11/15/2013

Okay, I think I've identified the main issue here and should be able to resolve it this weekend. I need to make a change to the feed to ensure the extension elements and other items I've defined that aren't part of the ATOM RFC are accepted. Once I make those changes we'll need to see if it's still an issue. However, just as an FYI, once you're able to upgrade to 4.0 it should be resolved as well. I was testing on the 4.0 beta version.

Also, thanks for letting us know on the emails. I noticed it was hung up and resolved that based on your feedback.

Dewey
11/15/2013 at 5:45 PM

Hi Alex:

Glad to hear that you've figured out the problem with the feed. I plan on upgrading to OS X 10.9 Mavericks (and NetNewsWire 4) as soon as I get some things taken care of that I need Rosetta under OS X 10.6.8 Snow Leopard to accomplish.

11/11/2013 at 7:03 PM

That's totally crazy. Why haven't these things existed forever?

Alex
11/12/2013

I consider myself fortunate to live in an age where they do exist! I think it has something to do with evolution.

11/12/2013 at 10:30 AM

OMG. OMG. I NEED THIS THING. Spendy, yes, but if it makes the oh-so daunting task of skim-coating basically my entire house more bearable, I think it's worth it?

Damn. Want.

Alex
11/12/2013

Now I consider myself to be quite the enabler when it comes to major home improvement purchases, especially those related to rounding out a tool collection, but my response has nothing to do with that. GO BUY IT TODAY! You could go the Brick City Love route and rent one to try out, but there is no way I could have skim coated every damn surface in our house without it. As a true test, try out this sander, then use a normal drywall sander for about 5 minutes. You'll want to shoot yourself.

I'll share a few more tips and tricks (and even tools to use) to get the surface almost perfect in the next week. I'm on my last coat now and the room is starting to look pretty amazing.

11/12/2013 at 6:49 PM

We have a giant hole in our ceiling due to an awesome unexpected water leak that you are more than welcome to do for us. Of course it had to happen in the bathroom that has 11 foot ceilings that we just finished painting after not decorating or renovating it for almost 2 years. I have alas no tips. Just a cry for help from you both. ;)

Phil Goodloe
7/27/2014 at 12:16 AM

While I have not tried the sander yet it looks like a marvelous tool. I would like to recommend building a bubbler bucket to run the dust through prior to the shop vacuum which will save filter changes on the vacuum.
parts needed 5 gallon bucket w lid, pvc piping & fittings some sealant for around the fittings. my guess is parts will run about $25. make two holes in the lid tio insert the pipes one long pipe goes near the bottom of the bucket,top of this one attaches to sander. The other pipe that goes through the lid is short, this one gets the shop vac attached. put enough water in the bottom of the bucket to where the bottom of the long pipe is submerged. As the air and dust get pulled through the water the great majority of the dust will get contained in the water.

Alex
7/27/2014

Phil, thanks for this! I think I'm definitely going to make this the next time I'm sanding something big. I'm already using an intermediate bucket for collection, so this is very easy to set up. I bet the water is a real treat once you're done standing a lot. Alt smile

Tam Dl
12/7/2016 at 11:18 PM

DON'T SAND!!!!

My approach is to not sand. Sanding is a drywall approach not a plastering approach. (I am taking a bit about drywall but it applies just as much to final coat restorations like the one under discussion here) In my house, working on drywall, I first noticed that in areas around windows or other places where a bunch of joints came together, I would skim coat the whole mess since there wasn't sufficient space to feather out individual joints. These always ended up looking better than the rest of the wall, and I started to wonder why I was drywalling when plastering was easier to do and didn't require sanding.

Skimcoat plaster is just plaster coats over drywall panels that can deal with the extra moisture.

The reason pros sand with drywall is because it is expeditious to do so, and jobs are quoted on the basis of the fewest returns to the site required to do the job. Another reason is because most drywall is installed on new homes where internal finishes are not present so it doesn't mater if there is a little dust. Sanding is not the best or fastest finish.

Two important things about DIY are that we are living in the home, so returning to the job to do another step is irrelevant; and we can't bear the dust. This is the situation in which plastering is perfect. It goes on wet, there is no dust, the results are better.

What I noticed with drywall compounds are that even when applied wet to a zero thickness feather, they dry to a raised edge. You can never apply enough coats of finish to avoid sanding, you use finishing compound. So you attack the problem like a plastering problem and then you go back and finish flaws. This works with final coats of drywall or final coats over plaster.

On ceilings you can use a paint roller and a bucket of whetted-out all purpose compound to build the final base. This is just like rolling on paint, but it really builds. Use a 3/8" nap roller. Just wrap the head in a plastic bag between uses. Once you get a workable amount on your ceiling, you can smooth it out with a plasterer's trowel. They make special long handled trowels with 24" wide trowels on them, but I didn't prefer them myself for smoothing. You learn quickly when to stop working the plaster. The surface will be very smooth with areas you have to come back to that didn't fill. Spot these with finishing compound. Sometimes the trowel leaves a raised track that is paper thin, it is usually better to leave that and take it off with a taping knife the following day. You can use a sponge and polishing trowel to remove blemishes.

The end result on my ceiling was so good I didn't paint it for about 5 years. It looked worse with paint, as latex has enough texture that it degraded the look. With trowels you can polish the surface till the plaster shines. And they used to cover that with gloss paint. Not sure I would like that, but it is an option that doesn't exist with drywall or sanding plaster..

There are a lot of details to this approach, but the main point is that you can do surfaces without sanding. You can use finishing skim coat plaster, if you can find it. Seems to be a regional thing, not even the suppliers seem to have it here. I think the companies that use it order it direct. I bought a 2/3rds bag to experiment with, and I didn't like it that well. I thought it would be like Durabond, but smooth like finishing compound, but it wasn't.

1/21/2017 at 2:05 AM

Amazing work Alex! I wonder if you’d agree on helping me sharpen my joint compounding skills, just like you helped Liam Neeson.

Joanna
6/25/2017 at 8:18 AM

Awesome tip!

Elena
9/13/2017 at 1:56 PM

I just purchased a 1820's farm house. LOTS OF WALLPAPER to cover up A LOT of plaster flaws. This is SUPER helpful!!! I have enjoyed reading and will continue!!!! You guys are awesome and give us DIYers hope!

10/7/2017 at 3:30 AM

I have enjoyed reading this wonderful article about plastering service. Really, entire discussion is more helpful and all the tips are more effective too. I am very glad to go through this kind of helpful article. Thanks for sharing a nice article.

Since you've not signed in yet, you will need to fill in your name and email below. If you have a Facebook account, save yourself a step and use Connect to login.

Denotes a required field.

Please enter full URL, including http://

You can use Markdown syntax in your comment. And you can also use lots of Emoji!
  • Search

  • Login
  • Follow
  • Advertising

If you're looking for information on advertising and sponsorships, head on over to our sponsorships page. You can purchase site sponsorships in a few easy clicks. 

Toolbox Tuesday
Open Housing
  • We're Featured!

Old Town Home has been featured in the following places and publications:

The Washington Post
 
Washingtonian Magazine
 
Domino
 
Old House Journal
 
 
Apartment Therapy House Tour
 
Washington Post Express Feature
 
Home & Garden Blogs
 
© 2024 OldTownHome.com. - Privacy Policy
Login Below
or
Sign in with Facebook
Connect

Unexpected Error

Your submission caused an unexpected error. You can try your request again, but if you continue to experience problems, please contact the administrator.

Working...

Working...