Last week we gave you a rundown of our progress in bringing our first floor bathroom's antique heart pine flooring back to life.
It had been hidden beneath poorly installed tile for many years, so we knew there'd be some repair necessary. The end result was a floor that needed to be heavily repaired with new heart pine, some serious tar that needed to be removed from the old flooring, and the need for a whole lot of sanding.
Our last post left off just before sanding some DIY wood filler mixed from heart pine sawdust and too little glue and realizing we'd need to apply a second coat of a slightly wetter mix of wood filler...this time with more glue.
Over the weekend we picked up where we left off by mixing up a new batch of wood filler...this time with a full gallon of wood glue available just in case.
The new batch was much less dry and would work far better to really fill in the voids on the damaged sections of the floor.
The new mix looked and felt much more like a peanut butter coconut cake batter, or maybe a good mix of brown tunafish. Mmmmmm, brown tuna.
We applied the brown tuna using a few wood shims we used to mix up the filler and simply smashed the filler into the voids we wanted to repair.
After allowing the wood glue to fully cure (a little less than 24 hours) we got back to sanding the wood filler, and the floor as a whole.
So we have some good news and some bad news about the floor sanding. As a whole, the sanding all went really well. Using the belt sander and a random orbit sander we worked our way up from 40 grit to 100 grit to prep the floor. That's the good news.
However, the bad news, the damage to the floor is still very obvious, and it's actually right in the middle of the room. The DIY wood filler worked well on many of the damaged sections, but the worst damage in the middle of the floor pretty much can't be fixed completely. So rather than trying to patch or wood fill, we decided to embrace the fact that the floor is over 100 years old and just sanded out the divot to the point where it could be finished.
One thing we could do to make sure the filler patches looked less obvious was to make sure the natural lines between boards weren't being lost. And we did this in the most simple of ways.
While the wood filler was drying we tried to put a little divot where the boards split. Then, once dry and sanded, Wendy used various shades of brown colored pencils to darken in the wood filler to give the appearance of lines.
The end result of several passes gave what appeared to be faux lines between boards that effectively break up the boards at their natural division. Since we'll be covering the floor with the same topcoat as in the rest of the house, these pencil lines will be sealed in for the long term.
After the floor was fully sanded, lines drawn on, and damaged sections embraced as 100 year old character rather than something we'd rather not have, we were ready to move ahead with the first step of the finishing process.
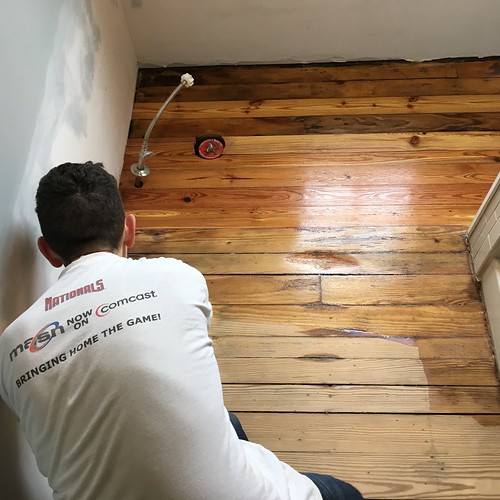
We're using the same finish techniques as the rest of the house, so we began by sealing with Pallmann Pal-X 325 sealer.
We applied it using a small stain applicator by simply pouring from the container...
...and then dragging the applicator along in a "snowplow" fashion.
We methodically worked back and forth making sure to remove excess along the way and giving ourselves a nice and evenly sealer surface with no puddles.
The sealer truly makes the color of the floor pop, and really lets the beauty of heart pine, even heart pine that's been discolored beneath layers of old flooring, shine through.
Now that the floor has been sealed we just have a few coats of finish topcoat to apply, some moulding to put into the room, some paint to apply, a rim lock to restore, and a vanity bottom to build beneath the sink top. Should only be a few more weekends worth of effort before our tiny downstairs bathroom is fully functional and full of character.
It's been a journey to get this bathroom in shape, and while it may not be the last time we do some work in this room, it's already looking like a place that we'll enjoy for some time until that next project day comes. Can't wait to finish up the work and share the finished look with you.