Over the weekend Lisa LaPorta of HGTV design fame tweeted "Everyone asks me about when to paint and what color but no one ever asks about the brush."
When I saw her tweet, I said to myself "That is completely true!" Nobody seems to understand just how important a good paintbrush or roller cover is to the overall success of a paint project.
Throughout the last eight years of our home renovation, we've been priming and painting trim, doors, furniture, ceilings, walls, indoor spaces, outdoor spaces, and even a floor along the way. We've gotten to the point where we can paint without tape, know how much paint we need for the room, and have learned numerous tips and tricks to improve the process as well as the finished product. I guess you could say we've been around the painting block.
Due to this somewhat extensive amateur painting experience, we have a reputation among friends as a rich source of advice when it comes to a paint project. Whenever people ask for my opinion on the type of paint, color, primer, or anything else, I always offer up a few pieces of additional advice.
#1 Buy premium paint. You'll use less to cover the same area, it will take less time to complete the job, and the color and finish will last longer.
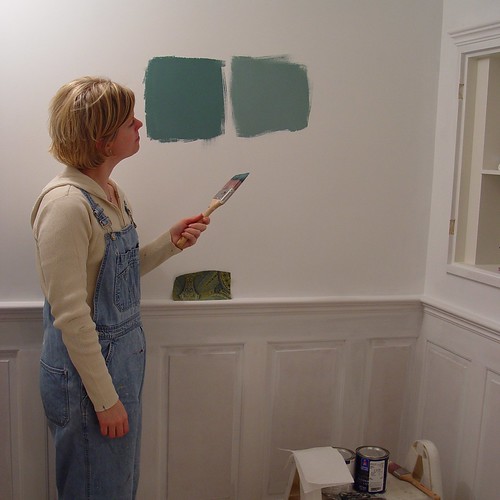
#2 Buy good roller covers and brushes.
#3 Wash paint brushes as soon as you complete a job. Proper care will dramatically extend the life of your paint brush. (Yet somehow I always end up doing all the brush washing in our house though!)
#4 Vacuum roller covers before use to avoid getting "roller fuzz" in the fresh paint on your wall.
A good paintbrush or roller cover makes all the difference when applying paint. The saying "With the right tools, almost anything is possible," works in reference to a paint brush as much as it does to a router or table saw.
In our house, we use Purdy brand paint brushes and roller covers for pretty much every job. On our first few projects, we didn't think the quality of the brush mattered. Throughout the process, I would get frustrated by the bristles that kept getting left on the wall, the bad brush marks, the clumps of paint that would easily build on the brush head, and the inability to properly clean the brushes without the bristles curling up. And you can forget about painting a straight line without tape because the bristles would spread themselves out in unexpected ways, putting paint everywhere I didn't want it to go. After our first few frustrating attempts at painting, we got the very same advice I'm giving in this post from a professional painter. We switched on the next project and haven't looked back since.
Of course, a higher quality paint brush costs more than the run of the mill brush, but with the high quality you get a better and more professional looking finish. Add to it the fact that the brush lasts much longer as it is able to withstand many cleanings, and you've got long term costs savings when you'd normally be replacing the lower quality brushes after only a few uses.
Our three pronged approach to a better paint jobs consists of:
Roller Covers
Typically, we use the 3/8" nap on just about all of our projects. We also like to save a little and buy in "bulk," so we prefer the contractor packs. They come with three roller covers to a pack, and they have them at most big box stores and local hardware stores. We know we're going to be painting again, so why not?
People often ask how we get our roller covers clean after using them. Our answer, "We don't." After trying to wash our rollers when we were done, waiting for them to dry, then getting bits of dried stuff in our paint after we've used the roller covers a few times, we were done with that game. We decided that we were going to go ahead and use the roller covers once and then throw them out. I know this may sounds a little odd, but to us, it just isn't worth the headache.
And as I said above, we always, and I mean always vaccum the roller covers just before we use them. We use our shop-vac with a standard attachment, and we try to get every bit of loose fuzz off of that cover before we put it in the paint tray. Every piece you can get off before, means fewer pieces of fuzz stuck in your newly rolled wall paint. There are few things that frustrate me more than fuzz in paint.
Brushes
It doesn't matter if you are a beginning painter or a seasoned pro, your brush will have an impact on your finished work. Every painter desires a flaw free and smooth finish, and there is no better way to achieve that than practice as well as using the right brushes. Each job, depending on type of paint, surface, location, size, etc, requires a brush that fits your needs. As I said, we like our Purdy brushes for our jobs, because we know that we will be able to find the right brush, and the brush won't fall apart in the middle of working.
The Purdy website even offers a paint brush selector so that you know you are using the right brush for your specific project. It doesn't get much easier to be sure you are getting the best finish for your efforts.
The single brush that I tend to use most often is the 2.5" angled Pro-Extra Glide. This brush just seems to get the job done the best and most comfortable for me. The handle has a good thickness, and the bristles leave a nice finish.
Once we're done with a project, the first thing I do, no matter how tired I may be, is head to the utility sink to thoroughly clean the brush. A good brush can be cleaned repeatedly and will last a very long time. I know we have a few brushes in our collection that are at least two years old, and we've been using them regularly this whole time.
Sometimes, if I'm painting a lot of trim and taking my time, I will even switch out brushes in the middle of the project before the paint starts to clump. I'll reach a stopping point, wash the brush, and start with a new one.
Cleaning Tools
The final two items are something that everyone needs who paints, wants to get the most out of their brushes and wants to make them last as long as possible: general brush cleaning tools. I'm primarily covering items that relate to latex based paints in this post, so you really only need two primary tools to keep your brush in painting shape.
The first is a brush comb. It is essentially a wooden stick with a bunch of metal pins sticking out of it. When you run your brush under water, you run this comb through it to get all of the paint that is hiding deep within out of the brush. You can also use this comb to comb out a dry or slightly stiff brush to break of stuck bristles.
The second is a basic brush and roller cleaning tool. Also use this and warm/hot water to get the majority of the paint off of your brush, especially the paint that may have started to clump on the base of the brush. This second tool does a great job of scraping away dry paint.
There you have it, our secret weapons in ensuring the best possible paint finish on our projects. Not to mention, Purdy brushes are also the brush of choice for our crew member and paint specialist, Lulu.
Do you prefer a specific brand of brush or painting supplies? Do you have any horror stories of using an off-brand that ruined an otherwise good project? Please share your experiences.
Note: We weren't compensated by Purdy in any way for this post. We simply want to share good products when we see them, and hope that learning from our mistakes can help save you time and frustration.