<?xml version="1.0" encoding="utf-8"?>
<feed xmlns="http://www.w3.org/2005/Atom" xmlns:media="http://search.yahoo.com/mrss/">
  <title>Old Town Home Category: 'Plaster'</title>
  <updated>2018-09-14T12:38:09.730-04:00</updated>
  <id>http://www.oldtownhome.com/plaster/index.atom</id>
  <link rel="alternate" href="http://www.oldtownhome.com/plaster/index.atom" />
  <author>
    <name>Alex and Wendy</name>
    <uri>http://www.oldtownhome.com/</uri>
    <email>wendy@oldtownhome.com</email>
  </author>
  <entry>
    <guid>e2934454-a66b-4167-95a9-ee6bff078829</guid>
    <id>https://www.oldtownhome.com/2018/9/14/A-Whirlwind-Recap-of-Our-Summers-Second-Half/</id>
    <title>A Whirlwind Recap of Our Summer's Second Half</title>
    <summary type="html"><![CDATA[<p>Have you missed us? Were you worried about us? I bet you were! ;-)</p><p>First, not to worry, we're here, and we're all fine. Second, wow have we had a lot going on! Over the last month we've wanted to write several blog posts but it has been so crazy the last little while we've just not had the time. Don't know if you know this, but it turns out topical blog posts require some inordinate level of time and concentration that we just haven't had the last few weeks.</p><p>
</p><div class="MediaContainer PhotoContainer"><a href="https://farm2.staticflickr.com/1798/43305644484_d84baba175_z.jpg" rel="PhotoPopup" popupheight="480" popupwidth="640"><img alt="" src="https://farm2.staticflickr.com/1798/43305644484_d84baba175.jpg" width="500" height="375" style="border-width: 0px; border-style: solid;"></a></div><p>Rather than trying to do a topical blog post about window glazing, a project that took months but we creatively make it look like a weekend, or a new recipe that we can't get enough of, we're going to get back on track by kicking it old school blogging style. "<em>What's that</em>" you say? We're going way back to the chronological journaling style roots of blogging, back before blogs were all shooting for compelling linkable content angling for pins and shares. Yes, we're going to look back over our last six weeks or so and summarize some of our highlights. If you follow us on Instagram there's a chance some of this may be familiar, but it will certainly have a bit more detail and far fewer hashtags. One thing's for sure, we haven't just been sitting around doing nothing the last several weeks. More on where these guys fit into the story in a bit.</p><p>
</p><div class="MediaContainer PhotoContainer"><a href="https://farm2.staticflickr.com/1882/42726541300_7a06753e0b_z.jpg" rel="PhotoPopup" popupheight="424" popupwidth="640"><img alt="" src="https://farm2.staticflickr.com/1882/42726541300_7a06753e0b.jpg" width="500" height="331" style="border-width: 0px; border-style: solid;"></a></div><p>Our last blog post was back near the end of July, when we did a little video home tour of our foursquare. Since then we've continued on several projects, experienced a few cool events, and we went on a handful of small trips. </p> <a href="https://www.oldtownhome.com/2018/9/14/A-Whirlwind-Recap-of-Our-Summers-Second-Half/">more</a>]]></summary>
    <published>2018-09-14T12:38:09.730-04:00</published>
    <updated>2018-09-14T12:38:09.730-04:00</updated>
    <link rel="alternate" href="https://www.oldtownhome.com/2018/9/14/A-Whirlwind-Recap-of-Our-Summers-Second-Half/" />
    <author>
      <name>Alex</name>
    </author>
    <content type="html"><![CDATA[<p>Have you missed us? Were you worried about us? I bet you were! ;-)</p>
<p>First, not to worry, we're here, and we're all fine. Second, wow have we had a lot going on! Over the last month we've wanted to write several blog posts but it has been so crazy the last little while we've just not had the time. Don't know if you know this, but it turns out topical blog posts require some inordinate level of time and concentration that we just haven't had the last few weeks.</p>
<p>
</p>
<div class="MediaContainer PhotoContainer"><a href="https://farm2.staticflickr.com/1798/43305644484_d84baba175_z.jpg" rel="PhotoPopup" popupheight="480" popupwidth="640"><img alt="" src="https://farm2.staticflickr.com/1798/43305644484_d84baba175.jpg" width="500" height="375" style="border-width: 0px; border-style: solid;" /></a></div>
<p>Rather than trying to do a topical blog post about window glazing, a project that took months but we creatively make it look like a weekend, or a new recipe that we can't get enough of, we're going to get back on track by kicking it old school blogging style. "<em>What's that</em>" you say? We're going way back to the chronological journaling style roots of blogging, back before blogs were all shooting for compelling linkable content angling for pins and shares. Yes, we're going to look back over our last six weeks or so and summarize some of our highlights. If you follow us on Instagram there's a chance some of this may be familiar, but it will certainly have a bit more detail and far fewer hashtags. One thing's for sure, we haven't just been sitting around doing nothing the last several weeks. More on where these guys fit into the story in a bit.</p>
<p>
</p>
<div class="MediaContainer PhotoContainer"><a href="https://farm2.staticflickr.com/1882/42726541300_7a06753e0b_z.jpg" rel="PhotoPopup" popupheight="424" popupwidth="640"><img alt="" src="https://farm2.staticflickr.com/1882/42726541300_7a06753e0b.jpg" width="500" height="331" style="border-width: 0px; border-style: solid;" /></a></div>
<p>Our last blog post was back near the end of July, when we did a little video home tour of our foursquare. Since then we've continued on several projects, experienced a few cool events, and we went on a handful of small trips. </p>
<p>
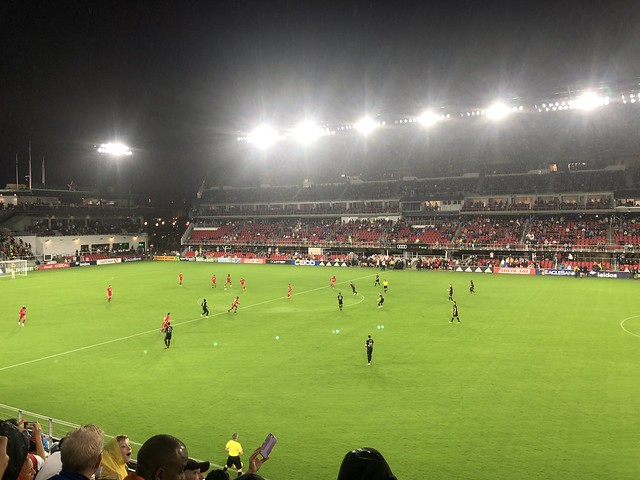
The whirlwind started when a friend of mine invited me to attend the opening of DC United's Audi Field downtown. As a lifelong soccer fan I've been anxiously awaiting the new stadium's opening for many years now, so the experience was a ton of fun, in spite of the torrential rains that greeted us upon our arrival at the stadium.</p>
<p>
</p>
<div class="MediaContainer PhotoContainer"><a href="https://farm1.staticflickr.com/852/43615996972_ea299cd737_z.jpg" rel="PhotoPopup" popupheight="480" popupwidth="640"><img alt="" src="https://farm1.staticflickr.com/852/43615996972_ea299cd737.jpg" width="500" height="375" style="border-width: 0px; border-style: solid;" /></a></div>
<p>If you're a DC area local, and/or a DC United fan, you should definitely make a point to get to a game. It's a great stadium with wonderful crowd noise and energy, and it seems like there's really not a bad seat in the house.</p>
<p>
</p>
<div class="MediaContainer PhotoContainer"><a href="https://farm1.staticflickr.com/914/41853531180_9175d5cd39_z.jpg" rel="PhotoPopup" popupheight="480" popupwidth="640"><img alt="" src="https://farm1.staticflickr.com/914/41853531180_9175d5cd39.jpg" width="500" height="375" style="border-width: 0px; border-style: solid;" /></a></div>
<p>Right at the end of July, Wendy and I loaded Lulu up in the car and we headed out on the first of our small weekend vacations. Our destination was to visit one of our closest friends, Katie, down near Morehead City, North Carolina. </p>
<p>
</p>
<div class="MediaContainer PhotoContainer"><a href="https://farm1.staticflickr.com/942/43684246481_647a5e4784_z.jpg" rel="PhotoPopup" popupheight="480" popupwidth="640"><img alt="" src="https://farm1.staticflickr.com/942/43684246481_647a5e4784.jpg" width="500" height="375" style="border-width: 0px; border-style: solid;" /></a></div>
<p>Katie's parents have had a cottage down on Bogue Sound for her whole life, and this was our chance to experience the place we'd heard much about for so many years. </p>
<p>
</p>
<div class="MediaContainer PhotoContainer"><a href="https://farm1.staticflickr.com/939/41876278790_8593e885a2_z.jpg" rel="PhotoPopup" popupheight="480" popupwidth="640"><img alt="" src="https://farm1.staticflickr.com/939/41876278790_8593e885a2.jpg" width="500" height="375" style="border-width: 0px; border-style: solid;" /></a></div>
<p>This was both Wendy's and my first time visiting the North Carolina coast, and what an amazing time we had. Katie and her husband Colin used to be neighbors of ours in Old Town, and we've been friends with them through several of their deployments, at least three moves, two kids, and more bottles of wine than we can count. Having the unique opportunity to experience Katie's childhood getaway through the eyes of a local was a true treat. </p>
<p>From local fare (the shrimp burgers are not to be missed), to great antique shops...</p>
<p>
</p>
<div class="MediaContainer PhotoContainer"><a href="https://farm2.staticflickr.com/1815/43078013604_68f92da709_z.jpg" rel="PhotoPopup" popupheight="640" popupwidth="480"><img alt="" src="https://farm2.staticflickr.com/1815/43078013604_68f92da709.jpg" width="375" height="500" style="border-width: 0px; border-style: solid;" /></a></div>
<p>...to some beach time with Lulu just behind Fort Macon, this little trip was just a few days long but was incredibly fun and relaxing. </p>
<p>
</p>
<div class="MediaContainer PhotoContainer"><a href="https://farm2.staticflickr.com/1876/30808602528_8fd6d65f69_z.jpg" rel="PhotoPopup" popupheight="480" popupwidth="640"><img alt="" src="https://farm2.staticflickr.com/1876/30808602528_8fd6d65f69.jpg" width="500" height="375" style="border-width: 0px; border-style: solid;" /></a><br />
<em>
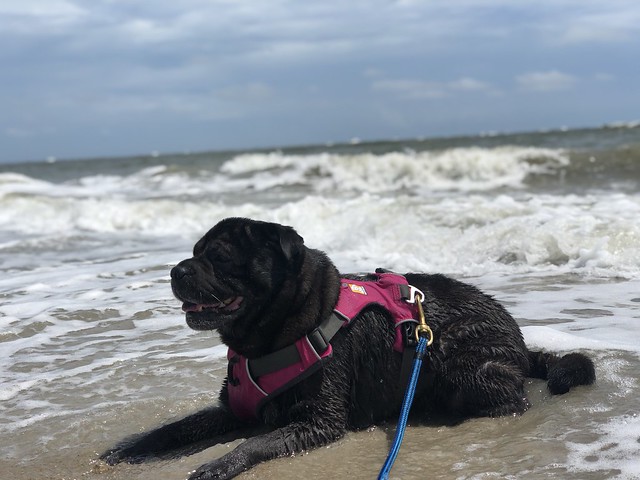
This is what pure bliss looks like.</em></div>
<p>While visiting we had the chance to stop by the historic town of Beaufort where we walked around town gawking at the amazing historic homes. </p>
<p>
</p>
<div class="MediaContainer PhotoContainer"><a href="https://farm2.staticflickr.com/1797/28835879007_ac8c1af4e2_z.jpg" rel="PhotoPopup" popupheight="479" popupwidth="640"><img alt="" src="https://farm2.staticflickr.com/1797/28835879007_ac8c1af4e2.jpg" width="500" height="375" style="border-width: 0px; border-style: solid;" /></a></div>
<p>It seemed like everywhere we turned there was a new place we liked better than the last. </p>
<p>Everything happening with Hurricane Florence and how it is impacting the coast and nearby inland cities has us heartbroken and worried. We had such a wonderful time while visiting and simply dread how significantly the people in that area are being impacted. A 10' storm surge will have an extreme impact on those area that we enjoyed so much, and this is simply terrible.</p>
<p>
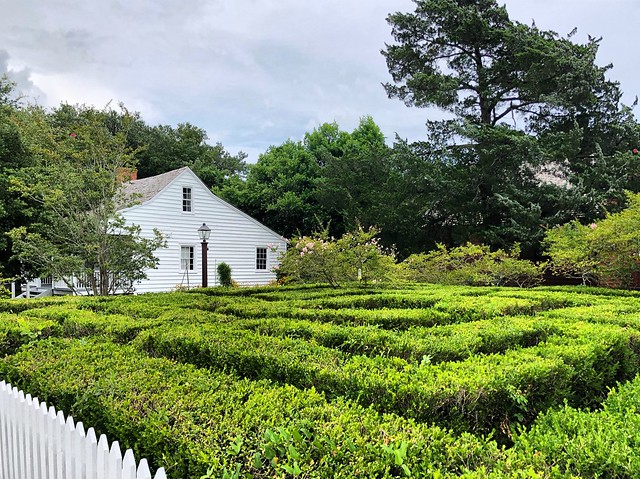
As we left town we drove through the city of New Bern, North Carolina and loved every minute of it. We took a half hour or so to drive around town and quickly tour the historic district. </p>
<p>
</p>
<div class="MediaContainer PhotoContainer"><a href="https://farm1.staticflickr.com/941/43747976891_8815f9dd27_z.jpg" rel="PhotoPopup" popupheight="480" popupwidth="640"><img alt="" src="https://farm1.staticflickr.com/941/43747976891_8815f9dd27.jpg" width="500" height="375" style="border-width: 0px; border-style: solid;" /></a></div>
<p>Some of the homes of New Bern date to the mid 18th century and the architecture as a whole is absolutely impressive. </p>
<p>
</p>
<div class="MediaContainer PhotoContainer"><a href="https://farm1.staticflickr.com/854/41939980630_312fbcdeba_z.jpg" rel="PhotoPopup" popupheight="480" popupwidth="640"><img alt="" src="https://farm1.staticflickr.com/854/41939980630_312fbcdeba.jpg" width="500" height="375" style="border-width: 0px; border-style: solid;" /></a></div>
<p>Wendy and I both want to make a longer trip and stay in New Bern the next time we head down there just to get to know the city a little better. It certainly seems worth the time.</p>
<p>
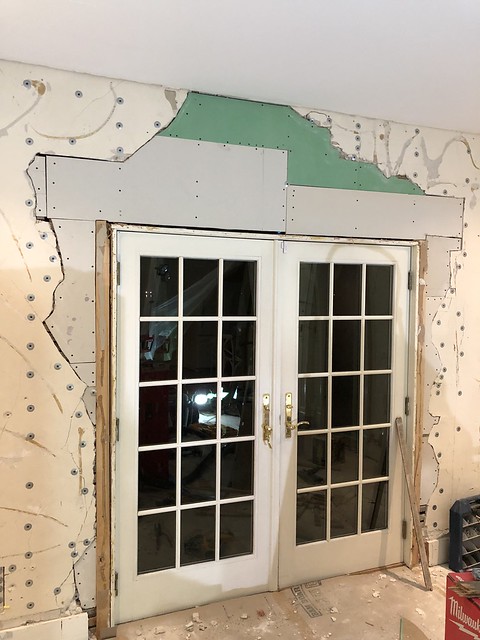
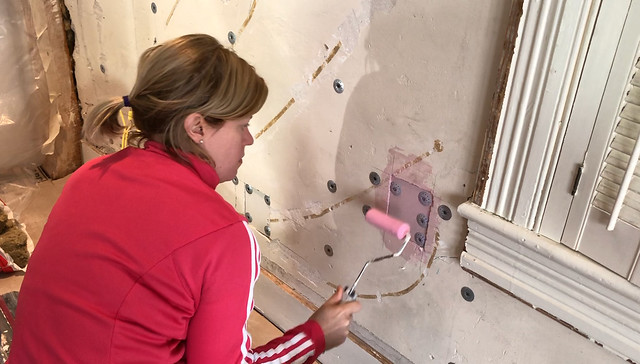
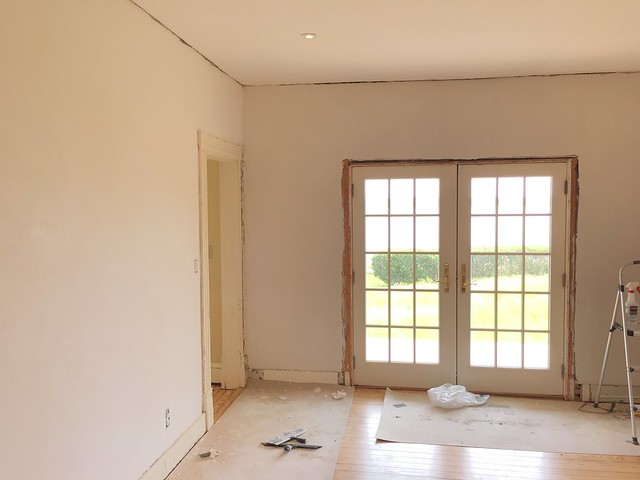
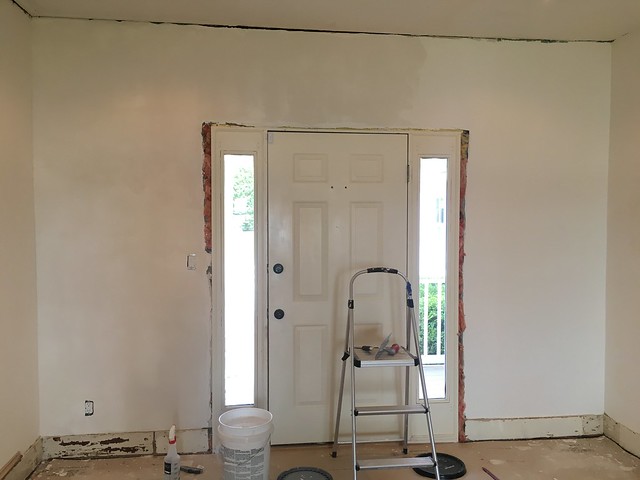
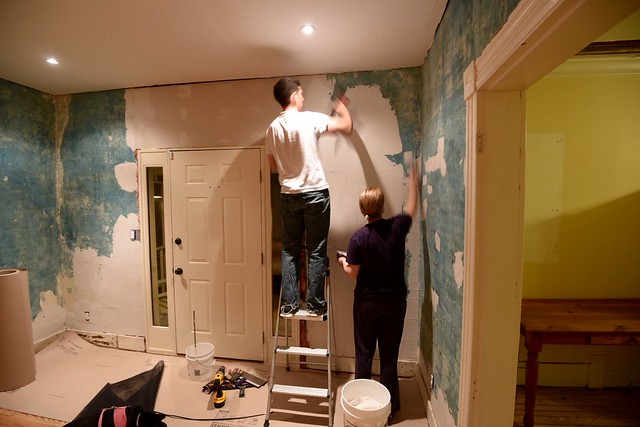
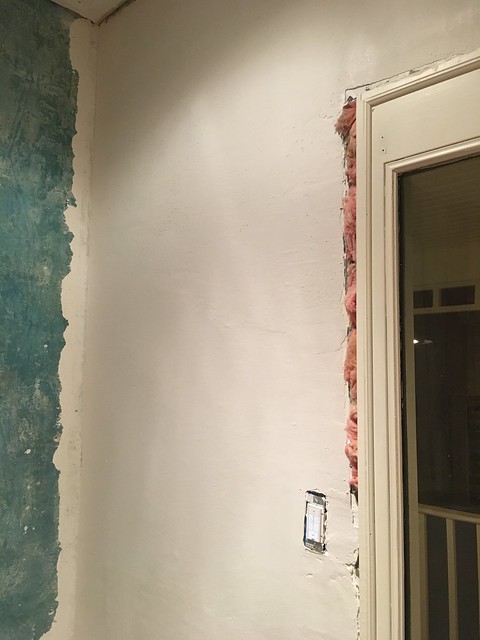
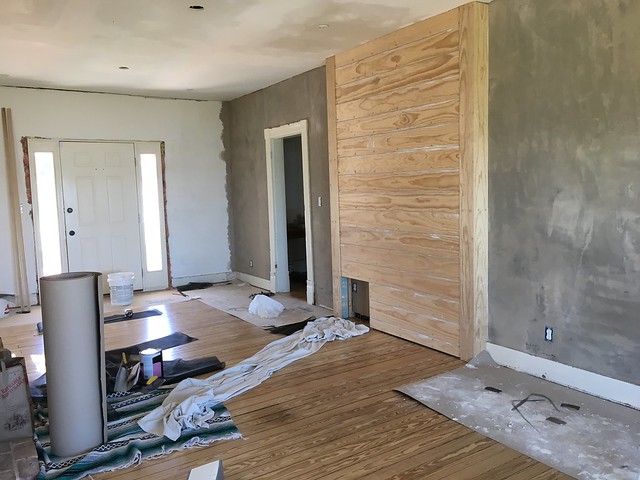
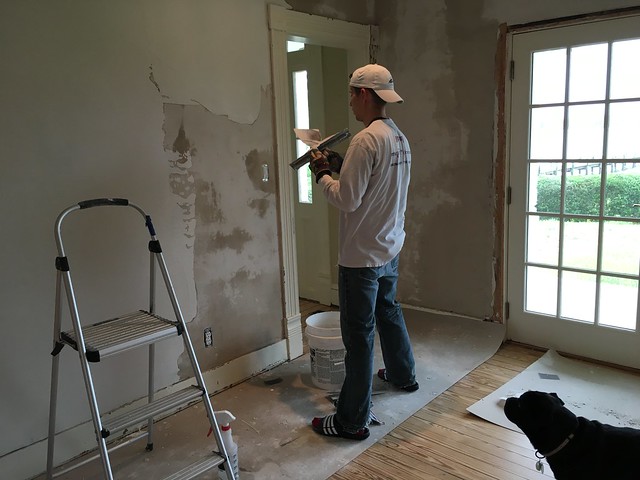
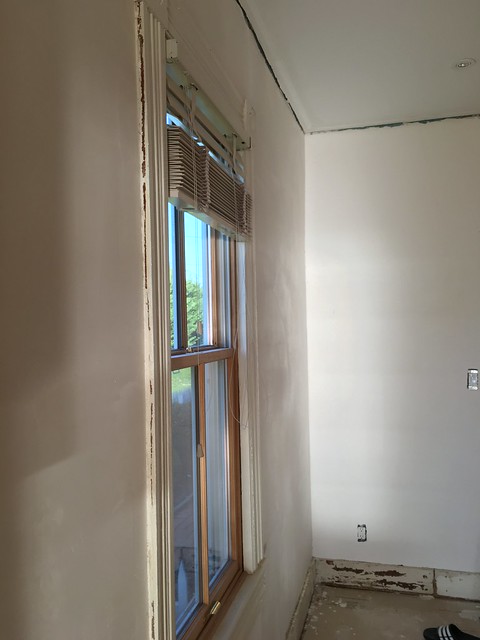
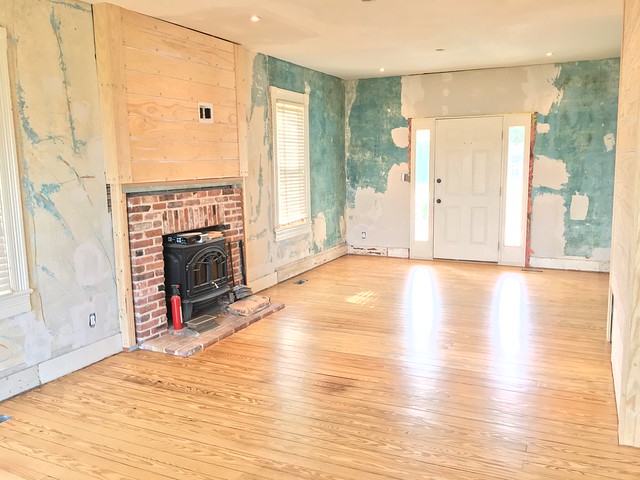
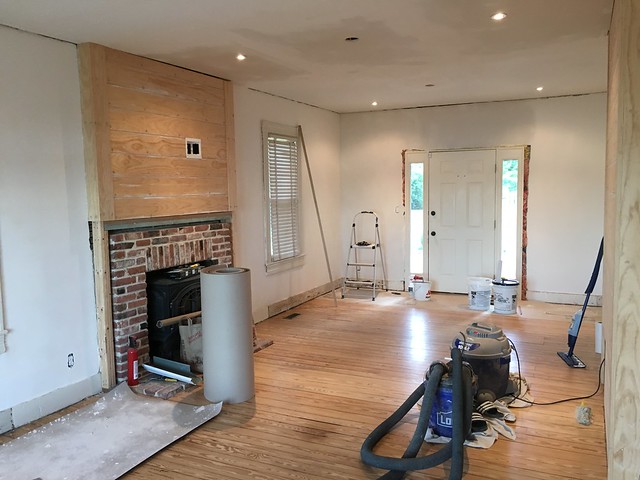
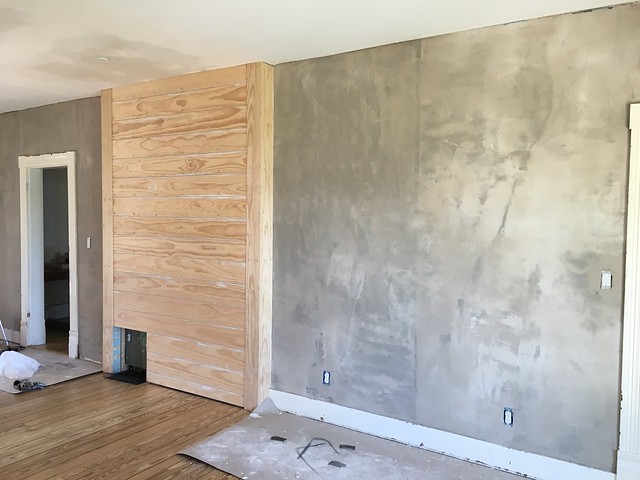
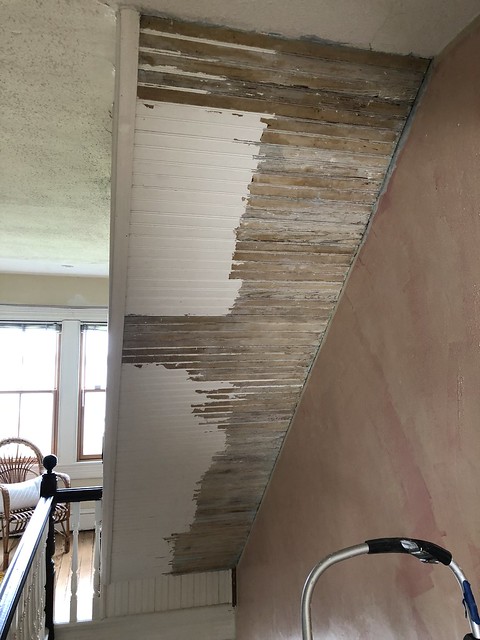
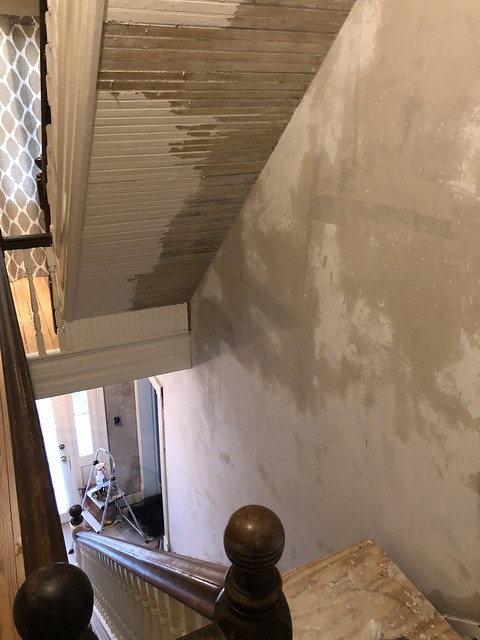
Once we returned home we used our relaxation as re-energization and turned it into progress on some of our projects. Most notably, we've continued to move ahead on the main hallway of the Foursquare. We learned one very unfortunate (for us) fact. The underside of the 3rd floor staircase, above our main staircase, is beadboard. Well wouldn't you know it, someone decided it would be a good idea to wallpaper the beadboard. Then someone else thought it would be a good idea to paint over the wallpapered beadboard. None of this was a good idea.</p>
<p>
</p>
<div class="MediaContainer PhotoContainer"><a href="https://farm2.staticflickr.com/1834/30290705618_0b7a0e3e27_z.jpg" rel="PhotoPopup" popupheight="640" popupwidth="360"><img alt="" src="https://farm2.staticflickr.com/1834/30290705618_0b7a0e3e27.jpg" width="281" height="500" style="border-width: 0px; border-style: solid;" /></a></div>
<p>So now we're taking care of that by slowly stripping all of the paint and paper off of the underside of the stairs.</p>
<p>
</p>
<div class="MediaContainer PhotoContainer"><a href="https://farm2.staticflickr.com/1847/43253455775_0437c8be19_z.jpg" rel="PhotoPopup" popupheight="640" popupwidth="480"><img alt="" src="https://farm2.staticflickr.com/1847/43253455775_0437c8be19.jpg" width="375" height="500" style="border-width: 0px; border-style: solid;" /></a></div>
<p>Beyond that absolute mess, one of the aspects we've covered at length in the past was the built-in bench build to disguise the new HVAC return duct and our crawlspace access. After hanging our antique Galway "Fishing" sign we still had the large opening for the air return. A while back we'd found an antique cast iron grate to fit the opening on eBay and previously spent a bunch of time cleaning it up and spraying it white. So I finally got around to mounting it in the opening to finish off the under stair project.</p>
<p>
</p>
<div class="MediaContainer PhotoContainer"><a href="https://farm2.staticflickr.com/1773/43891885491_65181ae0fc_z.jpg" rel="PhotoPopup" popupheight="640" popupwidth="480"><img alt="" src="https://farm2.staticflickr.com/1773/43891885491_65181ae0fc.jpg" width="375" height="500" style="border-width: 0px; border-style: solid;" /></a></div>
<p>We still need to put a final coat of the trim color on the grate, as well as on the large screw heads holding it in place, but this felt wonderful to finally have this checked off of the list.</p>
<p>
</p>
<div class="MediaContainer PhotoContainer"><a href="https://farm2.staticflickr.com/1838/43841018452_c80837783d_z.jpg" rel="PhotoPopup" popupheight="640" popupwidth="480"><img alt="" src="https://farm2.staticflickr.com/1838/43841018452_c80837783d.jpg" width="375" height="500" style="border-width: 0px; border-style: solid;" /></a></div>
<p>We also made some major lighting decisions in the hallway (like the fact we don't need any recessed lights in this room), and test hung the new light fixture Wendy found for the space some time ago. This step made the whole project start to feel real.</p>
<p>
</p>
<div class="MediaContainer PhotoContainer"><a href="https://farm2.staticflickr.com/1818/30016419348_1a7f6bfdd9_z.jpg" rel="PhotoPopup" popupheight="640" popupwidth="480"><img alt="" src="https://farm2.staticflickr.com/1818/30016419348_1a7f6bfdd9.jpg" width="375" height="500" style="border-width: 0px; border-style: solid;" /></a></div>
<p>It's important to remember that we're covering the summer in this description, so we did many of those wonderful things we like to do in the summer. We took in Nationals games...</p>
<p>
</p>
<div class="MediaContainer PhotoContainer"><a href="https://farm2.staticflickr.com/1771/43938257671_2bde0ba9d2_z.jpg" rel="PhotoPopup" popupheight="480" popupwidth="640"><img alt="" src="https://farm2.staticflickr.com/1771/43938257671_2bde0ba9d2.jpg" width="500" height="375" style="border-width: 0px; border-style: solid;" /></a></div>
<p>
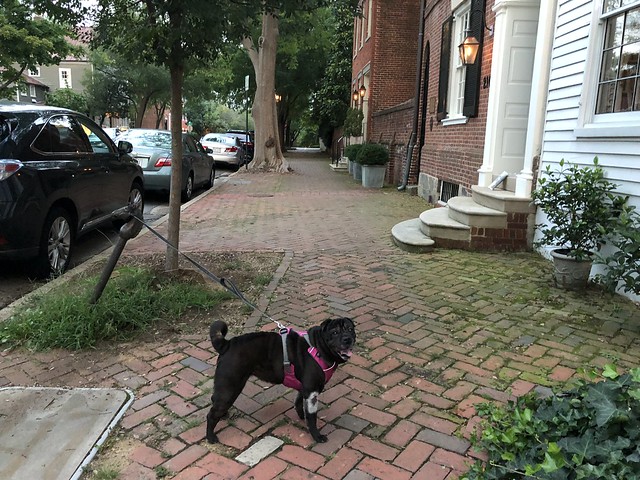
...we went for walks around Old Town...</p>
<p>
</p>
<div class="MediaContainer PhotoContainer"><a href="https://farm2.staticflickr.com/1778/43914073831_326ea2bffa_z.jpg" rel="PhotoPopup" popupheight="480" popupwidth="640"><img alt="" src="https://farm2.staticflickr.com/1778/43914073831_326ea2bffa.jpg" width="500" height="375" style="border-width: 0px; border-style: solid;" /></a></div>
<p>...we watched classic movies projected on our neighbor's garage (North by Northwest and Sabrina)...</p>
<p>
</p>
<div class="MediaContainer PhotoContainer"><a href="https://farm2.staticflickr.com/1774/43253633294_76c27458c8_z.jpg" rel="PhotoPopup" popupheight="479" popupwidth="640"><img alt="" src="https://farm2.staticflickr.com/1774/43253633294_76c27458c8.jpg" width="500" height="375" style="border-width: 0px; border-style: solid;" /></a></div>
<p>...and I got a bad case of poison ivy that tortured me from the day before we left for North Carolina for the next three weeks. I have no idea where I got it and I apparently react somewhat terribly to the plant's oils. Oh summer traditions of prednisone.</p>
<p>
</p>
<div class="MediaContainer PhotoContainer"><a href="https://farm2.staticflickr.com/1818/43813454442_e665588d5f_z.jpg" rel="PhotoPopup" popupheight="640" popupwidth="480"><img alt="" src="https://farm2.staticflickr.com/1818/43813454442_e665588d5f.jpg" width="375" height="500" style="border-width: 0px; border-style: solid;" /></a></div>
<p>
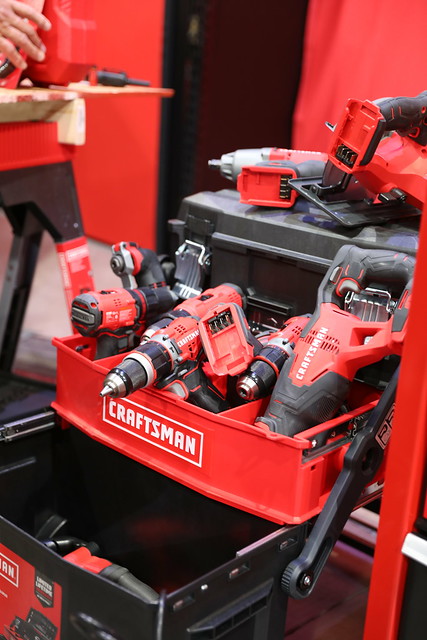
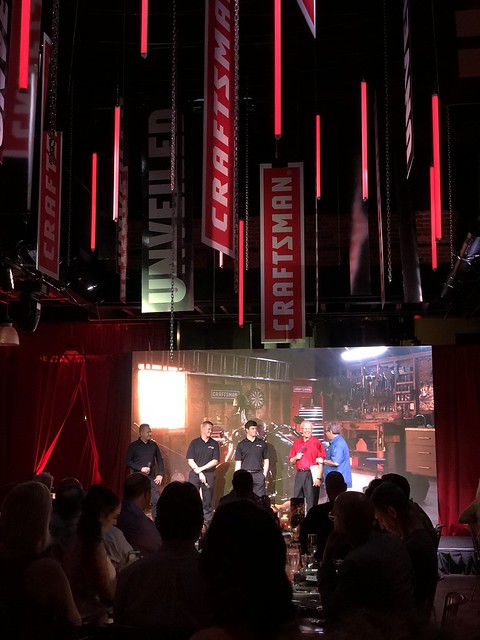
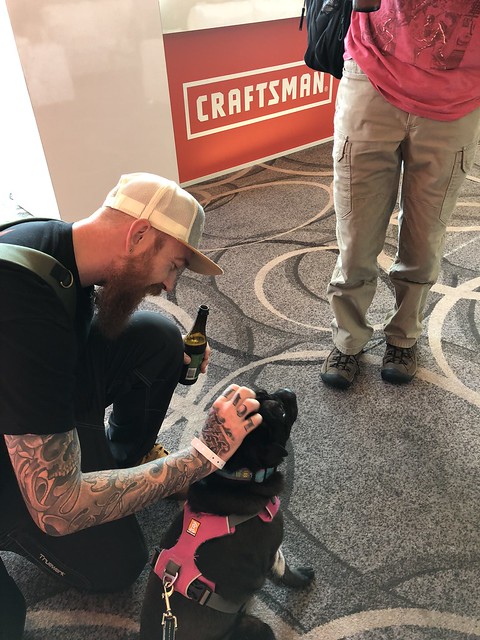
In the middle of August we got to do something that was a ton of fun. We headed up to Baltimore for the Stanley Black &amp; Decker launch of the Craftsman brand. Stanley Black &amp; Decker bought the Craftsman brand from Sears in 2017 and have been working on their overhaul ever since. </p>
<p>
</p>
<div class="MediaContainer PhotoContainer"><a href="https://farm2.staticflickr.com/1773/42259553110_1cc53dab86_z.jpg" rel="PhotoPopup" popupheight="480" popupwidth="640"><img alt="" src="https://farm2.staticflickr.com/1773/42259553110_1cc53dab86.jpg" width="500" height="375" style="border-width: 0px; border-style: solid;" /></a></div>
<p>
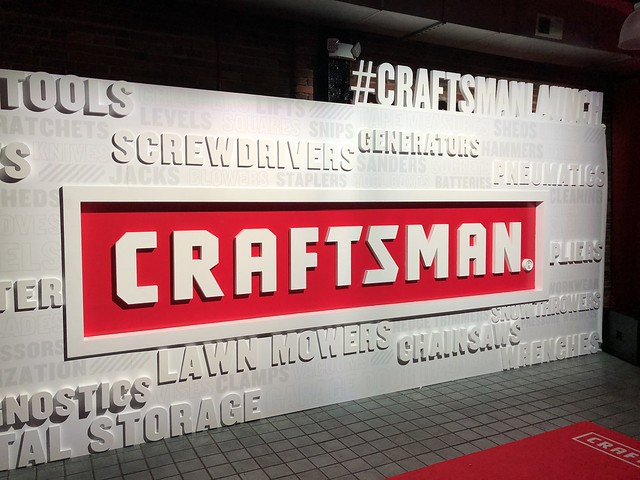
We were covering the event for Popular Mechanics, Charles &amp; Hudson, and ToolCrave.com and wrote up a summary of our <a href="https://charlesandhudson.com/new-craftsman-tools/" target="_blank">#CraftsmanLaunch experience over on Charles &amp; Hudson</a>. If you're a tool fanatic like me, or have some memories of Craftsman from your past, you should definitely check out the article. If you've noticed, this is also why you've been seeing Craftsman pop up a lot more in Lowe's, Ace Hardware, and on Amazon lately.</p>
<p>
</p>
<div class="MediaContainer PhotoContainer"><a href="https://farm2.staticflickr.com/1812/43171476645_5253a3f588_z.jpg" rel="PhotoPopup" popupheight="640" popupwidth="427"><img alt="" src="https://farm2.staticflickr.com/1812/43171476645_5253a3f588.jpg" width="333" height="500" style="border-width: 0px; border-style: solid;" /></a></div>
<p>Aside from the tools, this turned out to be a chance for me to live out one of my childhood dreams. Craftsman is sponsoring a few cars in NASCAR on the Joe Gibbs Racing team. As a result of this sponsorship several JGR drivers were in attendance, including Erik Jones and Ryan Preece.</p>
<p>
</p>
<div class="MediaContainer PhotoContainer"><a href="https://farm2.staticflickr.com/1795/29131864157_ea4d5d4b9d_z.jpg" rel="PhotoPopup" popupheight="640" popupwidth="480"><img alt="" src="https://farm2.staticflickr.com/1795/29131864157_ea4d5d4b9d.jpg" width="375" height="500" style="border-width: 0px; border-style: solid;" /></a></div>
<p>Now I don't know if you know this about me, but I am a lifelong NASCAR fan. I've been attending races and watching on TV for as long as I can remember. Part of this Craftsman launch event involved a stop the Autobahn Indoor Speedway all electric indoor go kart track.&nbsp;</p>
<p>
</p>
<div class="MediaContainer PhotoContainer"><a href="https://farm2.staticflickr.com/1799/43370942904_7176267ca7_z.jpg" rel="PhotoPopup" popupheight="640" popupwidth="481"><img alt="" src="https://farm2.staticflickr.com/1799/43370942904_7176267ca7.jpg" width="375" height="500" style="border-width: 0px; border-style: solid;" /></a></div>
<p>Not only were we able to have a little fun racing go karts, we had the chance to race against NASCAR drivers on the track!! </p>
<p>
</p>
<div class="MediaContainer PhotoContainer"><a href="https://farm2.staticflickr.com/1792/43370943704_2f4c6eee3f_z.jpg" rel="PhotoPopup" popupheight="640" popupwidth="481"><img alt="" src="https://farm2.staticflickr.com/1792/43370943704_2f4c6eee3f.jpg" width="375" height="500" style="border-width: 0px; border-style: solid;" /></a></div>
<p>
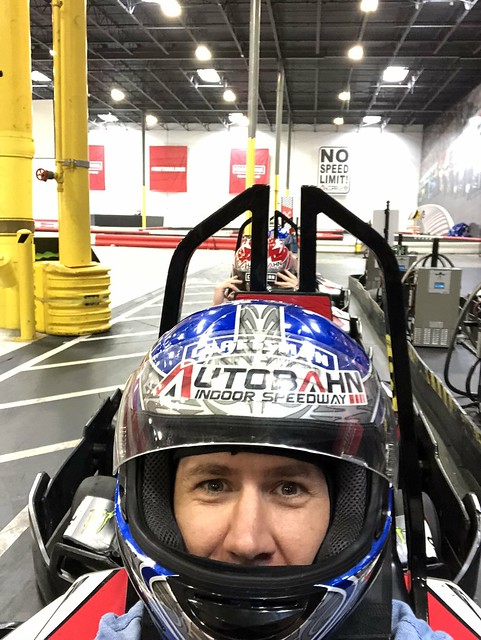
The outcome of our races? Well, I am not bashful in telling you that I beat Erik Jones in my race with him, and my time for our morning session was 2nd fastest out of all event attendees. I was only bested by Ryan Preece in top lap times for the morning session, and that was only by 0.1 seconds. Based on this, I think my best and only course of action is to immediately quit my job and begin pursuing my dreams of driving NASCAR in a professional and full time capacity. (Kidding not kidding.)</p>
<p>
</p>
<div class="MediaContainer PhotoContainer"><a href="https://farm2.staticflickr.com/1818/44035541512_b8eecde1c6_z.jpg" rel="PhotoPopup" popupheight="640" popupwidth="480"><img alt="" src="https://farm2.staticflickr.com/1818/44035541512_b8eecde1c6.jpg" width="375" height="500" style="border-width: 0px; border-style: solid;" /></a><br />
<em>Left to right <a href="http://krugerconstruction.net/" target="_blank">Murray Kruger</a>, Erik Jones, Wayne Carini, Ryan Preece, NASCAR's new oldest rookie</em></div>
<p>I could go on and on about the Craftsman launch as it was both a lot of fun from start to finish, and a ton of great information. One of the best parts of any event of this type is the opportunity to get to see old friends and meet new friends from all over the world that we normally only get to talk to on the Internet. The YouTube, Instagram, and online tool/maker/diy community is a wonderful one to be a part of. Best of all we got to do all of this up in Baltimore, which allowed us to bring Lulu up to the event, which allowed some people who only know her from Instagram the opportunity to meet her. How weird is that?</p>
<p>
</p>
<div class="MediaContainer PhotoContainer"><a href="https://farm2.staticflickr.com/1793/44094708331_faee07f0c3_z.jpg" rel="PhotoPopup" popupheight="640" popupwidth="480"><img alt="" src="https://farm2.staticflickr.com/1793/44094708331_faee07f0c3.jpg" width="375" height="500" style="border-width: 0px; border-style: solid;" /></a><br />
<em>Lulu and Murray from <a href="https://instagram.com/krugerconstruction" target="_blank">@KrugerConstruction</a> (who is also <a href="https://instagram.com/jaxxypug" target="_blank">@jaxxypug</a>'s dad)</em></div>
<p>
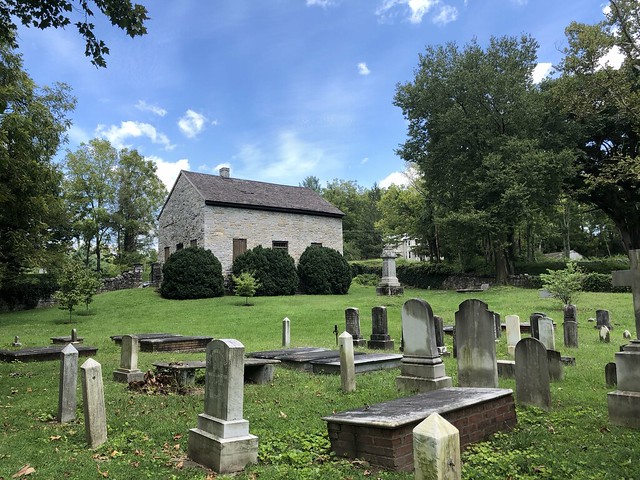
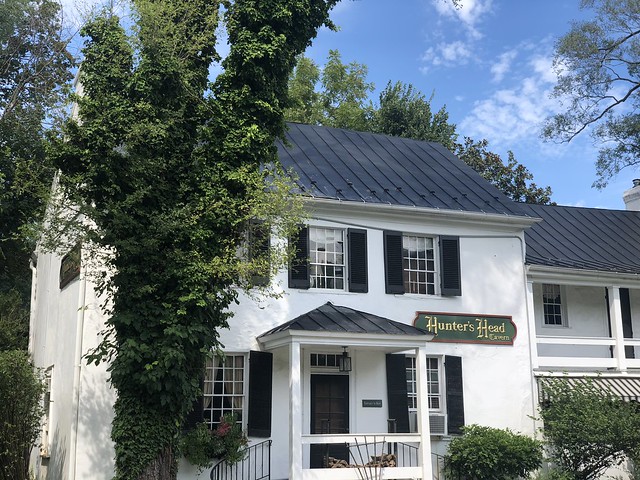
A litter later in August we took a day trip out to the Shenandoah Valley area in Virginia. Some of Wendy's wonderful clients were looking at a great house in the country on some land, so I tagged along and we decided to make a whole day of the outing, rather than just driving there and back. Boy did we have a great time! We found so many great places to stop and explore by taking a less direct route home. We stopped in antique stores in Berryville, VA...</p>
<p>
</p>
<div class="MediaContainer PhotoContainer"><a href="https://farm2.staticflickr.com/1899/44371782051_a8d1465d37_z.jpg" rel="PhotoPopup" popupheight="640" popupwidth="480"><img alt="" src="https://farm2.staticflickr.com/1899/44371782051_a8d1465d37.jpg" width="375" height="500" style="border-width: 0px; border-style: solid;" /></a></div>
<p>...explored 18th century graveyards...</p>
<p>
</p>
<div class="MediaContainer PhotoContainer"><a href="https://farm2.staticflickr.com/1866/43654960014_148d5449ee_z.jpg" rel="PhotoPopup" popupheight="480" popupwidth="640"><img alt="" src="https://farm2.staticflickr.com/1866/43654960014_148d5449ee.jpg" width="500" height="375" style="border-width: 0px; border-style: solid;" /></a></div>
<p>...had lunch at an 18th century pub...</p>
<p>
</p>
<div class="MediaContainer PhotoContainer"><a href="https://farm2.staticflickr.com/1843/44315989562_3bc3c95c04_z.jpg" rel="PhotoPopup" popupheight="480" popupwidth="640"><img alt="" src="https://farm2.staticflickr.com/1843/44315989562_3bc3c95c04.jpg" width="500" height="375" style="border-width: 0px; border-style: solid;" /></a></div>
<p>
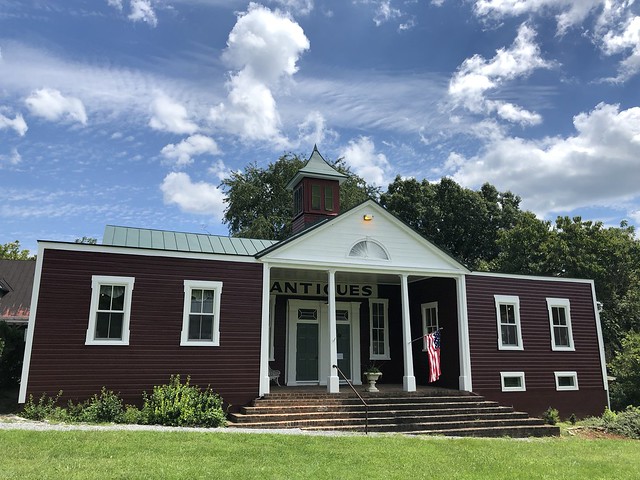
...and found an amazing antique store called <a href="https://www.redschoolhouseantiques.net/" target="_blank">Red Schoolhouse Antiques</a>. This place is not your typical antique store where you have so much stuff sitting on top of other stuff that you can barely see what you're searching for. This store is in an amazing old schoolhouse and is full of European antiques brought over by the owner's of the store, who live in Scotland full time. </p>
<p>
</p>
<div class="MediaContainer PhotoContainer"><a href="https://farm2.staticflickr.com/1875/43462826475_bccf2db785_z.jpg" rel="PhotoPopup" popupheight="640" popupwidth="480"><img alt="" src="https://farm2.staticflickr.com/1875/43462826475_bccf2db785.jpg" width="375" height="500" style="border-width: 0px; border-style: solid;" /></a></div>
<p>
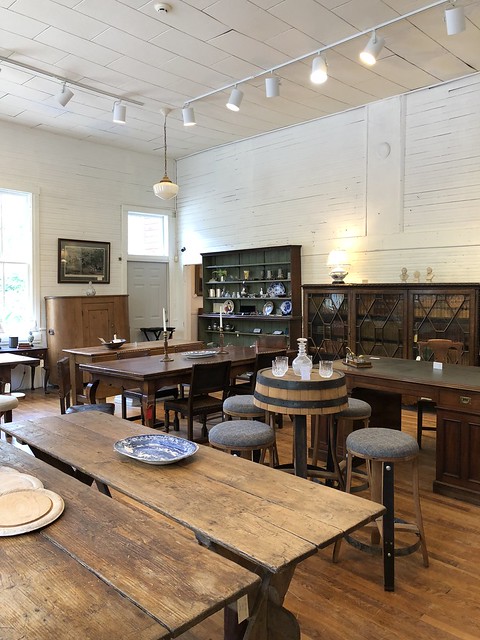
If you find yourself nearby, it's an excellent place to stop. The prices are extremely reasonable, especially given how high end the pieces in the shop are. </p>
<p>
<div class="MediaContainer PhotoContainer"><a href="https://farm2.staticflickr.com/1888/42868902530_eb691abd6a_z.jpg" rel="PhotoPopup" popupheight="480" popupwidth="640"><img alt="" src="https://farm2.staticflickr.com/1888/42868902530_eb691abd6a.jpg" width="500" height="375" style="border-width: 0px; border-style: solid;" /></a></div>
</p>
<p>Over labor day weekend Wendy, Lulu, and I took our final trip of the summer when we piled into the car and headed to Cincinnati. We were going for two reasons, the wedding of Wendy's cousin, and to visit the Cincinnati Zoo for an animal encounter I had given to Wendy for her birthday earlier in the year.</p>
<p>
</p>
<div class="MediaContainer PhotoContainer"><a href="https://farm2.staticflickr.com/1871/43742813084_a7210a93e3_z.jpg" rel="PhotoPopup" popupheight="480" popupwidth="640"><img alt="" src="https://farm2.staticflickr.com/1871/43742813084_a7210a93e3.jpg" width="500" height="375" style="border-width: 0px; border-style: solid;" /></a></div>
<p>
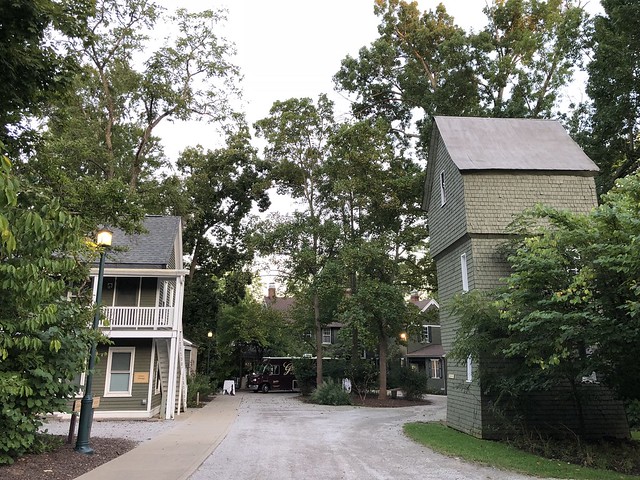
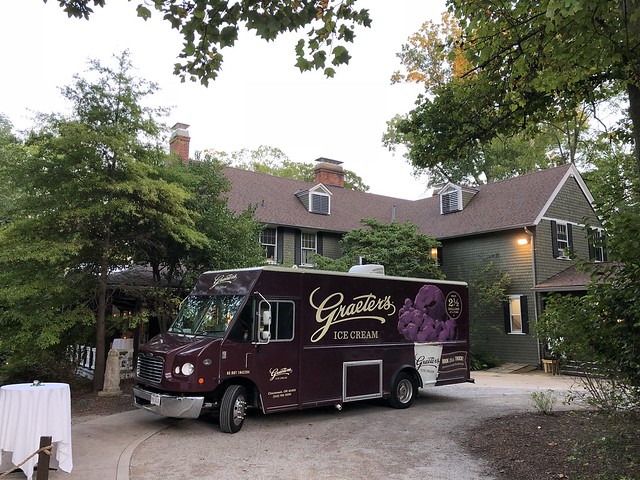
The wedding was held at the Cincinnati Nature Center's Krippendorf Lodge. The historic lodge from the early 1900s was a perfect wedding setting and allowed us to take in the wonderfully preserved building in addition to enjoying the celebration with friends and family. Not to mention the fact that the wedding had an open Graeter's Ice Cream Truck in the driveway!</p>
<p>
</p>
<div class="MediaContainer PhotoContainer"><a href="https://farm2.staticflickr.com/1848/43742812844_878e67bef3_z.jpg" rel="PhotoPopup" popupheight="480" popupwidth="640"><img alt="" src="https://farm2.staticflickr.com/1848/43742812844_878e67bef3.jpg" width="500" height="375" style="border-width: 0px; border-style: solid;" /></a></div>
<p>
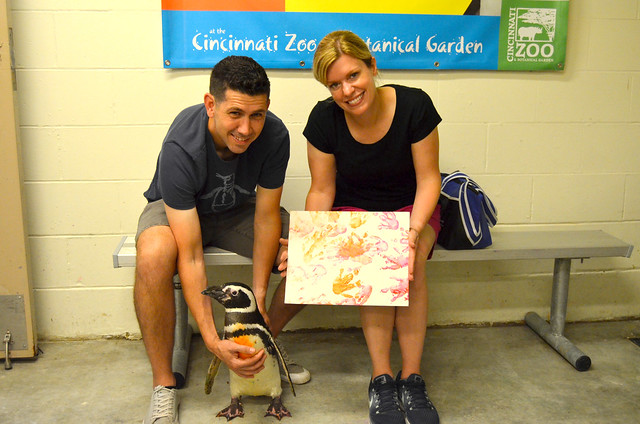
In addition to the wedding we took a trip to the Cincinnati Zoo for a chance to do something really special. We enjoyed an interactive experience with some of their Penguins and their two toed sloth named Moe.</p>
<p>
</p>
<div class="MediaContainer PhotoContainer"><a href="https://farm2.staticflickr.com/1892/42652066750_177747410b_z.jpg" rel="PhotoPopup" popupheight="480" popupwidth="640"><img alt="" src="https://farm2.staticflickr.com/1892/42652066750_177747410b.jpg" width="500" height="375" style="border-width: 0px; border-style: solid;" /></a></div>
<p>Back when I was trying to figure out what to get Wendy for her birthday, I was wracking my brain for something unique, fun, and memorable. Wendy is a huge fan of the Cincinnati Zoo (and Fiona the hippo), penguins, and sloths, so I figured, why not get a chance to actually meet them in person. It's a great way to give a unique gift that's also benefiting zoo and animal programs.&nbsp;</p>
<p>
</p>
<div class="MediaContainer PhotoContainer"><a href="https://farm2.staticflickr.com/1896/43817803044_5576496189_z.jpg" rel="PhotoPopup" popupheight="640" popupwidth="424"><img alt="" src="https://farm2.staticflickr.com/1896/43817803044_5576496189.jpg" width="331" height="500" style="border-width: 0px; border-style: solid;" /></a></div>
<p>
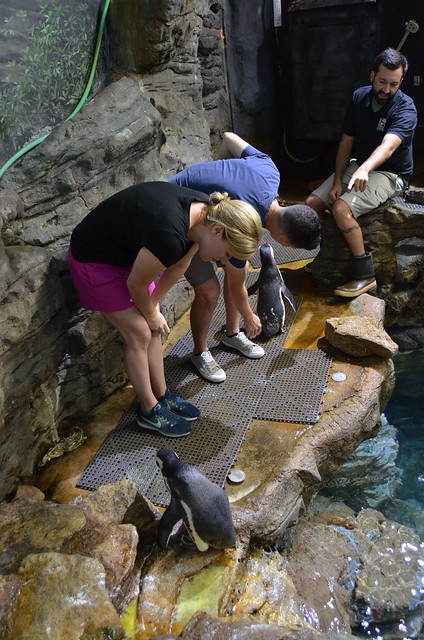
Buddy the Magellanic Penguin even gave Wendy a gift of a completely custom painting! Unfortunately, Buddy did lay down with his chest in the paint at one point. Nothing a quick swim won't take care of.</p>
<p>
</p>
<div class="MediaContainer PhotoContainer"><a href="https://farm2.staticflickr.com/1872/30807790468_5fe6656bbe_z.jpg" rel="PhotoPopup" popupheight="424" popupwidth="640"><img alt="" src="https://farm2.staticflickr.com/1872/30807790468_5fe6656bbe.jpg" width="500" height="331" style="border-width: 0px; border-style: solid;" /></a></div>
<p>
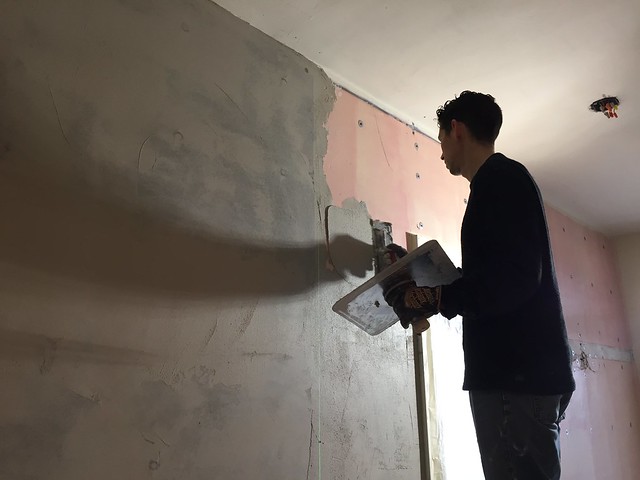
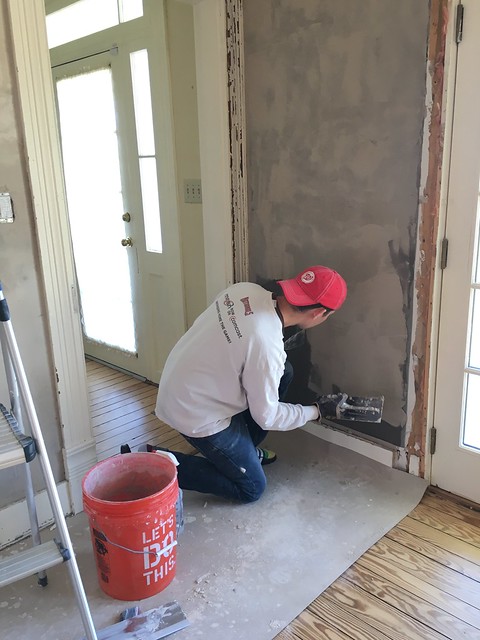
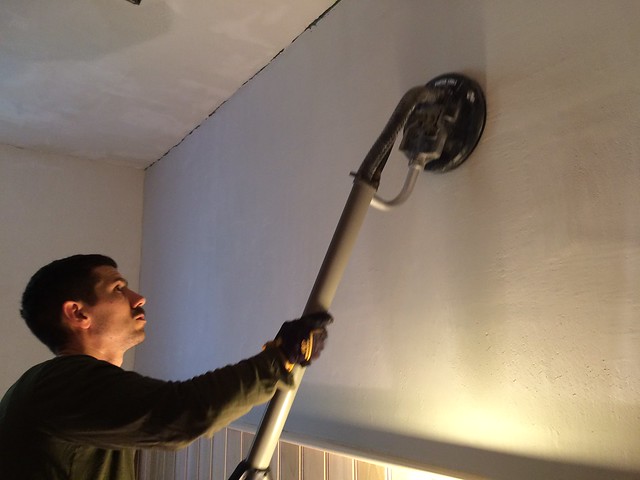
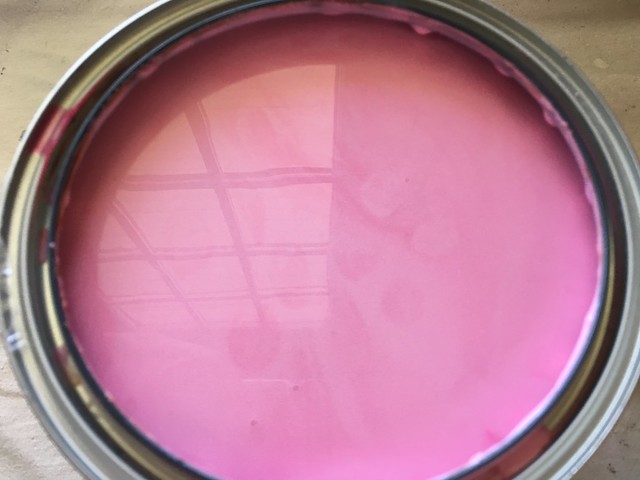
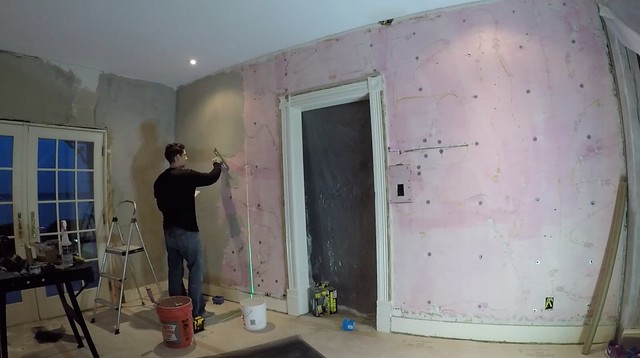
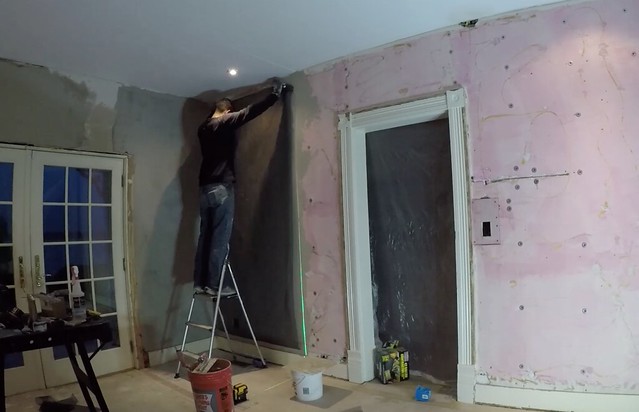
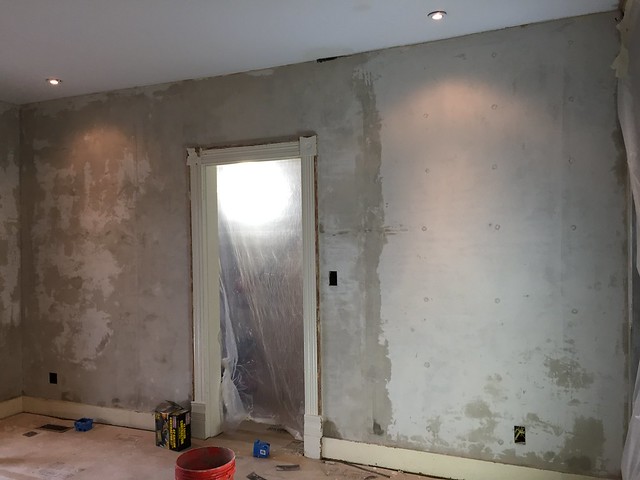
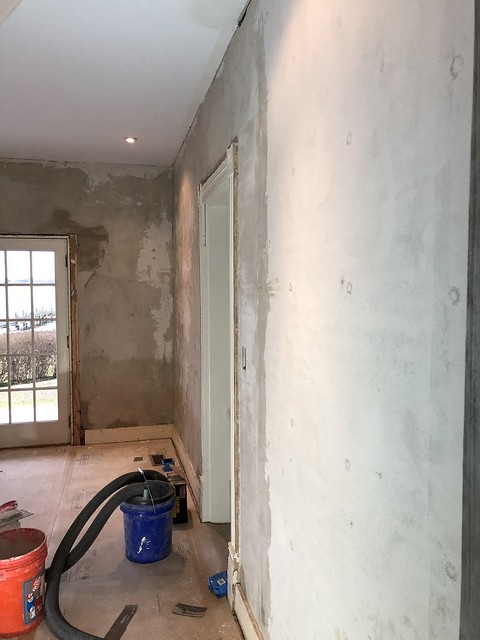
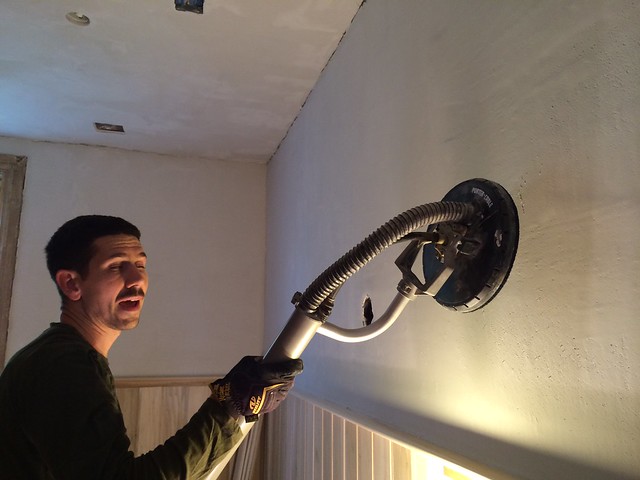
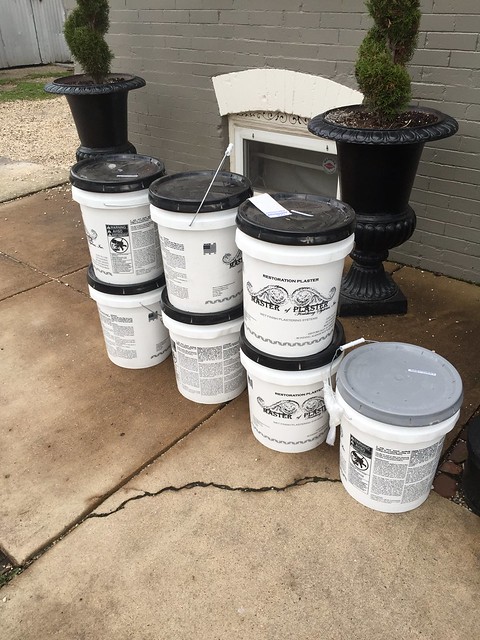
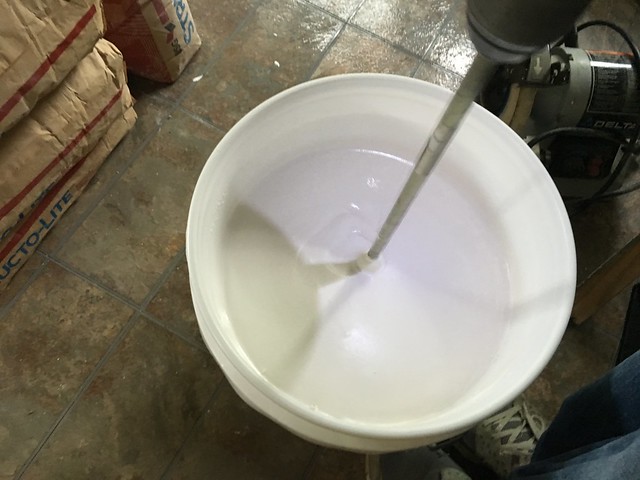
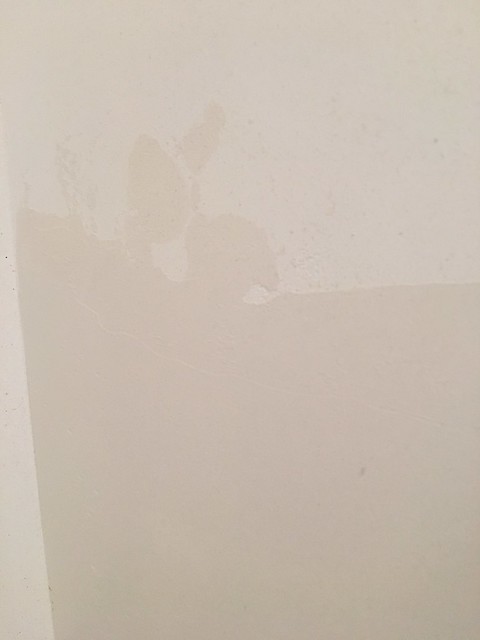
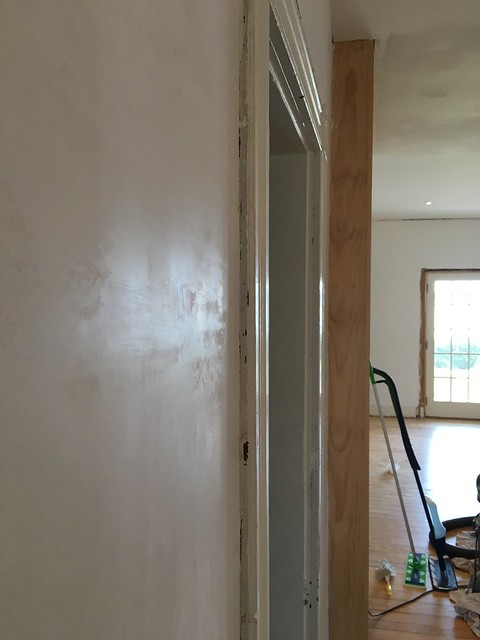
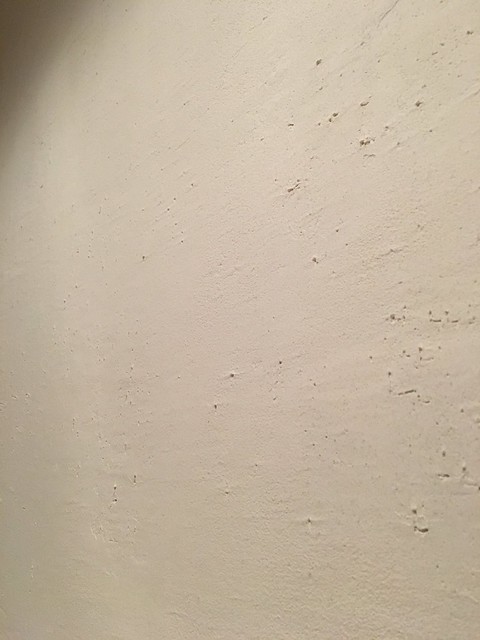
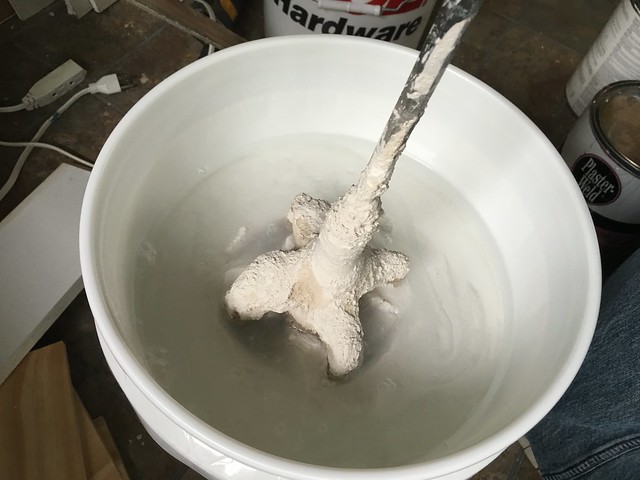
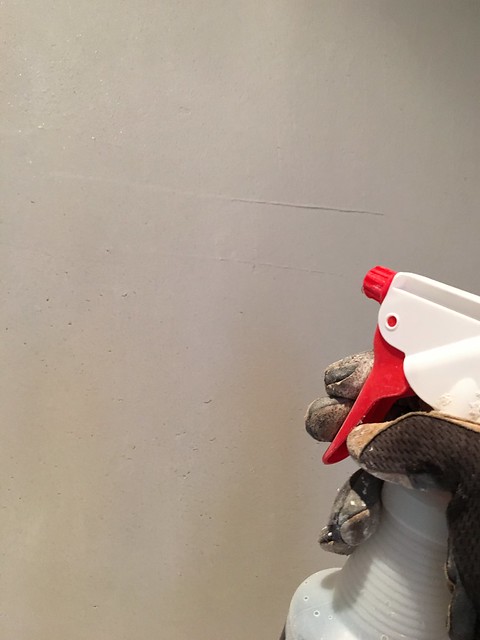
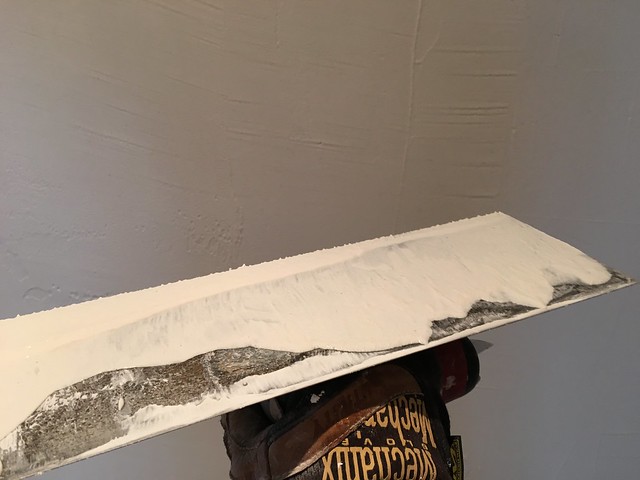
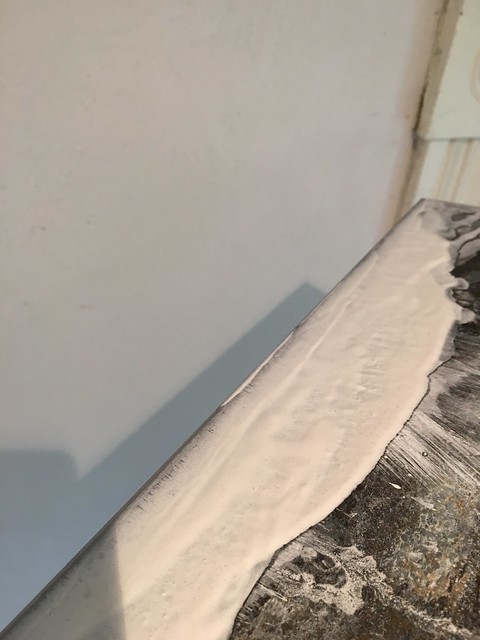
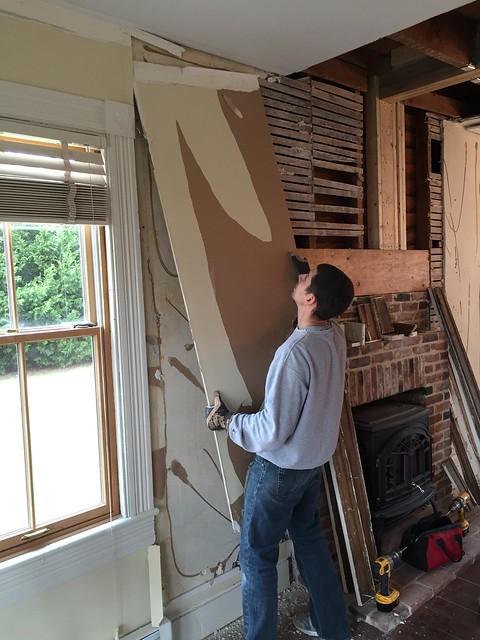
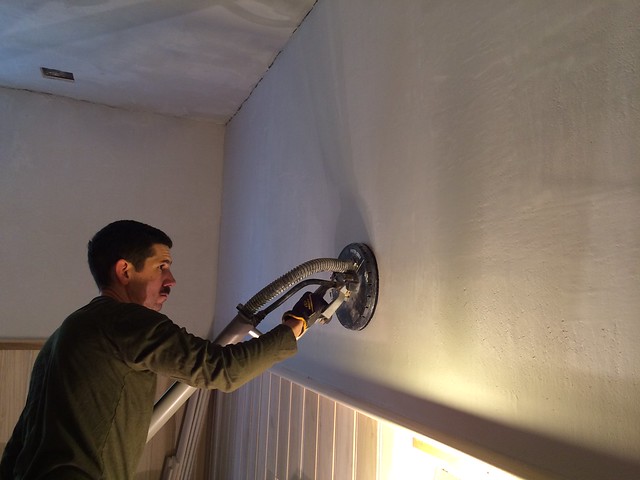
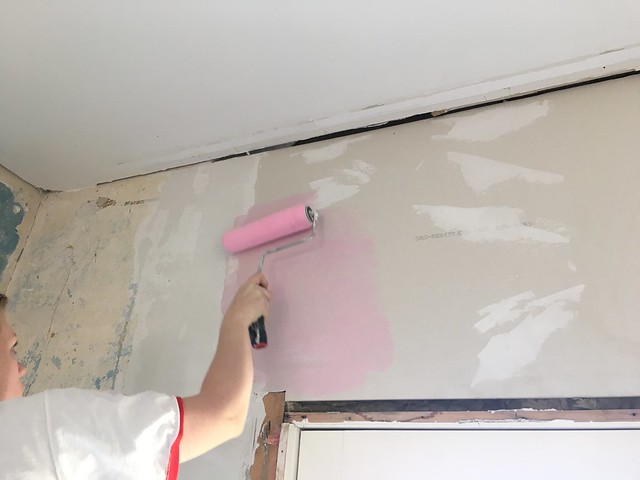
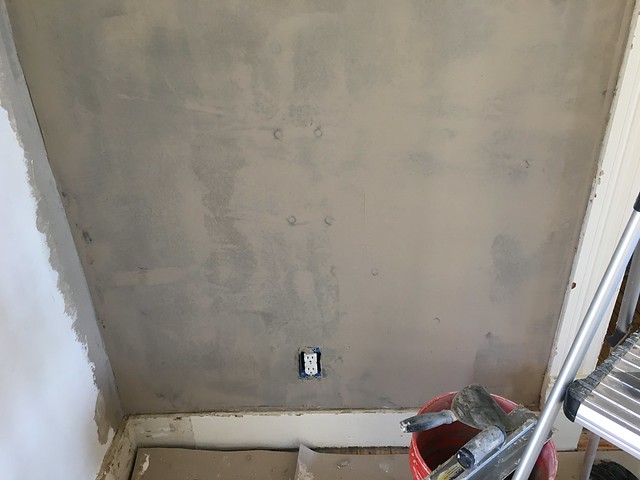
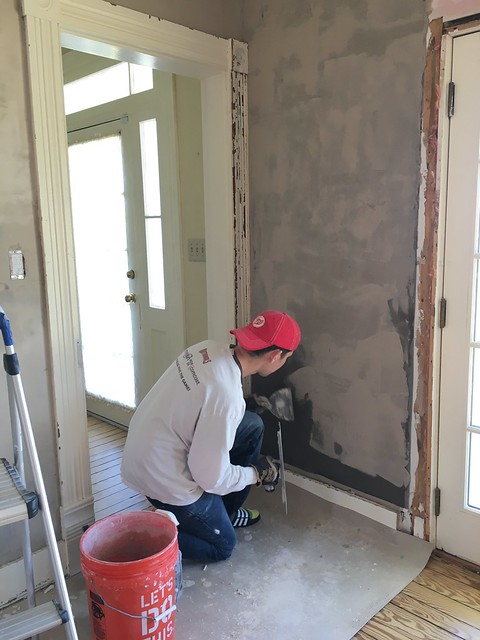
Our giant whirlwind of the end of our summer wouldn't be complete without a little more work on the main hallway project. For that we launched into finishing up the plaster work throughout the hallway.</p>
<p>
</p>
<div class="MediaContainer PhotoContainer"><a href="https://farm2.staticflickr.com/1841/29221210727_4147f8a378_z.jpg" rel="PhotoPopup" popupheight="640" popupwidth="480"><img alt="" src="https://farm2.staticflickr.com/1841/29221210727_4147f8a378.jpg" width="375" height="500" style="border-width: 0px; border-style: solid;" /></a></div>
<p>We've spent the last several weekends we've been in town applying coat after coat of plaster in hopes of having this hallway project completed before we're solidly into fall. While it's slow going only getting to work a day or two per weekend, we're making some solid progress and it feels like we're moving along.</p>
<p>
</p>
<div class="MediaContainer PhotoContainer"><a href="https://farm2.staticflickr.com/1874/44109451142_aa67f96203_z.jpg" rel="PhotoPopup" popupheight="640" popupwidth="480"><img alt="" src="https://farm2.staticflickr.com/1874/44109451142_aa67f96203.jpg" width="375" height="500" style="border-width: 0px; border-style: solid;" /></a></div>
<p>
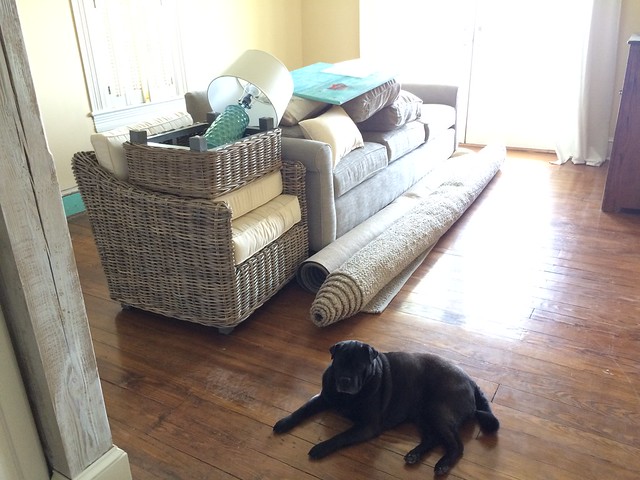
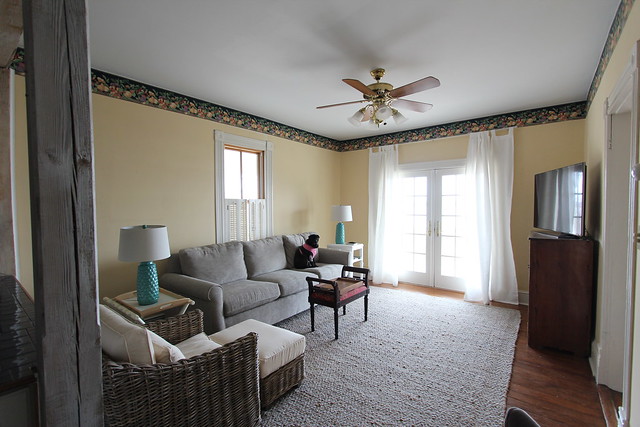
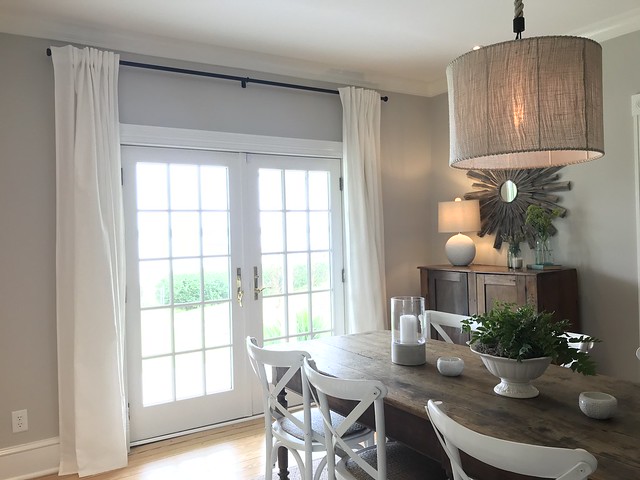
While the last month and a half has been a blur, we anticipate much of the same over the next two months. We'll be doing our best to keep you all updated on our latest goings on, but our apologies if it's not as regular as we would like. We also have a few big projects on the horizon that we can't wait to share more about. Until then, we're just enjoying our finished dining room project every chance we get.</p>
<p>
</p>
<div class="MediaContainer PhotoContainer"><a href="https://farm2.staticflickr.com/1832/44083517781_4e375027a6_z.jpg" rel="PhotoPopup" popupheight="480" popupwidth="640"><img alt="" src="https://farm2.staticflickr.com/1832/44083517781_4e375027a6.jpg" width="500" height="375" style="border-width: 0px; border-style: solid;" /></a></div>
<p>So that's what we've been up to. What did you do to close out the summer? Anything fun? Any big projects?</p><p><a href="https://www.oldtownhome.com/2018/9/14/A-Whirlwind-Recap-of-Our-Summers-Second-Half/">Read Full Post</a></p>]]></content>
    <category term="Header Image" />
    <category term="Plaster" />
    <category term="Summer" />
    <category term="Vacation" />
    <category term="Water House" />
    <PostImage>https://c2.staticflickr.com/2/1843/44630300042_949e6b1a1b_c.jpg</PostImage>
    <media:thumbnail url="https://c2.staticflickr.com/2/1843/44630300042_949e6b1a1b_t.jpg" />
    <ExtensionElements>
      <Item>PostImage</Item>
      <Item>media:thumbnail</Item>
    </ExtensionElements>
  </entry>
  <entry>
    <guid>e681f99f-d55a-4f25-8866-eddd141793c7</guid>
    <id>https://www.oldtownhome.com/2018/2/14/Plaster-Like-a-Boss-Tackling-the-Plaster-Weld-Prep-Structolite-Base-Coat-Steps/</id>
    <title>Plaster Like a Boss: Tackling the Plaster Weld Prep &amp;amp; Structolite Base Coat Steps</title>
    <summary type="html"><![CDATA[<p>When it comes to historic plaster repair and restoration, there's definitely something to the old adage that "practice makes perfect!"</p><p>After all, this is why a professional plasterer has to apprentice for years before they're formally allowed to work on anything that anyone is even allowed to see. Thankfully for us as DIYers, we don't have any such rules, and we're able to put our learning curve and imperfections on full display for all of you.</p><p>
</p><div class="MediaContainer PhotoContainer"><a href="https://farm5.staticflickr.com/4672/25126606487_f129213923_z.jpg" rel="PhotoPopup" popupheight="480" popupwidth="640"><img alt="" src="https://farm5.staticflickr.com/4672/25126606487_f129213923.jpg" width="500" height="375" style="border-width: 0px; border-style: solid;"></a></div><p>At this point we have over 15 years of amateur plastering experience in repairing anything from small sections of cracked or missing plaster, to complete room overhauls. My teenage self of the early '90s just read that statement and cringed at what his life has become. <em>Don't worry 13 year old Alex, you're even more lame at 13 than 40 year old you, you just don't know it yet. Go ahead and play another game of Joe Montana Football on your Sega Genesis and call me when you're less obsessed with Andre Agassi.</em></p><p>In our 15 years we've learned more about plaster than we ever expected when we first bought our historic home. Along the way we've picked up tips and tricks, we've made plenty of mistakes, and we finally feel like we're starting to get the hang of this whole plastering thing...until we learn more that makes us second guess what we've done in the past and we begin to think we're actually just total crap at plastering.&nbsp;</p><p>Oh, and we've even been featured in a published guide on how to attempt some DIY plaster repair (that makes some in the historic plaster repair community cringe because it used joint compound as an ingredient)! <em>See '90s Alex, all that time spent memorizing the lyrics to Rapper's Delight and figuring out how to dance like MC Hammer have paid off, now you're a pseudo plaster expert and can grow a semi respectable yet unreasonably creepy looking mustache. Dreams do come true.</em></p> <a href="https://www.oldtownhome.com/2018/2/14/Plaster-Like-a-Boss-Tackling-the-Plaster-Weld-Prep-Structolite-Base-Coat-Steps/">more</a>]]></summary>
    <published>2018-02-14T12:30:00.000-05:00</published>
    <updated>2018-02-14T12:30:00.000-05:00</updated>
    <link rel="alternate" href="https://www.oldtownhome.com/2018/2/14/Plaster-Like-a-Boss-Tackling-the-Plaster-Weld-Prep-Structolite-Base-Coat-Steps/" />
    <author>
      <name>Alex</name>
    </author>
    <content type="html"><![CDATA[<p>When it comes to historic plaster repair and restoration, there's definitely something to the old adage that "practice makes perfect!"</p>
<p>After all, this is why a professional plasterer has to apprentice for years before they're formally allowed to work on anything that anyone is even allowed to see. Thankfully for us as DIYers, we don't have any such rules, and we're able to put our learning curve and imperfections on full display for all of you.</p>
<p>
</p>
<div class="MediaContainer PhotoContainer"><a href="https://farm5.staticflickr.com/4672/25126606487_f129213923_z.jpg" rel="PhotoPopup" popupheight="480" popupwidth="640"><img alt="" src="https://farm5.staticflickr.com/4672/25126606487_f129213923.jpg" width="500" height="375" style="border-width: 0px; border-style: solid;" /></a></div>
<p>At this point we have over 15 years of amateur plastering experience in repairing anything from small sections of cracked or missing plaster, to complete room overhauls. My teenage self of the early '90s just read that statement and cringed at what his life has become. <em>Don't worry 13 year old Alex, you're even more lame at 13 than 40 year old you, you just don't know it yet. Go ahead and play another game of Joe Montana Football on your Sega Genesis and call me when you're less obsessed with Andre Agassi.</em></p>
<p>In our 15 years we've learned more about plaster than we ever expected when we first bought our historic home. Along the way we've picked up tips and tricks, we've made plenty of mistakes, and we finally feel like we're starting to get the hang of this whole plastering thing...until we learn more that makes us second guess what we've done in the past and we begin to think we're actually just total crap at plastering.&nbsp;</p>
<p>Oh, and we've even been featured in a published guide on how to attempt some DIY plaster repair (that makes some in the historic plaster repair community cringe because it used joint compound as an ingredient)! <em>See '90s Alex, all that time spent memorizing the lyrics to Rapper's Delight and figuring out how to dance like MC Hammer have paid off, now you're a pseudo plaster expert and can grow a semi respectable yet unreasonably creepy looking mustache. Dreams do come true.</em></p>
<p>
</p>
<div class="MediaContainer PhotoContainer"><a href="https://farm6.staticflickr.com/5543/10716910265_58def3ea9c_z.jpg" rel="PhotoPopup" popupheight="640" popupwidth="480"><img alt="" src="https://farm6.staticflickr.com/5543/10716910265_58def3ea9c.jpg" width="375" height="500" style="border-width: 0px; border-style: solid;" /></a></div>
<p>All that being said, we're feeling pretty good about the progress we're making in our dining room, and we'd like to share the latest in our plastering endeavors with all of you. Our goal is simple, share our journey for entertainment and the hope our experience can help when it comes to work on your own home. At the very least you can see what we can do, realize that if we can do it, you can certainly do it yourself, and award yourself another virtual merit badge skill learned by reading a guide on the Internets.</p>
<p>
</p>
<div class="MediaContainer PhotoContainer"><a href="https://farm2.staticflickr.com/1577/26509003556_5d7dfe674a_z.jpg" rel="PhotoPopup" popupheight="640" popupwidth="480"><img alt="" src="https://farm2.staticflickr.com/1577/26509003556_5d7dfe674a.jpg" width="375" height="500" style="border-width: 0px; border-style: solid;" /></a></div>
<p>Our dining room project is now the second room in our house where we're going the more tried, true, and "appropriate" route of plaster repair. We're using more traditional methods and materials to skim our patched and repaired walls, rather than the use of the more readily available and commonly leveraged joint compound.&nbsp;</p>
<p>You see, after years of use I learned that joint compound was once my crutch. I spent so much time slathering the cake icing consistency gypsum based paste all over our walls that I was blinded to the fact I had been mislead early on by the likes of an perpetually inebriated fellow DIYer and former neighbor that enjoyed telling tales of lime additives in the "green label joint compound," home improvement television shows touting the advantages of skimming, and Internet message boards that informed me, "when one would like to get to fixin' up their broken plaster, they should grab a bucket of mud, slap it on the wall, and get to sanding once it reaches a full cure."&nbsp;</p>
<p>
</p>
<div class="MediaContainer PhotoContainer"><a href="https://farm6.staticflickr.com/5538/10658755313_c51aa59484_z.jpg" rel="PhotoPopup" popupheight="480" popupwidth="640"><img alt="" src="https://farm6.staticflickr.com/5538/10658755313_c51aa59484.jpg" width="500" height="375" style="border-width: 0px; border-style: solid;" /></a></div>
<p>Not only did I learn this flawed technique, for years I peddled it as the righteous path forward as I shared our progress. But when it comes down to it, even though our walls and ceilings look rather lovely, smooth, and like beautiful old plaster some 15 years removed from the original work, there are problems. Primarily, they were a real mess to create, and they tend to ding and chip far easier than we'd like. This doesn't mean we were wrong in what we did, simply that there's a better way for future work.</p>
<p>When it comes down to it, we must challenge ourselves to grow and learn, evolving in our approach to plastering, much like our distant ancestors discovering that a sugary drink and a little added yeast allowed to sit for long enough in the right conditions turned them into delicious alcoholic beverages, which after sufficient chilling, can be used to celebrate the completion of a plastering job well done.</p>
<p>In our dining room plaster repair project we're applying the skim in multiple coats and eliminating sanding as a part of our process (which is seriously cutting down on the mess and, as a result, improving spousal approval of the technique). And most importantly, we're making updates that will hopefully stand the test of time and will preserve our home for many generations of future owners.</p>
<p class="MediaContainer PhotoContainer"><a href="https://farm5.staticflickr.com/4616/25824850798_fe6921ec3c_z.jpg" rel="PhotoPopup" popupheight="640" popupwidth="480"><img alt="" src="https://farm5.staticflickr.com/4616/25824850798_fe6921ec3c.jpg" width="375" height="500" style="border-width: 0px; border-style: solid;" /></a></p>
<p class="MediaContainer PhotoContainer"><em>The missing plaster was patched in with drywall against the wood lath.</em></p>
<p>In <a href="https://www.oldtownhome.com/2018/2/1/Our-Dining-Room-Electrical-and-Plaster-Restoration-is-in-Full-Swing/">our last post on our work in this room</a>, we described how we had painstakingly prepared our walls. They had been plaster buttoned, scraped of liquid nails, and patched with drywall where necessary, At that point we were ready to begin putting everything back together again and making our walls smooth and solid. But before we could launch into the actual plastering process, we had to make sure our plaster had something to really hold onto.</p>
<h2>Bonding Agent (Plaster Weld)</h2>
<p>Our walls in this room have a very old coat of paint on them. This paint last saw the light of day in about 1992, and even then it was looking rather defeated, much like 14 year old Alex of the same era when he realized he possessed far too much inherent fear and not nearly enough athletic ability to become the next Tony Hawk. The paint beneath the drywall is missing in large sections, but it was intact enough to act as a barrier that could prevent the new plaster skim coat from really adhering to the walls.&nbsp;</p>
<p>In addition to the paint possibly preventing a good bond, the patches in sections where we used drywall to repair large missing portions of plaster needed to be prepared in order to ensure a good and solid surface that would accept the plaster.</p>
<p>
</p>
<div class="MediaContainer PhotoContainer"><a href="https://farm5.staticflickr.com/4609/28390076429_f2b0bd760b_z.jpg" rel="PhotoPopup" popupheight="364" popupwidth="640"><img alt="" src="https://farm5.staticflickr.com/4609/28390076429_f2b0bd760b.jpg" width="500" height="284" style="border-width: 0px; border-style: solid;" /></a></div>
<p>When it comes to getting painted or drywall surfaces reader for plaster, or more specifically, ready for the Structolite base coat we're using, you need to apply a bonding agent. Polyvinyl acetate, or PVA&nbsp;glue mixed with water is traditionally used by plasterers in Europe, but in our case we picked up a few gallons of PlasterWeld.&nbsp;</p>
<p>
</p>
<div class="MediaContainer PhotoContainer"><a href="https://farm2.staticflickr.com/1466/26442574192_dbe8e97709_z.jpg" rel="PhotoPopup" popupheight="480" popupwidth="640"><img alt="" src="https://farm2.staticflickr.com/1466/26442574192_dbe8e97709.jpg" width="500" height="375" style="border-width: 0px; border-style: solid;" /></a></div>
<p>PlasterWeld is the Pepto Bismol pink bonding agent that can be painted onto the surface to be plastered and provides a suitable surface to which plaster can adhere while also preventing significant suction. Amazon has it but it's somewhat expensive, but we found it through Walmart.com for just $26 per gallon.</p>
<p>
</p>
<div class="MediaContainer PhotoContainer"><a href="https://farm5.staticflickr.com/4632/40170332421_5db9868f44_z.jpg" rel="PhotoPopup" popupheight="640" popupwidth="364"><img alt="" src="https://farm5.staticflickr.com/4632/40170332421_5db9868f44.jpg" width="284" height="500" style="border-width: 0px; border-style: solid;" /></a></div>
<p>Preventing suction is import to the success of the plaster's ability to cure, otherwise water will be drawn out of the new plaster too quickly, causing it to dry prematurely, crack, and fail. This is why you paint the bonding agent over the drywall paper, as it has the tendency to suck the moisture from the plaster.</p>
<p>
</p>
<div class="MediaContainer VideoEmbed"><iframe width="560" height="349" src="https://www.youtube.com/embed/AqoafchwP2o?wmode=transparent" frameborder="0" allowfullscreen="true"></iframe></div>
<p>We painted the PlasterWeld on all of the new drywall and the portions of the wall that seemed to be most throughly covered by old paint. Once the PlasterWeld is applied, you need to give it at least an hour to dry, but can apply the plaster anywhere from about one hour to seven days after application. If you let it sit for longer than seven to 10 days, you risk losing the qualities that make it bond to the plaster really well...so don't put it on and wait a few months to plaster.</p>
<p>
</p>
<div class="MediaContainer PhotoContainer"><a href="https://farm5.staticflickr.com/4652/28390076379_990bbf24a7_z.jpg" rel="PhotoPopup" popupheight="362" popupwidth="640"><img alt="" src="https://farm5.staticflickr.com/4652/28390076379_990bbf24a7.jpg" width="500" height="283" style="border-width: 0px; border-style: solid;" /></a></div>
<p>Once the pink bonding agent with the odd but not entirely unpleasant scent was sufficiently cured and awaiting its upcoming coat of plaster, it was time to mix up a little Structolite.</p>
<h2>Base Coat Plaster (Structolite)</h2>
<p>We've talked Structolite in the past, but we're much more familiar with the product now and really enjoy using it. You can pick up Structolite in 50 pound bags from either Home Depot or Lowe's (and I'm sure many other locations), but check online to see if your local store carries it as it seems to be pretty hit or miss. We've had to order it and have it shipped to the store each time we've bought it.</p>
<p>
</p>
<div class="MediaContainer PhotoContainer"><a href="https://farm2.staticflickr.com/1673/23711241513_5c9b05b7c4_z.jpg" rel="PhotoPopup" popupheight="640" popupwidth="480"><img alt="" src="https://farm2.staticflickr.com/1673/23711241513_5c9b05b7c4.jpg" width="375" height="500" style="border-width: 0px; border-style: solid;" /></a></div>
<p>When it comes to mixing the plaster we find filling a 5 gallon bucket half full is roughly the right amount for us that allows us enough time to apply all of the plaster without losing the workability. If you take too long and it begins to cure in the bucket, you're pretty much out of luck when it comes to getting it on the wall, and your bucket is also a lost cause.</p>
<p>
</p>
<div class="MediaContainer PhotoContainer"><a href="https://farm2.staticflickr.com/1539/23711239723_c45cd62242_z.jpg" rel="PhotoPopup" popupheight="480" popupwidth="640"><img alt="" src="https://farm2.staticflickr.com/1539/23711239723_c45cd62242.jpg" width="500" height="375" style="border-width: 0px; border-style: solid;" /></a></div>
<p>When you mix the Structolite it's best to pour some of your water into a 5 gallon bucket, then slowly add in the plaster and mix. This allows you to ensure complete mixing of the plaster and will let you achieve the consistency you're looking for, which is pretty much that of a Frosty or soft serve ice cream. (Plastering sounds delicious.)</p>
<p>This time around we've finally started using a hawk and trowel (rather than taping knife and trowel) to apply our plaster. The hawk presented a little bit of a learning curve, but it certainly helped get the material on the wall faster, and reduced the need for repeated trips to the bucket to refill my trowel.</p>
<p>Now I'm not saying I didn't drop a whole pant-load of plaster on the floor on several occasions as I learned how to properly use the hawk, but now that I have more confidence and a little more experience using a hawk, I am never going to look back when it comes to plastering.</p>
<p>
</p>
<div class="MediaContainer PhotoContainer"><a href="https://farm5.staticflickr.com/4624/39358936905_8228fe26f4_z.jpg" rel="PhotoPopup" popupheight="359" popupwidth="640"><img alt="" src="https://farm5.staticflickr.com/4624/39358936905_8228fe26f4.jpg" width="500" height="280" style="border-width: 0px; border-style: solid;" /></a></div>
<p>Since the next step requires embedding 48" sections of reinforcement fiberglass screen (aka window screen) in the plaster, we set up our laser level to denote where each 48" line was from the prior piece of embedded mesh. This was a much more effective approach to setting a boundary so I'd know where to plaster up to without going significantly over.</p>
<h2>Embedding Fiberglass Mesh</h2>
<p>As we worked around the room spreading the Structolite over the original plaster and patched areas (and over the Plaster Weld) we also methodically embedded fiberglass window screen as an isolation membrane of sorts. We've been using this approach behind both plaster and joint compound for over 12 years, and it has worked very well for our purposes.&nbsp;</p>
<p>The idea is to prevent minor cracks from beneath from transferring through to the surface through a decoupling layer of sorts. The mesh we're using is nothing more than standard window screen. We buy it in rolls of 100' and the rolls are 48" wide.</p>
<p>
</p>
<div class="MediaContainer PhotoContainer"><a href="https://farm5.staticflickr.com/4607/28195017869_9b1f074487_z.jpg" rel="PhotoPopup" popupheight="640" popupwidth="480"><img alt="" src="https://farm5.staticflickr.com/4607/28195017869_9b1f074487.jpg" width="375" height="500" style="border-width: 0px; border-style: solid;" /></a></div>
<p>These rolls are usually about $55-$60 but don't go for the "extra strength" variety as it's both more expensive and less forgiving. While we're plastering Wendy rolls out sections on the floor as we plan out the room and I work around the joint plastering.&nbsp;</p>
<p>
</p>
<div class="MediaContainer PhotoContainer"><a href="https://farm5.staticflickr.com/4766/25834908718_e72974c3d2_z.jpg" rel="PhotoPopup" popupheight="480" popupwidth="640"><img alt="" src="https://farm5.staticflickr.com/4766/25834908718_e72974c3d2.jpg" width="500" height="375" style="border-width: 0px; border-style: solid;" /></a></div>
<p>Since the laser level gives us a good boundary line we don't risk premature curing of the plaster that would prevent the screen from being embedded and end up in an extra lumpy finish.</p>
<p>
</p>
<div class="MediaContainer PhotoContainer"><a href="https://farm5.staticflickr.com/4753/40211951852_4287b55ecd_z.jpg" rel="PhotoPopup" popupheight="413" popupwidth="640"><img alt="" src="https://farm5.staticflickr.com/4753/40211951852_4287b55ecd.jpg" width="500" height="322" style="border-width: 0px; border-style: solid;" /></a></div>
<p>Once all of the Structolite plaster was applied up to the line Wendy would pass me another length of screen and I'd hang it at the top while she eyeballed the base to be sure I had good coverage. It doesn't have to be a two person job, but it does make it easier. However, sometimes it's necessary for the second person to go to the store to buy more screen because you ran out. In such a case, you can handle it yourself. Just climb up on a ladder and smoosh it into the plaster.</p>
<p>
</p>
<div class="MediaContainer VideoEmbed"><iframe width="560" height="349" src="https://www.youtube.com/embed/NvdR8frrKNw?wmode=transparent&amp;hd=1" frameborder="0" allowfullscreen="true"></iframe></div>
<p>Then it was simply a matter of embedding the screen securely in the fresh plaster, making sure to apply it evenly, without wrinkles or ridges, and with adequate coverage. This is easiest to accomplish when you use a trowel to evenly apply pressure, top down, middle out.</p>
<p>In the corners we wrap the first pieces of screen around the inside corner by about two to five inches and embed in the plaster. Once that first pieces of screen is in good shape, we continue applying the next section of plaster and overlap the pieces of screen just shy of the corner. The overlap is important to ensure good coverage and protection against future cracks in the corners.</p>
<p>
</p>
<div class="MediaContainer PhotoContainer"><a href="https://farm5.staticflickr.com/4713/39974607181_c5c7980198_z.jpg" rel="PhotoPopup" popupheight="480" popupwidth="640"><img alt="" src="https://farm5.staticflickr.com/4713/39974607181_c5c7980198.jpg" width="500" height="375" style="border-width: 0px; border-style: solid;" /></a></div>
<p>When dealing with junction boxes we like to take any boxes out and apply the screen right over the openings. Once the plaster cures sufficiently we cut out the plaster over the hole, and after the next coat of plaster, put any junction boxes back in. Since we're adding some thickness to the wall with the plaster this ensures the boxes are not recessed below the wall's surface.</p>
<p>
</p>
<div class="MediaContainer PhotoContainer"><a href="https://farm5.staticflickr.com/4751/39099169665_24e220683b_z.jpg" rel="PhotoPopup" popupheight="480" popupwidth="640"><img alt="" src="https://farm5.staticflickr.com/4751/39099169665_24e220683b.jpg" width="500" height="375" style="border-width: 0px; border-style: solid;" /></a></div>
<p>When all was said and done with this first coat of plaster we had ourselves a room that no longer had massive missing sections of plaster, significant damage, remnants of old liquid nails, or evidence of the years of neglect these walls have suffered. We also had the first of three coats of plaster complete on our road to a beautiful dining room.</p>
<p>
</p>
<div class="MediaContainer PhotoContainer"><a href="https://farm5.staticflickr.com/4750/28218155299_58eb03483f_z.jpg" rel="PhotoPopup" popupheight="480" popupwidth="640"><img alt="" src="https://farm5.staticflickr.com/4750/28218155299_58eb03483f.jpg" width="500" height="375" style="border-width: 0px; border-style: solid;" /></a></div>
<p>But wait! We have one more step before we're done with this first coat! This is a tip we picked up to ensure a slow cure that results in a nice and smooth base coat to build on. Structolite plaster should cure slowly as the water in the material evaporates. The bonding agent (Plaster Weld) ensures the base doesn't suck the water out of the plaster, but I've noticed it has the tendency to dry somewhat quickly when humidity is low, as it is in the winter...or in Arizona.</p>
<p>
</p>
<div class="MediaContainer PhotoContainer"><a href="https://farm5.staticflickr.com/4748/39974630051_09ae562513_z.jpg" rel="PhotoPopup" popupheight="640" popupwidth="480"><img alt="" src="https://farm5.staticflickr.com/4748/39974630051_09ae562513.jpg" width="375" height="500" style="border-width: 0px; border-style: solid;" /></a></div>
<p>About 30 minutes after I finish applying the plaster I like to go around the room with a spray bottle and my trowel, gently misting the wall and using the trowel to smooth any ridges or high spots. This does double duty of smoothing the surface that will support the next coat, and also slowing the cure by gently wetting the curing plaster. Then after allowing the plaster to cure for about 8 to 12 hours (like after a night's sleep), come back through and gently mist the plaster again to dampen it during its final cure. Again, this just slows the cure, helping to prevent any chances of cracking from a cure that happens too fast.</p>
<p>While this phase of renovation feels like it takes forever, it's exciting to see the walls come together, so to speak. Now that they're free of holes and patches, we can get a much better sense of how the room will look when finished. Just two more coats of plaster, and then we're moving right on to trim work and molding!</p><p><a href="https://www.oldtownhome.com/2018/2/14/Plaster-Like-a-Boss-Tackling-the-Plaster-Weld-Prep-Structolite-Base-Coat-Steps/">Read Full Post</a></p>]]></content>
    <category term="Header Image" />
    <category term="Plaster" />
    <category term="Plaster Repair" />
    <category term="Plaster Repair Series" />
    <category term="Water House Dining Room" />
    <PostImage>https://c1.staticflickr.com/5/4715/40224652442_56226951ee_z.jpg</PostImage>
    <media:thumbnail url="https://c1.staticflickr.com/5/4715/40224652442_56226951ee_t.jpg" />
    <ExtensionElements>
      <Item>PostImage</Item>
      <Item>media:thumbnail</Item>
    </ExtensionElements>
  </entry>
  <entry>
    <guid>1742de91-876a-458b-b7ab-b8e9501bfd34</guid>
    <id>https://www.oldtownhome.com/2016/6/24/Plaster-Restoration-Part-3-Master-of-Plaster-Finish-Coat-with-No-Sanding/</id>
    <title>Plaster Restoration Part 3: Master of Plaster Finish Coat with No Sanding!</title>
    <summary type="html"><![CDATA[<p>Traditional plasterers achieve perfectly flat and smooth walls with nothing more than a trowel...no sanding required. </p><p>Yes, you heard me, no sanding at all!</p><p><em>Before we get started, this is one of a series of blog posts about Master of Plaster's Lime Restoration Plaster. Be sure to check out the rest in the series for our progress and more of our thoughts on the product.</em></p><p>For years I've used what was readily available to achieve the "plaster" look. At this point I've probably applied close to 300 gallons of joint compound to give our walls the authentically vintage look of plaster. I've also discussed this somewhat labor intensive and messy method at length, which included the many MANY references to sanding it all smooth until my arms could sand no more. </p><p>Over the years I adopted techniques to ease the process, tools to reduce the mess, dust collection methods to keep the drywall dust from venturing into each and every nook and cranny in the house. But no matter how good I got, it was always the same: <a href="http://www.oldtownhome.com/2013/11/8/How-To-Fix-Plaster-Like-a-Boss-Sand-Baby-Sand/">apply, sand, apply, sand, apply, sand</a>, repeat until you cry out to the wall "I have a bad mustache and I just can't take this any longer!"</p><p>
</p> <a href="https://www.oldtownhome.com/2016/6/24/Plaster-Restoration-Part-3-Master-of-Plaster-Finish-Coat-with-No-Sanding/">more</a>]]></summary>
    <published>2016-06-24T14:30:12.623-04:00</published>
    <updated>2016-06-24T14:30:12.623-04:00</updated>
    <link rel="alternate" href="https://www.oldtownhome.com/2016/6/24/Plaster-Restoration-Part-3-Master-of-Plaster-Finish-Coat-with-No-Sanding/" />
    <author>
      <name>Alex</name>
    </author>
    <content type="html"><![CDATA[<p>Traditional plasterers achieve perfectly flat and smooth walls with nothing more than a trowel...no sanding required. </p>
<p>Yes, you heard me, no sanding at all!</p>
<p><em>Before we get started, this is one of a series of blog posts about Master of Plaster's Lime Restoration Plaster. Be sure to check out the rest in the series for our progress and more of our thoughts on the product.</em></p>
<ul>
    <li><a href="http://www.oldtownhome.com/2016/5/26/Plaster-Restoration-Next-Steps-Part-1-Base-Coat-with-StructoLite/"><em>Plaster Restoration Next Steps Part 1: Base Coat with Structo-Lite</em></a></li>
    <li><a href="http://www.oldtownhome.com/2016/6/2/Plaster-Restoration-Next-Steps-Part-2-Master-of-Plasters-Beautiful-Lime-Base-Coat/"><em>Plaster Restoration Next Steps Part 2: Master of Plaster's Beautiful Lime Base Coat</em></a></li>
    <li><a href="http://www.oldtownhome.com/2016/6/24/Plaster-Restoration-Part-3-Master-of-Plaster-Finish-Coat-with-No-Sanding/"><em>Plaster Restoration Part 3: Master of Plaster Finish Coat with No Sanding!</em></a></li>
</ul>
<p>For years I've used what was readily available to achieve the "plaster" look. At this point I've probably applied close to 300 gallons of joint compound to give our walls the authentically vintage look of plaster. I've also discussed this somewhat labor intensive and messy method at length, which included the many MANY references to sanding it all smooth until my arms could sand no more. </p>
<p>Over the years I adopted techniques to ease the process, tools to reduce the mess, dust collection methods to keep the drywall dust from venturing into each and every nook and cranny in the house. But no matter how good I got, it was always the same: <a href="http://www.oldtownhome.com/2013/11/8/How-To-Fix-Plaster-Like-a-Boss-Sand-Baby-Sand/">apply, sand, apply, sand, apply, sand</a>, repeat until you cry out to the wall "I have a bad mustache and I just can't take this any longer!"</p>
<p>
</p>
<div class="MediaContainer PhotoContainer"><a href="https://farm4.staticflickr.com/3787/10611938723_81b27257d6_z.jpg" rel="PhotoPopup" popupheight="480" popupwidth="640"><img alt="" src="https://farm4.staticflickr.com/3787/10611938723_81b27257d6.jpg" width="500" height="375" style="border-width: 0px; border-style: solid;" /></a></div>
<p>Your situation may be different than mine, but you get the idea.</p>
<p>The only thing more shocking than the amount of sanding that's necessary with joint compound is the number of spousal disputes this especially fine layer of dust has generated. I can't tell you how often I was asked "did you tape the door, use filter bags, use a HEPA filter, and clean up before you came out of the room where you were sanding?... Then why in the hell is there a layer of dust over everything?" After always answering the same, "because there's just no way to control it!" I was more ready than ever to figure out the right way to achieve what we wanted without all of the mess, inconvenience, and clean up associated with sanding joint compound. </p>
<p>Back in January I started to post about working with Master of Plaster lime restoration plaster in our new house's living room. To this point I've covered the two layers of base coat plaster we've applied to the living room walls. The first was <a href="http://www.oldtownhome.com/2016/5/26/Plaster-Restoration-Next-Steps-Part-1-Base-Coat-with-StructoLite/">a layer of Structo-Lite plaster with an embedded fiberglass mesh</a>. The second was <a href="http://www.oldtownhome.com/2016/6/2/Plaster-Restoration-Next-Steps-Part-2-Master-of-Plasters-Beautiful-Lime-Base-Coat/">a layer of lime based Master of Plaster restoration in their base coat formula</a>. This gave an exceptionally smooth covering over the entire wall with no sanding, but still with a bit of a rough "tooth" to accept a final finish coat of plaster. </p>
<p>
</p>
<div class="MediaContainer PhotoContainer"><a href="https://farm8.staticflickr.com/7784/26811714202_7809f64eee_z.jpg" rel="PhotoPopup" popupheight="480" popupwidth="640"><img alt="" src="https://farm8.staticflickr.com/7784/26811714202_7809f64eee.jpg" width="500" height="375" style="border-width: 0px; border-style: solid;" /></a></div>
<p>Our final step in plastering this rather large room was to apply an extremely thin and fine layer of Master of Plaster finish coat over the entire roughly 500 square feet of wall space. The hope at the end of this endeavor is to have a perfectly crisp and smooth traditional lime based plaster wall, fully restored and ready for paint with absolutely no sanding at all. </p>
<p>After allowing the base coats to fully cure, the finish coat of MoP is ready to apply. The bucket of finish coat is set off from the base coat by its gray lid.</p>
<p>
</p>
<div class="MediaContainer PhotoContainer"><a href="https://farm8.staticflickr.com/7635/16408559383_6e2294ede0_z.jpg" rel="PhotoPopup" popupheight="640" popupwidth="480"><img alt="" src="https://farm8.staticflickr.com/7635/16408559383_6e2294ede0.jpg" width="375" height="500" style="border-width: 0px; border-style: solid;" /></a></div>
<p>But the real difference is in the consistency of the material. Just like the other material, it needs to be mixed before use, but the mixing is much easier because it's so much looser.</p>
<p>
</p>
<div class="MediaContainer PhotoContainer"><a href="https://farm8.staticflickr.com/7201/27221339436_2352f2dff8_z.jpg" rel="PhotoPopup" popupheight="480" popupwidth="640"><img alt="" src="https://farm8.staticflickr.com/7201/27221339436_2352f2dff8.jpg" width="500" height="375" style="border-width: 0px; border-style: solid;" /></a></div>
<p>Where the base coat seems like a soupy wet sand consistency, it can still hold its form decently. However, the finish coat is much more of an extremely loose pancake batter. You know, when you put too much water in the pancake mixture and you get really flat pancakes? That's how loose this is. </p>
<p>
</p>
<div class="MediaContainer PhotoContainer"><a href="https://farm8.staticflickr.com/7357/27221498026_b9a5a5b72e_z.jpg" rel="PhotoPopup" popupheight="640" popupwidth="480"><img alt="" src="https://farm8.staticflickr.com/7357/27221498026_b9a5a5b72e.jpg" width="375" height="500" style="border-width: 0px; border-style: solid;" /></a></div>
<p>There's no grit to the finish coat like there is with the base coat (that's the mica in the base coat), which is what allows it to go on so smooth. My technical contact at MoP actually told me she was excited for us to get to the point of applying the finish plaster because it goes on "like onion skin." This was enough to get my plaster nerd heart racing.</p>
<p>I'll tell you one thing, she was 100% correct! The photo really can't do it justice.</p>
<p>
</p>
<div class="MediaContainer PhotoContainer"><a href="https://farm8.staticflickr.com/7716/26648516134_8483974ac7_z.jpg" rel="PhotoPopup" popupheight="640" popupwidth="480"><img alt="" src="https://farm8.staticflickr.com/7716/26648516134_8483974ac7.jpg" width="375" height="500" style="border-width: 0px; border-style: solid;" /></a></div>
<p>The most important thing I learned very quickly when working with the finish coat is simple, don't try to put too much on your trowel. I got to the point where I was just more or less slapping the taping knife in the finish bucket and then scraping that onto the trowel. Any more than that and I risked having it slide off of the trowel and onto the floor.</p>
<p>Then it was just working quickly to get the finish coat as smooth as possible. As soon as it was all spread smooth, I'd grab a little more on the trowel and move on.</p>
<p>
</p>
<div class="MediaContainer VideoEmbed"><iframe width="560" height="349" src="https://www.youtube.com/embed/KzppMtp5Hoc?wmode=transparent&amp;hd=1" frameborder="0" allowfullscreen="true"></iframe></div>
<p>The other most important thing was to make sure I had one some killer Adidas sandals and black socks at all time. It made me feel way more competent.</p>
<p>
</p>
<div class="MediaContainer PhotoContainer"><a href="https://farm8.staticflickr.com/7031/27255242195_3b894e36fa_z.jpg" rel="PhotoPopup" popupheight="640" popupwidth="480"><img alt="" src="https://farm8.staticflickr.com/7031/27255242195_3b894e36fa.jpg" width="375" height="500" style="border-width: 0px; border-style: solid;" /></a></div>
<p>By comparison, the whole room took a little over six 5 gallon buckets of base coat to cover everything. The finish coat over the entire room will take just a little less than one 5 gallon bucket of the finish plaster! </p>
<p>But the big question, was I going to be able to accomplish my goal of a nearly perfectly flat and smooth plaster wall without the need to sand? Back when I was researching Master of Plaster I read the guidance on the products, and took special note of the "no sanding required" aspect. It intrigued me and worried me at the same time. I was concerned I wouldn't be capable of producing the surface I needed without sanding. My own self doubt and knowledge that I've spent the better part of a dozen years sanding walls until I couldn't lift my arms. How could I possibly achieve this goal?</p>
<p>The answer ended up being pretty simple...YES!</p>
<p>
</p>
<div class="MediaContainer PhotoContainer"><a href="https://farm8.staticflickr.com/7124/27564016881_9487455e1d_z.jpg" rel="PhotoPopup" popupheight="480" popupwidth="640"><img alt="" src="https://farm8.staticflickr.com/7124/27564016881_9487455e1d.jpg" width="500" height="375" style="border-width: 0px; border-style: solid;" /></a></div>
<p>Pretty amazing given where we started.</p>
<p>
</p>
<div class="MediaContainer PhotoContainer"><a href="https://farm2.staticflickr.com/1628/24461566845_50d4942ccd_z.jpg" rel="PhotoPopup" popupheight="427" popupwidth="640"><img alt="" src="https://farm2.staticflickr.com/1628/24461566845_50d4942ccd.jpg" width="500" height="333" style="border-width: 0px; border-style: solid;" /></a></div>
<p>The key here was to apply the finish coat in somewhat small sections, maybe four feet by four feet, and then immediately circle back with the spray bottle to spritz the wall and smooth out anything that's not really flat. Continued troweling and spraying smooths everything out so much that the finished surface looks so smooth it shines.</p>
<p>
</p>
<div class="MediaContainer PhotoContainer"><a href="https://farm8.staticflickr.com/7348/27027920033_7cac0fbc12_z.jpg" rel="PhotoPopup" popupheight="640" popupwidth="480"><img alt="" src="https://farm8.staticflickr.com/7348/27027920033_7cac0fbc12.jpg" width="375" height="500" style="border-width: 0px; border-style: solid;" /></a></div>
<p>Earlier I had waited too long to spray the wall and it let the plaster set up too much, which made smoothing it much harder. As long as I kept spraying before it was too dry, we were golden.</p>
<p>The other important thing I learned was to work from the top of the wall down. The water from the spray bottle, no matter how hard you try to prevent it, will drip down the wall in places. Working from the upper part of the wall down will keep those drips from running through already completed sections. </p>
<p>All told the finish coat proved to be the easier of all of the coats of plaster. It goes quickly and smoothly once you get into a rhythm. And when all is said and done, you're left with an almost perfectly smooth wall with crisp lime plaster and absolutely no need at all to sand out any imperfections.</p>
<p>This was a breathtaking thing, let me assure you. The mess is almost nil, the effort reduced, no more pushing the pole sander against the wall, my shoulders and back screaming, while the whine of the shop vac struggling to keep up with the endless flow of ultra-fine dust cries out in the background. Instead I joyously hummed along to whatever I happened to be playing on the Sonos in the other room, giving my nervous twitch from the mess that stems from sanding a nice rest.</p>
<p>
</p>
<div class="MediaContainer PhotoContainer"><a href="https://farm8.staticflickr.com/7339/27158208972_3e4d3ed6a1_z.jpg" rel="PhotoPopup" popupheight="640" popupwidth="480"><img alt="" src="https://farm8.staticflickr.com/7339/27158208972_3e4d3ed6a1.jpg" width="375" height="500" style="border-width: 0px; border-style: solid;" /></a></div>
<p>In the end I couldn't be more happy with the end results of Master of Plaster's lime restoration project. It's given me a new level of confidence when it comes to patching and properly restoring lime plaster. While this material is certainly suitable for and used by many professionals, it's also a very DIYer friendly product. The most important things to remember are to work in small sections, use the spray bottle to smooth, and don't try to load too much up on your trowel at any given time. </p>
<p>
</p>
<div class="MediaContainer PhotoContainer"><a href="https://farm8.staticflickr.com/7540/27518599701_6c2f6eb760_z.jpg" rel="PhotoPopup" popupheight="480" popupwidth="640"><img alt="" src="https://farm8.staticflickr.com/7540/27518599701_6c2f6eb760.jpg" width="500" height="375" style="border-width: 0px; border-style: solid;" /></a></div>
<p>Nearly our whole house has paster walls in need of some level of help, whether extensive like this living room, or more minor like the bedroom ceilings, and I think the thing I needed most was the confidence to know we'll be able to tackle these issues in each room no matter how severe they may be. And best of all, without sanding. In my opinion the MoP plaster restoration system beats the pants off of using joint compound to fake the look of plaster. It's easier to work with, gives a better finish, is more historically accurate, and is well suited whether your house is historically significant or you just want beautiful plaster walls.</p>
<p>Our next steps in this room will be the finish molding, some painting, installing the light/fan fixtures, build a new mantel, and then we can move our furniture in! After our long effort to get this room done, we can't wait until it's a great place to relax. It's a huge room and it will make us feel like it's in an entirely different house!</p>
<span style="font-style: italic;">This blog post and project was done in partnership with Master of Plaster. Master of Plaster supplied the base and finish coat plaster but all experiences and opinions of the restoration plaster product are our own. For more details on Master of Plaster, and for information on how to purchase, please visit the&nbsp;</span><a href="http://www.masterofplaster.com/" target="_blank" style="font-style: italic;">Master of Plaster website</a><span style="font-style: italic;">.</span><br />
<div><span style="font-style: italic;"><br />
</span></div><p><a href="https://www.oldtownhome.com/2016/6/24/Plaster-Restoration-Part-3-Master-of-Plaster-Finish-Coat-with-No-Sanding/">Read Full Post</a></p>]]></content>
    <category term="2nd House Living Room" />
    <category term="Header Image" />
    <category term="Master of Plaster" />
    <category term="Plaster" />
    <category term="Plaster Repair" />
    <category term="Plaster Repair Series" />
    <category term="Water House" />
    <PostImage>https://c2.staticflickr.com/8/7370/27805735911_9674787f18.jpg</PostImage>
    <media:thumbnail url="https://c2.staticflickr.com/8/7370/27805735911_9674787f18_t.jpg" />
    <ExtensionElements>
      <Item>PostImage</Item>
      <Item>media:thumbnail</Item>
    </ExtensionElements>
  </entry>
  <entry>
    <guid>4db0d04f-82bc-4075-801a-99102b03b02c</guid>
    <id>https://www.oldtownhome.com/2016/6/2/Plaster-Restoration-Next-Steps-Part-2-Master-of-Plasters-Beautiful-Lime-Base-Coat/</id>
    <title>Plaster Restoration Next Steps Part 2: Master of Plaster's Beautiful Lime Base Coat</title>
    <summary type="html"><![CDATA[<p>Lime based plaster is sort of the holy grail of plaster restoration, so why is it so hard to find a suitable plaster product? Apparently you just need to know where to look. </p><p><em>Before we get started, this is one of a series of blog posts about Master of Plaster's Lime Restoration Plaster. Be sure to check out the rest in the series for our progress and more of our thoughts on the product.</em></p><p>Last week we shared <a href="http://www.oldtownhome.com/2016/5/26/Plaster-Restoration-Next-Steps-Part-1-Base-Coat-with-StructoLite/">part 1 of our two part post on our plaster repair project.</a> It involved using Structo-Lite as the base coat to even out irregularities around the room. We also embedded fiberglass screen in the plaster to act as an isolation membrane of sorts, which will help prevent future cracks. And we also covered the use of Plaster Weld, which helped us apply the Structo-Lite plaster to new drywall patches. Whew...that was a lot of work to get that first coat on. </p><p>
</p><div class="MediaContainer PhotoContainer"><a href="https://farm2.staticflickr.com/1459/25932126053_d43960e34f_z.jpg" rel="PhotoPopup" popupheight="480" popupwidth="640"><img alt="" src="https://farm2.staticflickr.com/1459/25932126053_d43960e34f.jpg" width="500" height="375" style="border-width: 0px; border-style: solid;"></a></div><p>After the first base coat was wrapped up we turned our focus to the second coat, and that's where the real lime based plaster work started. But before I get ahead of myself, let me get you caught up on the experience I already had working with Master of Plaster. </p><p>We began working with the proper lime based restoration plaster product just before Wendy's hip surgery in January. The first five gallon bucket on the first wall seemed to go really well, except we had a few areas where the mica in the plaster seemed to be pulling with the trowel, leaving deep gouges and a very irregular surface.</p> <a href="https://www.oldtownhome.com/2016/6/2/Plaster-Restoration-Next-Steps-Part-2-Master-of-Plasters-Beautiful-Lime-Base-Coat/">more</a>]]></summary>
    <published>2016-06-02T10:07:00.000-04:00</published>
    <updated>2016-06-02T10:07:00.000-04:00</updated>
    <link rel="alternate" href="https://www.oldtownhome.com/2016/6/2/Plaster-Restoration-Next-Steps-Part-2-Master-of-Plasters-Beautiful-Lime-Base-Coat/" />
    <author>
      <name>Alex</name>
    </author>
    <content type="html"><![CDATA[<p>Lime based plaster is sort of the holy grail of plaster restoration, so why is it so hard to find a suitable plaster product? Apparently you just need to know where to look. </p>
<p><em>Before we get started, this is one of a series of blog posts about Master of Plaster's Lime Restoration Plaster. Be sure to check out the rest in the series for our progress and more of our thoughts on the product.</em></p>
<ul>
    <li><a href="http://www.oldtownhome.com/2016/5/26/Plaster-Restoration-Next-Steps-Part-1-Base-Coat-with-StructoLite/"><em>Plaster Restoration Next Steps Part 1: Base Coat with Structo-Lite</em></a></li>
    <li><a href="http://www.oldtownhome.com/2016/6/2/Plaster-Restoration-Next-Steps-Part-2-Master-of-Plasters-Beautiful-Lime-Base-Coat/"><em>Plaster Restoration Next Steps Part 2: Master of Plaster's Beautiful Lime Base Coat</em></a></li>
    <li><a href="http://www.oldtownhome.com/2016/6/24/Plaster-Restoration-Part-3-Master-of-Plaster-Finish-Coat-with-No-Sanding/"><em>Plaster Restoration Part 3: Master of Plaster Finish Coat with No Sanding!</em></a></li>
</ul>
<p>Last week we shared <a href="http://www.oldtownhome.com/2016/5/26/Plaster-Restoration-Next-Steps-Part-1-Base-Coat-with-StructoLite/">part 1 of our two part post on our plaster repair project.</a> It involved using Structo-Lite as the base coat to even out irregularities around the room. We also embedded fiberglass screen in the plaster to act as an isolation membrane of sorts, which will help prevent future cracks. And we also covered the use of Plaster Weld, which helped us apply the Structo-Lite plaster to new drywall patches. Whew...that was a lot of work to get that first coat on. </p>
<p>
</p>
<div class="MediaContainer PhotoContainer"><a href="https://farm2.staticflickr.com/1459/25932126053_d43960e34f_z.jpg" rel="PhotoPopup" popupheight="480" popupwidth="640"><img alt="" src="https://farm2.staticflickr.com/1459/25932126053_d43960e34f.jpg" width="500" height="375" style="border-width: 0px; border-style: solid;" /></a></div>
<p>After the first base coat was wrapped up we turned our focus to the second coat, and that's where the real lime based plaster work started. But before I get ahead of myself, let me get you caught up on the experience I already had working with Master of Plaster. </p>
<p>We began working with the proper lime based restoration plaster product just before Wendy's hip surgery in January. The first five gallon bucket on the first wall seemed to go really well, except we had a few areas where the mica in the plaster seemed to be pulling with the trowel, leaving deep gouges and a very irregular surface.</p>
<p>
</p>
<div class="MediaContainer PhotoContainer"><a href="https://farm2.staticflickr.com/1696/23536586334_88e566bb05_z.jpg" rel="PhotoPopup" popupheight="640" popupwidth="480"><img alt="" src="https://farm2.staticflickr.com/1696/23536586334_88e566bb05.jpg" width="375" height="500" style="border-width: 0px; border-style: solid;" /></a></div>
<p>Do you see what I'm talking about? I know it might be a little hard to be quite as ridiculously obsessive about the results as I am when looking at a photo, but I felt like it should be smooth, not full of pits.</p>
<p>
</p>
<div class="MediaContainer PhotoContainer"><a href="https://farm2.staticflickr.com/1653/23869163780_f08feaaae0_z.jpg" rel="PhotoPopup" popupheight="640" popupwidth="480"><img alt="" src="https://farm2.staticflickr.com/1653/23869163780_f08feaaae0.jpg" width="375" height="500" style="border-width: 0px; border-style: solid;" /></a></div>
<p>This was our first rodeo with the plaster, and only our base coat, so I wasn't sure if this was correct or not. Knowing the pros at the small, family owned company were there to help, we shared our progress with the experts at Master of Plaster to see if this was normal or not. Their advice was amazingly helpful and they had me on the right track almost immediately.</p>
<p>As it turns out my experience with joint compound was undermining my work with this more traditional plaster, and I was making it harder than it should be (which is sometimes the thing I do best). First of all, I was being a little too stingy with the plaster while I was applying it to the walls. I was so worried I'd end up using too much and not have enough to do the whole room that I was using way too little. Couple that with using too hard of an angle on the trowel, trying not to touch it after it was applied (like you do with joint compound), trying to use smoothing tools that are really only meant to overcome joint compound's inherent workability issues, and you have a recipe for an imperfect finish.</p>
<p>The guidance from the experts outlined the steps I'd need to take to rectify the situation:</p>
<p>
</p>
<ul>
    <li>Use more plaster in thicker coats</li>
    <li>After applying the plaster, let it set up a little, then use the spray bottle to mist the plaster with water and continue to work and smooth it with a very low trowel angle</li>
    <li>Keep working the plaster with the trowel and water before it fully sets until we're happy with the results.</li>
</ul>
<p>This advice was spot on. It allowed me to overcome the limitations my familiarity with joint compound had imposed on our project and gave me the necessary confidence to correct any issues I was experiencing.</p>
<p>In addition to the sage advice from the pros, I also did a lot of watching of their YouTube demo videos. <strong>PRICELESS!!!</strong></p>
<p><strong>
</strong></p>
<div class="MediaContainer VideoEmbed"><iframe width="560" height="349" src="https://www.youtube.com/embed/NdrLY4NdaMo?wmode=transparent&amp;hd=1" frameborder="0" allowfullscreen="true"></iframe></div>
<strong>
</strong>
<p>Armed with the knowledge I certainly needed, I resumed my plastering with renewed gusto!</p>
<p>
</p>
<div class="MediaContainer PhotoContainer"><a href="https://farm2.staticflickr.com/1557/26509026956_63928b14c5_z.jpg" rel="PhotoPopup" popupheight="480" popupwidth="640"><img alt="" src="https://farm2.staticflickr.com/1557/26509026956_63928b14c5.jpg" width="500" height="375" style="border-width: 0px; border-style: solid;" /></a></div>
<p>The Master of Plaster, or MoP as it's often called, requires a good mixing before it can be used after it's sat for while. Over my seven 5 gallon buckets of the base coat, I got really good at fully mixing without slopping the material all over the place. </p>
<p>
</p>
<div class="MediaContainer PhotoContainer"><a href="https://farm8.staticflickr.com/7220/26253956233_96e02525be_z.jpg" rel="PhotoPopup" popupheight="480" popupwidth="640"><img alt="" src="https://farm8.staticflickr.com/7220/26253956233_96e02525be.jpg" width="500" height="375" style="border-width: 0px; border-style: solid;" /></a></div>
<p>The key in the mixing process lies in using the drill mixer attachment to first push down and "cut" the material into four quadrants, then begin mixing from the middle cross section about half way down in the bucket. This keeps it all contained and allows you to work towards the outside and bottom without spraying plaster and water all over the place. </p>
<p>Once mixed I was ready to start applying to the wall with my newfound knowledge. First, I decided to load less up on my trowel, as I kept having an issue with letting globs of the plaster drop off my trowel and onto the floor. My first go-round was starting to look like the Stay Puffed Marshmallow Man had exploded nearby. This time, putting less on the trowel, putting that on the wall, then immediately loading the trowel again proved far more effective in getting good coverage without much loss. </p>
<p>
</p>
<div class="MediaContainer PhotoContainer"><a href="https://farm8.staticflickr.com/7197/26764651592_6f506cabbe_z.jpg" rel="PhotoPopup" popupheight="480" popupwidth="640"><img alt="" src="https://farm8.staticflickr.com/7197/26764651592_6f506cabbe.jpg" width="500" height="375" style="border-width: 0px; border-style: solid;" /></a></div>
<p>There's a certain rhythm you have to get into when plastering. Scoop some plaster, place on trowel, trowel onto wall in a single movement, skim over to smooth a few times, repeat. And you can hear from this video, it's not a totally buttery smooth material. The base coat is far more gritty than smooth, and the grit gives you a surface to float on and make a uniform thickness coat of plaster.</p>
<p>
</p>
<div class="MediaContainer VideoEmbed"><iframe width="560" height="349" src="https://www.youtube.com/embed/ZMlbWPNa2hk?wmode=transparent&amp;hd=1" frameborder="0" allowfullscreen="true"></iframe></div>
<p>With this first application speed is the key. Ridges and grooves are okay, but a mostly smooth surface is desired. Corners and around molding takes longer, big open sections go faster. </p>
<p>
</p>
<div class="MediaContainer PhotoContainer"><a href="https://farm8.staticflickr.com/7528/27068787221_716f87e162_z.jpg" rel="PhotoPopup" popupheight="640" popupwidth="480"><img alt="" src="https://farm8.staticflickr.com/7528/27068787221_716f87e162.jpg" width="375" height="500" style="border-width: 0px; border-style: solid;" /></a></div>
<p>The point where the wall meets the ceiling is the trickiest since the plaster is very wet and wants to jump off of the trowel. Straight from trowel to wall always ends up with a giant plop-thud of the plaster hitting the floor. Instead I start by applying a little bit in an upwards motion to pack it onto the trowel, followed by quickly inverting the trowel and applying from top down. </p>
<p>Luckily, we're doing crown molding, so the ceiling corners aren't of much concern, but it would be very doable if it was something we'd need to address. </p>
<p>
</p>
<div class="MediaContainer PhotoContainer"><a href="https://farm8.staticflickr.com/7784/26811714202_7809f64eee_z.jpg" rel="PhotoPopup" popupheight="480" popupwidth="640"><img alt="" src="https://farm8.staticflickr.com/7784/26811714202_7809f64eee.jpg" width="500" height="375" style="border-width: 0px; border-style: solid;" /></a></div>
<p>As I worked ahead on a large wall section I'd keep an eye on how long it has been since I started the section. The key here is letting the material set up some and then circling back to smooth and take out the irregularities. </p>
<p>After about 20 minutes or so I'd get to a stopping point on the wall where I was working and head back to where I started, trowel in hand. This step is the biggest key to working with MoP. After it's started to set up you can work any perfections out with a little water from the spray bottle and a few passes with the trowel.</p>
<p>
</p>
<div class="MediaContainer PhotoContainer"><a href="https://farm2.staticflickr.com/1504/26677092942_b4c313fb59_z.jpg" rel="PhotoPopup" popupheight="640" popupwidth="480"><img alt="" src="https://farm2.staticflickr.com/1504/26677092942_b4c313fb59.jpg" width="375" height="500" style="border-width: 0px; border-style: solid;" /></a></div>
<p>It only takes a few light spritzes and some first pressure with a rather flat trowel and any of the imperfections left from the first application tends to more or less fade away.</p>
<p>
</p>
<div class="MediaContainer PhotoContainer"><a href="https://farm8.staticflickr.com/7654/26253013464_45445ea36b_z.jpg" rel="PhotoPopup" popupheight="480" popupwidth="640"><img alt="" src="https://farm8.staticflickr.com/7654/26253013464_45445ea36b.jpg" width="500" height="375" style="border-width: 0px; border-style: solid;" /></a></div>
<p>One of the real keys to this process is working up the "cream" of the plaster. This rather wet and smooth byproduct of working the plaster is great for filling in the little gaps and voids that are left from the first pass.</p>
<p>
</p>
<div class="MediaContainer PhotoContainer"><a href="https://farm8.staticflickr.com/7369/26253013444_a9915bfcaa_z.jpg" rel="PhotoPopup" popupheight="640" popupwidth="480"><img alt="" src="https://farm8.staticflickr.com/7369/26253013444_a9915bfcaa.jpg" width="375" height="500" style="border-width: 0px; border-style: solid;" /></a></div>
<p>After working the partially cured plaster for a while, it slowly transforms into an almost perfectly smooth surface with a little bit of coarse tooth to it. This tooth is there to allow either for a slightly rough finish, or as something for the smooth finish coat to grab onto. </p>
<p>
</p>
<div class="MediaContainer PhotoContainer"><a href="https://farm8.staticflickr.com/7109/26529864684_63acb8d06e_z.jpg" rel="PhotoPopup" popupheight="480" popupwidth="640"><img alt="" src="https://farm8.staticflickr.com/7109/26529864684_63acb8d06e.jpg" width="500" height="375" style="border-width: 0px; border-style: solid;" /></a></div>
<p>Our whole room took about 38 gallons of base coat total to make up the 2nd coat of plaster. You can certainly tell where I started vs where I finished because the surface ended up looking so much better as I got the hang of working with MoP. I also ended up going back over that first wall I did back in January in order to resolve the problems I caused before. It was as easy as applying a single thin coat over that section of wall.</p>
<p>
</p>
<div class="MediaContainer PhotoContainer"><a href="https://farm8.staticflickr.com/7082/26533201723_fac1c986e9_z.jpg" rel="PhotoPopup" popupheight="640" popupwidth="480"><img alt="" src="https://farm8.staticflickr.com/7082/26533201723_fac1c986e9.jpg" width="375" height="500" style="border-width: 0px; border-style: solid;" /></a></div>
<p>Now that we've got the 2nd coat applied throughout the room, I'm looking forward to working with the finish coat to give this room the beautiful and smooth set of plaster walls it's always deserved. I'm downright giddy about our progress, as it means we're a big step closer to being able to actually use our living room!&nbsp;</p>
<p>During this time, Wendy has started on the room design and we've been slowly purchasing new/collecting second hand furniture and accessories for the space. &nbsp;</p>
<p>
</p>
<div class="MediaContainer PhotoContainer"><a href="https://farm4.staticflickr.com/3770/18273807134_7b624e7689_z.jpg" rel="PhotoPopup" popupheight="480" popupwidth="640"><img alt="" src="https://farm4.staticflickr.com/3770/18273807134_7b624e7689.jpg" width="500" height="375" style="border-width: 0px; border-style: solid;" /></a></div>
<p>What will be the dining room has been serving as our temporary living room until the work is completed.&nbsp;</p>
<p>
</p>
<div class="MediaContainer PhotoContainer"><a href="https://farm8.staticflickr.com/7325/16560907392_b30ff6590d_z.jpg" rel="PhotoPopup" popupheight="427" popupwidth="640"><img alt="" src="https://farm8.staticflickr.com/7325/16560907392_b30ff6590d.jpg" width="500" height="333" style="border-width: 0px; border-style: solid;" /></a></div>
<p>It's a "temporary" (okay, so temporary means more than a year in our tortoise speed style of renovating) set up that has worked well to date, but it's going to be so great when we can spread out in the new living room...and not have to stare at a partially stripped fruit wallpaper border.</p>
<p><em>This blog post and project was done in partnership with Master of Plaster. Master of Plaster supplied the base and finish coat plaster but all experiences and opinions of the restoration plaster product are our own. For more details on Master of Plaster, and for information on how to purchase, please visit the <a href="http://www.masterofplaster.com/" target="_blank">Master of Plaster website</a>.</em></p><p><a href="https://www.oldtownhome.com/2016/6/2/Plaster-Restoration-Next-Steps-Part-2-Master-of-Plasters-Beautiful-Lime-Base-Coat/">Read Full Post</a></p>]]></content>
    <category term="2nd House Living Room" />
    <category term="Header Image" />
    <category term="Master of Plaster" />
    <category term="Plaster" />
    <category term="Plaster Repair" />
    <category term="Plaster Repair Series" />
    <category term="Water House" />
    <PostImage>https://c2.staticflickr.com/8/7418/27311076712_a90faa2651.jpg</PostImage>
    <media:thumbnail url="https://c2.staticflickr.com/8/7418/27311076712_a90faa2651_t.jpg" />
    <ExtensionElements>
      <Item>PostImage</Item>
      <Item>media:thumbnail</Item>
    </ExtensionElements>
  </entry>
  <entry>
    <guid>e116d173-1bd6-4548-92a3-869d43604e62</guid>
    <id>https://www.oldtownhome.com/2016/5/26/Plaster-Restoration-Next-Steps-Part-1-Base-Coat-with-StructoLite/</id>
    <title>Plaster Restoration Next Steps Part 1: Base Coat with StructoLite</title>
    <summary type="html"><![CDATA[<p>Back in January we shared the first steps we were taking to properly restore our original plaster walls. Today we have part one (of a two part) update on our progress. </p><p><em>Before we get started, this is one of a series of blog posts about Master of Plaster's Lime Restoration Plaster. Be sure to check out the rest in the series for our progress and more of our thoughts on the product.</em></p><p>In true Alex form, this project has stretched on and on, taking far longer than any reasonable project timeline should. I spent the lull between activity doing what I do best, obsessing about the work we were doing and how to make the end result the best it could be while essentially paralyzing myself from making headway. But as we're finally nearing the conclusion, I'm extremely excited to share some major advances in taking our walls from damaged and dingy...</p><p>
</p><div class="MediaContainer PhotoContainer"><a href="https://farm6.staticflickr.com/5692/22079949153_5d5ecf4b70_z.jpg" rel="PhotoPopup" popupheight="480" popupwidth="640"><img alt="" src="https://farm6.staticflickr.com/5692/22079949153_5d5ecf4b70.jpg" width="500" height="375" style="border-width: 0px; border-style: solid;"></a></div><p>...to crisp and limie.</p><p>
</p> <a href="https://www.oldtownhome.com/2016/5/26/Plaster-Restoration-Next-Steps-Part-1-Base-Coat-with-StructoLite/">more</a>]]></summary>
    <published>2016-05-26T08:40:00.000-04:00</published>
    <updated>2016-05-26T08:40:00.000-04:00</updated>
    <link rel="alternate" href="https://www.oldtownhome.com/2016/5/26/Plaster-Restoration-Next-Steps-Part-1-Base-Coat-with-StructoLite/" />
    <author>
      <name>Alex</name>
    </author>
    <content type="html"><![CDATA[<p>Back in January we shared the first steps we were taking to properly restore our original plaster walls. Today we have part one (of a two part) update on our progress. </p>
<p><em>Before we get started, this is one of a series of blog posts about Master of Plaster's Lime Restoration Plaster. Be sure to check out the rest in the series for our progress and more of our thoughts on the product.</em></p>
<ul>
    <li><a href="http://www.oldtownhome.com/2016/5/26/Plaster-Restoration-Next-Steps-Part-1-Base-Coat-with-StructoLite/"><em>Plaster Restoration Next Steps Part 1: Base Coat with Structo-Lite</em></a></li>
    <li><a href="http://www.oldtownhome.com/2016/6/2/Plaster-Restoration-Next-Steps-Part-2-Master-of-Plasters-Beautiful-Lime-Base-Coat/"><em>Plaster Restoration Next Steps Part 2: Master of Plaster's Beautiful Lime Base Coat</em></a></li>
    <li><a href="http://www.oldtownhome.com/2016/6/24/Plaster-Restoration-Part-3-Master-of-Plaster-Finish-Coat-with-No-Sanding/"><em>Plaster Restoration Part 3: Master of Plaster Finish Coat with No Sanding!</em></a></li>
</ul>
<p>In true Alex form, this project has stretched on and on, taking far longer than any reasonable project timeline should. I spent the lull between activity doing what I do best, obsessing about the work we were doing and how to make the end result the best it could be while essentially paralyzing myself from making headway. But as we're finally nearing the conclusion, I'm extremely excited to share some major advances in taking our walls from damaged and dingy...</p>
<p>
</p>
<div class="MediaContainer PhotoContainer"><a href="https://farm6.staticflickr.com/5692/22079949153_5d5ecf4b70_z.jpg" rel="PhotoPopup" popupheight="480" popupwidth="640"><img alt="" src="https://farm6.staticflickr.com/5692/22079949153_5d5ecf4b70.jpg" width="500" height="375" style="border-width: 0px; border-style: solid;" /></a></div>
<p>...to crisp and limie.</p>
<p>
</p>
<div class="MediaContainer PhotoContainer"><a href="https://farm8.staticflickr.com/7569/26529865614_1e1d0b09d4_z.jpg" rel="PhotoPopup" popupheight="480" popupwidth="640"><img alt="" src="https://farm8.staticflickr.com/7569/26529865614_1e1d0b09d4.jpg" width="500" height="375" style="border-width: 0px; border-style: solid;" /></a></div>
<p>This whole endeavor started last year when we realized many of the walls in our historic weekend home were actually drywall applied over top of original rough finish plaster. </p>
<p>
</p>
<div class="MediaContainer PhotoContainer"><a href="https://farm8.staticflickr.com/7461/15705441503_01f451de78_z.jpg" rel="PhotoPopup" popupheight="640" popupwidth="480"><img alt="" src="https://farm8.staticflickr.com/7461/15705441503_01f451de78.jpg" width="375" height="500" style="border-width: 0px; border-style: solid;" /></a></div>
<p>The project we're talking about involves the living room, but this same drywall over plaster debacle exists in the kitchen, dining room, master bathroom, and the back rooms of the house. This must all be resolved.</p>
<p>We decided to take on this rather significant endeavor because;</p>
<p>
</p>
<ul>
    <li>We both love the look and slight irregularity of traditional plaster,</li>
    <li>We noticed how the 1/2" drywall layer took depth away from original moldings,</li>
    <li>We could see how sloppily finished the bottom of the drywall was once we removed the baseboard radiators,</li>
    <li>And we wanted to restore these original plaster walls as an historic element of the house if at all possible.</li>
</ul>
<p>In the past, when tackling similar skim coating and plaster repair projects, I've used copious amounts of joint compound and hours of sanding to achieve the "plaster look," but always knew there had to be a more traditional and historically appropriate choice. After all, plaster doesn't require sanding the way gypsum based joint compound does.</p>
<p>
</p>
<div class="MediaContainer PhotoContainer"><a href="https://farm8.staticflickr.com/7436/10716679393_b7c92ae651_z.jpg" rel="PhotoPopup" popupheight="480" popupwidth="640"><img alt="" src="https://farm8.staticflickr.com/7436/10716679393_b7c92ae651.jpg" width="500" height="375" style="border-width: 0px; border-style: solid;" /></a></div>
<p>One of the major issues with our existing wall is the fact that it never had a finish coat of plaster applied. It has always been covered with wallpaper, so once we removed what remained of the wallpaper, we were left with a very irregular surface. Before we could apply the first coat of Master of Plaster, I wanted to smooth many of the major problem areas and make everything a little smoother. For this process we'll ultimately do a three coat plaster approach.</p>
<p>The coats are;</p>
<p>
</p>
<ul>
    <li>Base coat with fiberglass mesh embedded</li>
    <li>Base coat to completely cover mesh and give us flat surface</li>
    <li>Finish coat to give a smooth and ready for paint surface</li>
</ul>
<p>Based on this we wouldn't have enough Master of Plaster to do the whole room with two base coats, so we had to make a little change with the first coat. To accomplish this I decided to use StructoLite, a modern mix type base coat plaster. Within this first coat I would embed my fiberglass mesh (window screen) to bridge any cracks and gaps that had formed over the years. </p>
<p>
</p>
<div class="MediaContainer PhotoContainer"><a href="https://farm2.staticflickr.com/1673/23711241513_5c9b05b7c4_z.jpg" rel="PhotoPopup" popupheight="640" popupwidth="480"><img alt="" src="https://farm2.staticflickr.com/1673/23711241513_5c9b05b7c4.jpg" width="375" height="500" style="border-width: 0px; border-style: solid;" /></a></div>
<p>StructoLite is much different than working with joint compound. It's a base coat plaster and is very coarse. It's also recommended by Master of Plaster to fill significant gaps and voids before applying the lime plaster. When you apply StructoLite to the wall the trowel feels like it sort of floats across the surface in the gritty and rough way. </p>
<p>
</p>
<div class="MediaContainer PhotoContainer"><a href="https://farm2.staticflickr.com/1539/23711239723_c45cd62242_z.jpg" rel="PhotoPopup" popupheight="480" popupwidth="640"><img alt="" src="https://farm2.staticflickr.com/1539/23711239723_c45cd62242.jpg" width="500" height="375" style="border-width: 0px; border-style: solid;" /></a></div>
<p>One thing to note about Master of Plaster is that it sticks to anything equally well. However, StructoLite does not. It sticks to plaster without issue, but it has an issue with drywall. This has to do with the drywall paper sucking the water out of the plaster too quickly as it cures. This can cause cracking. Since we have a few large drywall patches where the plaster has been removed over the years, like above the French doors or front door, we had to prepare the area to accept a base coat of StructoLite.</p>
<p>
</p>
<div class="MediaContainer PhotoContainer"><a href="https://farm2.staticflickr.com/1628/24461566845_50d4942ccd_z.jpg" rel="PhotoPopup" popupheight="427" popupwidth="640"><img alt="" src="https://farm2.staticflickr.com/1628/24461566845_50d4942ccd.jpg" width="500" height="333" style="border-width: 0px; border-style: solid;" /></a></div>
<div class="ToolItem"><iframe style="width: 120px; height: 240px;" marginwidth="0" marginheight="0" scrolling="no" frameborder="0" src="//ws-na.amazon-adsystem.com/widgets/q?ServiceVersion=20070822&amp;OneJS=1&amp;Operation=GetAdHtml&amp;MarketPlace=US&amp;source=ac&amp;ref=qf_sp_asin_til&amp;ad_type=product_link&amp;tracking_id=oltoho-20&amp;marketplace=amazon&amp;region=US&amp;placement=B00AP59BM8&amp;asins=B00AP59BM8&amp;linkId=CCH5YE53NRRYIJDO&amp;show_border=false&amp;link_opens_in_new_window=true&amp;price_color=333333&amp;title_color=0066C0&amp;bg_color=FAFAF8">
</iframe>
</div>
<p>This is why we picked up a gallon of Plaster Weld. </p>
<p>This Pepto Bismol looking stuff gets applied to the paper of regular old drywall and allows plaster to bind to the drywall without the paper of the drywall sucking up all of the water and causing cracking. It's similar to the stuff that comes pre-coated when you buy Blueboard drywall.</p>
<p>It gets applied to the drywall with a standard paint roller and must be allowed to dry before applying the plaster. But once it dries, you should apply the plaster within the next nine or 10 days or it can begin to lose its effectiveness.</p>
<p>Once the PlasterWeld was applied and allowed to dry, we could move forward with the base coat around the whole room.</p>
<p>
</p>
<div class="MediaContainer PhotoContainer"><a href="https://farm2.staticflickr.com/1467/25932007843_abfd8afa61_z.jpg" rel="PhotoPopup" popupheight="480" popupwidth="640"><img alt="" src="https://farm2.staticflickr.com/1467/25932007843_abfd8afa61.jpg" width="500" height="375" style="border-width: 0px; border-style: solid;" /></a></div>
<p>In the corners I wrapped the mesh about two inches onto the next wall to hopefully prevent future corner cracks, a typically very vulnerable location for plaster.</p>
<p>
</p>
<div class="MediaContainer PhotoContainer"><a href="https://farm2.staticflickr.com/1558/26442649472_412dca80da_z.jpg" rel="PhotoPopup" popupheight="480" popupwidth="640"><img alt="" src="https://farm2.staticflickr.com/1558/26442649472_412dca80da.jpg" width="500" height="375" style="border-width: 0px; border-style: solid;" /></a></div>
<p>As always, I'd apply the plaster, hang my mesh, then make a drawing of a cat to make sure the screen would stay in place until I could really embed it on the wall.</p>
<p>
</p>
<div class="MediaContainer PhotoContainer"><a href="https://farm2.staticflickr.com/1447/26262085170_4782a1961b_z.jpg" rel="PhotoPopup" popupheight="640" popupwidth="480"><img alt="" src="https://farm2.staticflickr.com/1447/26262085170_4782a1961b.jpg" width="375" height="500" style="border-width: 0px; border-style: solid;" /></a></div>
<p>If the plaster was setting up a little too quickly and I had ridges I wanted to remove, I'd just give it a quick spritz with the spray bottle and trowel back over it.</p>
<p>
</p>
<div class="MediaContainer PhotoContainer"><a href="https://farm2.staticflickr.com/1626/25930014004_5c6a53400e_z.jpg" rel="PhotoPopup" popupheight="640" popupwidth="480"><img alt="" src="https://farm2.staticflickr.com/1626/25930014004_5c6a53400e.jpg" width="375" height="500" style="border-width: 0px; border-style: solid;" /></a></div>
<p>I methodically worked my way around the room until the whole place was covered in gray.</p>
<p>
</p>
<div class="MediaContainer PhotoContainer"><a href="https://farm2.staticflickr.com/1669/25932057203_b984a8389b_z.jpg" rel="PhotoPopup" popupheight="480" popupwidth="640"><img alt="" src="https://farm2.staticflickr.com/1669/25932057203_b984a8389b.jpg" width="500" height="375" style="border-width: 0px; border-style: solid;" /></a></div>
<p>The end result of this first coat of plaster was an even and consistent looking room that no longer had streaks of blue and fractured old plaster.</p>
<p>
</p>
<div class="MediaContainer PhotoContainer"><a href="https://farm2.staticflickr.com/1697/26262136600_3a592ab033_z.jpg" rel="PhotoPopup" popupheight="171" popupwidth="640"><img alt="" src="https://farm2.staticflickr.com/1697/26262136600_3a592ab033.jpg" width="500" height="134" style="border-width: 0px; border-style: solid;" /></a></div>
<p>Wendy said she really liked this base coat of plaster because it gave her a sense of what the room would look like if we ended up painting the room gray.</p>
<p>
</p>
<div class="MediaContainer PhotoContainer"><a href="https://farm2.staticflickr.com/1459/25932126053_d43960e34f_z.jpg" rel="PhotoPopup" popupheight="480" popupwidth="640"><img alt="" src="https://farm2.staticflickr.com/1459/25932126053_d43960e34f.jpg" width="500" height="375" style="border-width: 0px; border-style: solid;" /></a></div>
<p>Now that our base coat was applied and curing, we could begin focusing on applying the base and finish coats of Master of Plaster to complete our room's plaster restoration. I'm going to split that out into the part 2 continuation blog post since it will have a whole lot of information.</p>
<p>
</p>
<div class="MediaContainer PhotoContainer"><a href="https://farm2.staticflickr.com/1644/25930010544_4dd0c5a231_z.jpg" rel="PhotoPopup" popupheight="480" popupwidth="640"><img alt="" src="https://farm2.staticflickr.com/1644/25930010544_4dd0c5a231.jpg" width="500" height="375" style="border-width: 0px; border-style: solid;" /></a></div>
<p>Have you ever worked with StructoLite when it comes to plaster restoration? Would love to hear your opinion on working with it and how it felt applying it to the wall. Stay tuned for Part 2 in our series coming soon when I'll share how much I'm absolutely enjoying my time working with the Master of Plaster system. But the bottom line is we're finally making some noticeable progress. It's easy to lose sight of this progress given how long this project has stretched on and on, but when looking back at our first weekend in the house, it's pretty amazing how far we've come.</p>
<p>
</p>
<div class="MediaContainer PhotoContainer"><a href="https://farm4.staticflickr.com/3950/15526716335_136949a31b_z.jpg" rel="PhotoPopup" popupheight="427" popupwidth="640"><img alt="" src="https://farm4.staticflickr.com/3950/15526716335_136949a31b.jpg" width="500" height="333" style="border-width: 0px; border-style: solid;" /></a></div>
<p>Once the plaster work is complete, we're moving on to installing baseboard and crown molding -- a true sign we're nearing the finish line.</p><p><a href="https://www.oldtownhome.com/2016/5/26/Plaster-Restoration-Next-Steps-Part-1-Base-Coat-with-StructoLite/">Read Full Post</a></p>]]></content>
    <category term="2nd House Living Room" />
    <category term="Header Image" />
    <category term="Plaster" />
    <category term="Plaster Repair" />
    <category term="Plaster Repair Series" />
    <category term="Water House" />
    <PostImage>https://c2.staticflickr.com/8/7459/27255965465_2f92957735.jpg</PostImage>
    <media:thumbnail url="https://c2.staticflickr.com/8/7459/27255965465_2f92957735_t.jpg" />
    <ExtensionElements>
      <Item>PostImage</Item>
      <Item>media:thumbnail</Item>
    </ExtensionElements>
  </entry>
</feed>