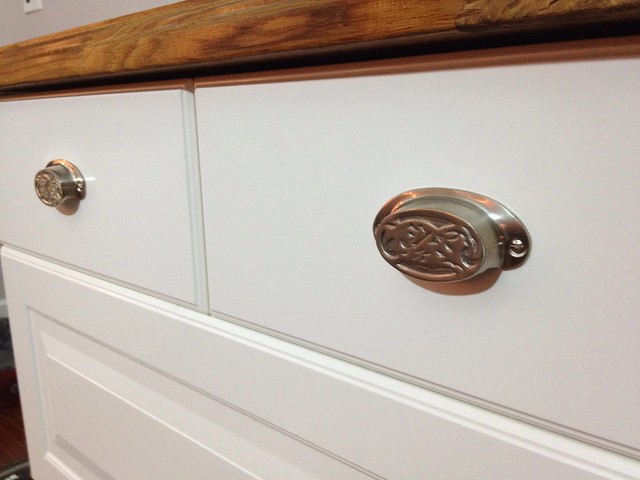
Over the years we've worked to install various old architectural salvage items in our home. From transom windows to doors and hinges to locks, using old materials in your renovation not only adds character you just can't get from new products, it can also make a renovation look appropriate in an old home, like it's always been that way.
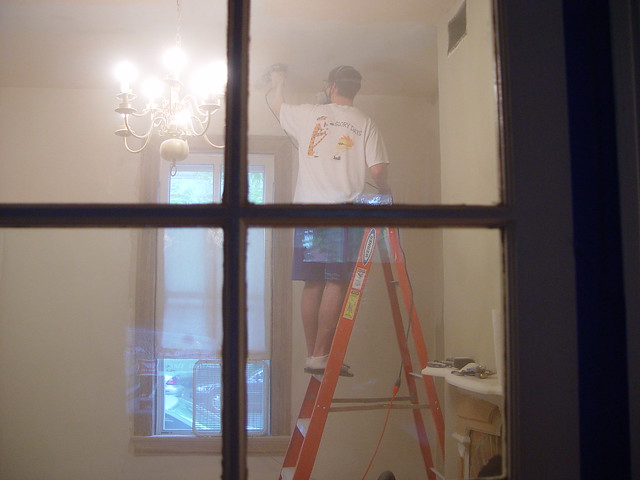
For example, our entry hall before and after, with reproduction mouldings, a salvaged leaded glass transom with antique hardware, and minor reconfiguration.
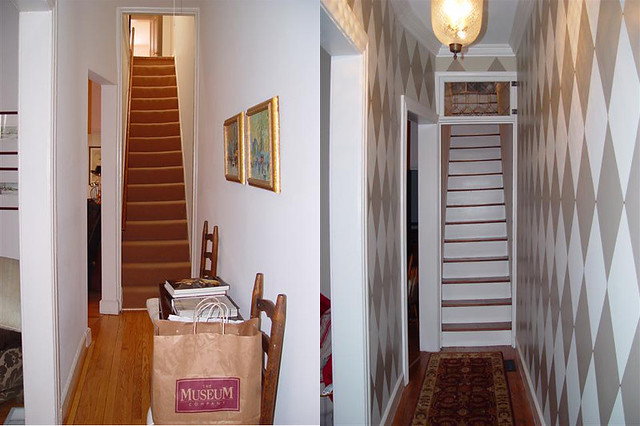
Before and After of our entry hallway with salvaged leaded glass transom
more]]>Over the years we've worked to install various old architectural salvage items in our home. From transom windows to doors and hinges to locks, using old materials in your renovation not only adds character you just can't get from new products, it can also make a renovation look appropriate in an old home, like it's always been that way.
For example, our entry hall before and after, with reproduction mouldings, a salvaged leaded glass transom with antique hardware, and minor reconfiguration.
Before and After of our entry hallway with salvaged leaded glass transom
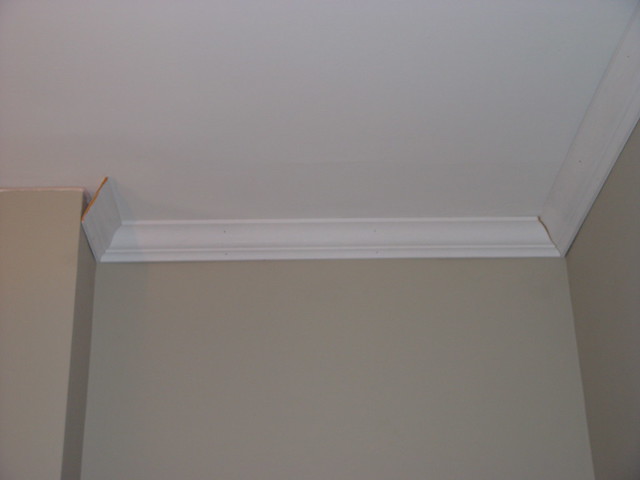
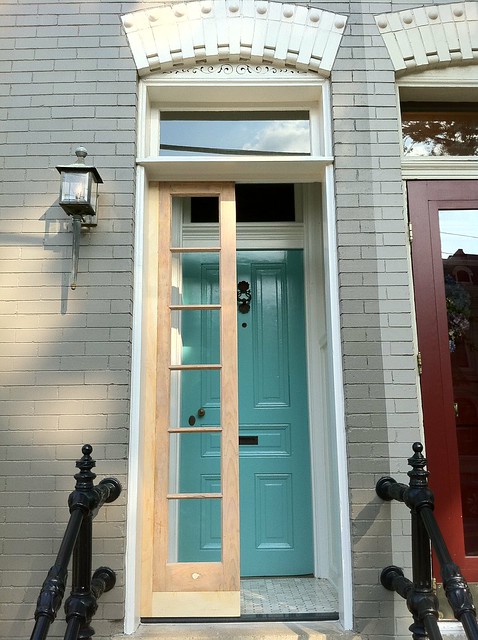
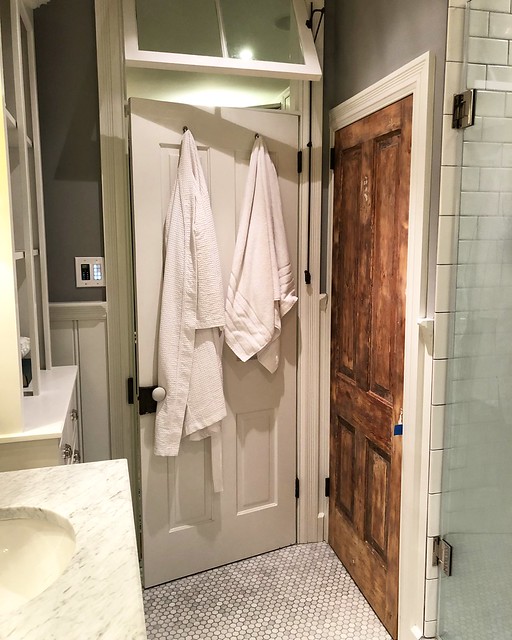
Or our master bathroom door with custom reproduction door jamb, salvaged door, custom reproduction transom window with wavy glass, and salvaged hinges, door lock, and transom lift mechanism.

But one of the most significant challenges we've faced in our home is the seemingly simple task of making an old salvaged door work in a jamb for which it wasn't built. However, we've accomplished this very job in scenarios where the door was too large, too small, out of square, or badly damaged. It wasn't without struggle, and we've gotten much better at it over the years. I'm sure there are tons of tips and tricks out there to make this process much easier, but the following is our process, advice, and useful guidance that has worked well for us in our experiences as we've honed our skills.
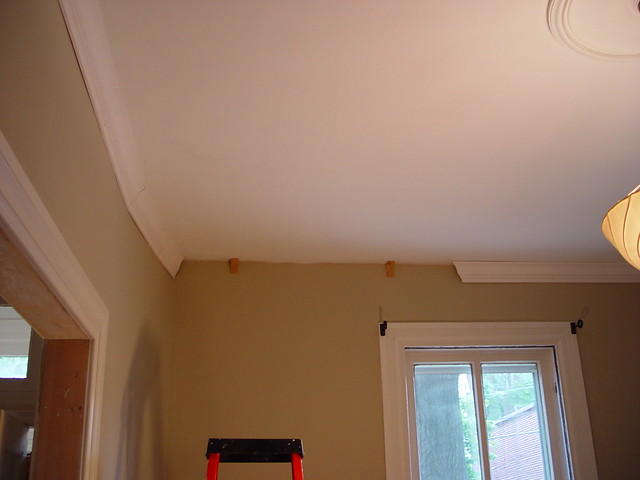
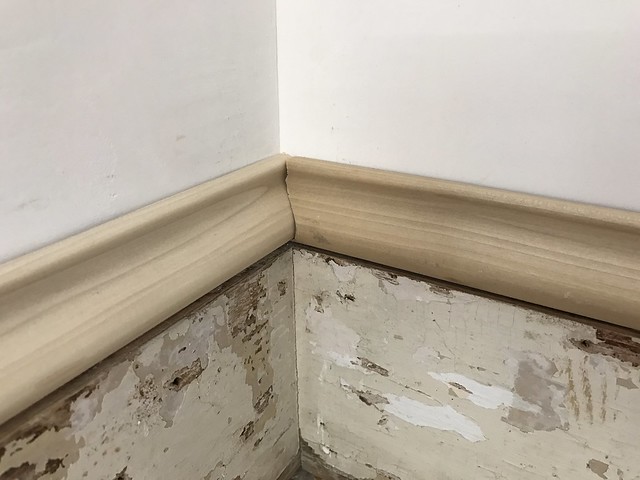
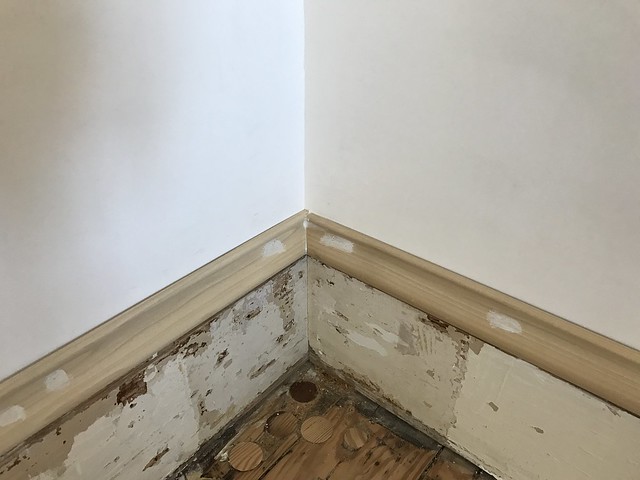
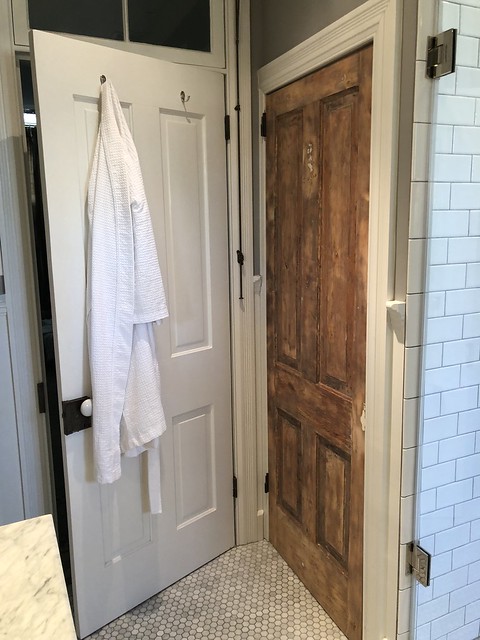
Our master bathroom has a small closet nestled between the doorway to the room and the shower. This closet is both extra storage and houses many of my clothes.

Its walls are made up of original pine flooring and it sports an antique oak dresser that's essentially built right into the opening. It's not coming out any time soon, but we've build the door jamb and casings so they can be removable in the event someone wants to take the dresser out without destroying it.

This tight space is also home to a pretty great plaster rhino that I tend to use as a hat rack of sorts.

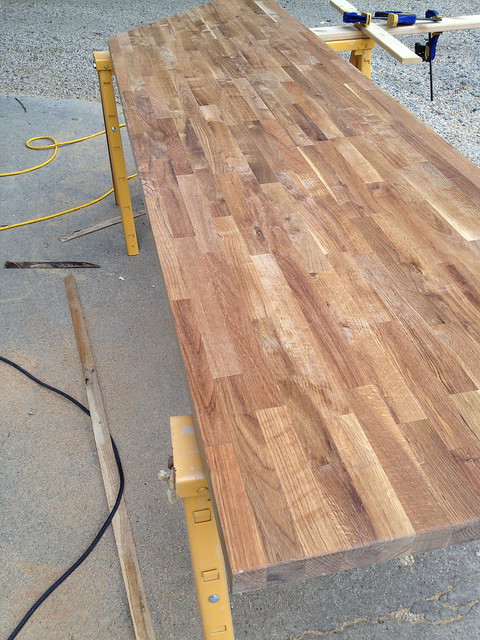
The door jamb in this closet is a custom jamb built from 4/5 poplar and meant to be a similar size and look to the original jambs in our 1886 house. This means that the opening is completely custom, which certainly makes mounting a door somewhat of a challenge.
One other wrinkle here is that I wanted the light in the closet to turn on when the door was opened, and off when it was closed. As a result we mounted a contact closure switch in the jamb to work in conjunction with the light switch on the wall.
Prerequisites
When I'm working to mount a salvaged door there are a few prerequisites I like to check before we get started.
Prereq 1 - Jamb
The jamb and door opening are critical when working with salvaged doors. The ideal scenario is to have an opening that is square, plumb, and level. Sometimes this is not possible, sometimes it is. Regardless, you need understand if the opening is out of square, has a wonky angle somewhere, or has some other issue to be aware of (like if the floor is going to be an obstruction as the door is opened). This will all impact how you ultimately trim your door to fit.

Once you have a good idea on the jamb, it's time to move on to the next item.
Prereq 2 - The Door
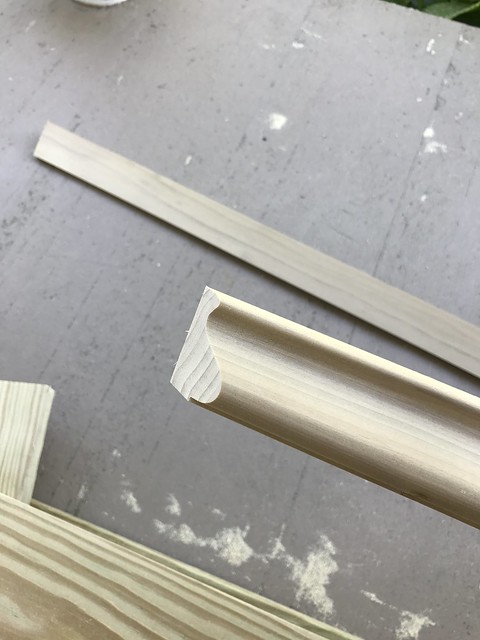
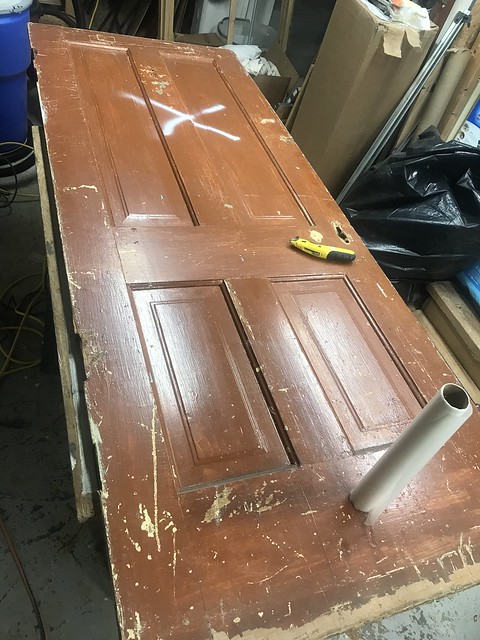
First, the door. Our primary goal is always to find a door with the right look and profiles to match the other doors or general style of our house. For us we have two styles of interior doors, both of which are four panel raised panel doors. One style has a single bevel on the panel and is for the bedrooms. The other is a double bevel panel and is primarily used for smaller rooms and closets. We were lucky enough several years ago to find a large set of doors that were nearly an identical match to our closet doors. We bought six of these doors many years ago (five were used for our bedroom closets) and one has been patiently waiting in our basement to eventually be our bathroom's closet door.
From this point forward I plan to only ever work with doors that will either fit the current opening, or are larger than the current opening. It's pretty easy to cut doors down to size, but it's a whole other thing to make them larger. We did this very thing on several of our interior doors as well as our new front door and French doors, and it was an undertaking that I'd like to avoid in the future.
The other thing that's important to consider about your door is warping. Quite often salvaged doors have some level of warp to them. In many scenarios, this is not a problem as it is minor and will be disguised by the door's opening. But if you're doing a double door (like our closet for example), and the two doors warp away from each other, the problem will be very noticeable and they'll never look like they are completely closed. You need to determine your tolerance for warping in your situation and take a square and straight edge with you to the salvage yard.
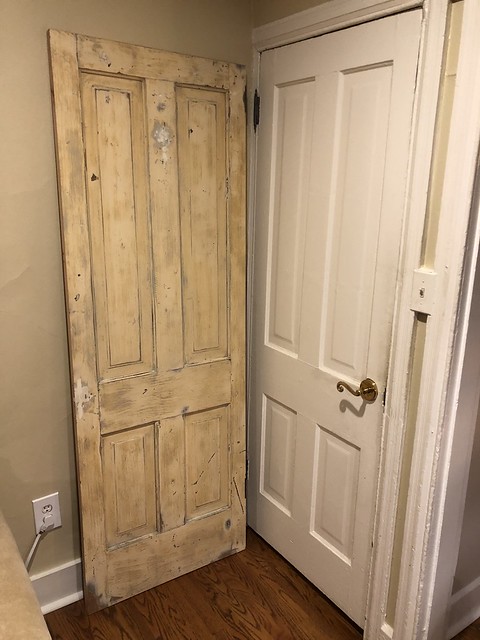
The door on the right is the final remaining original unstripped door with 1980s hardware in the house. The door on the left is our matched salvaged door.
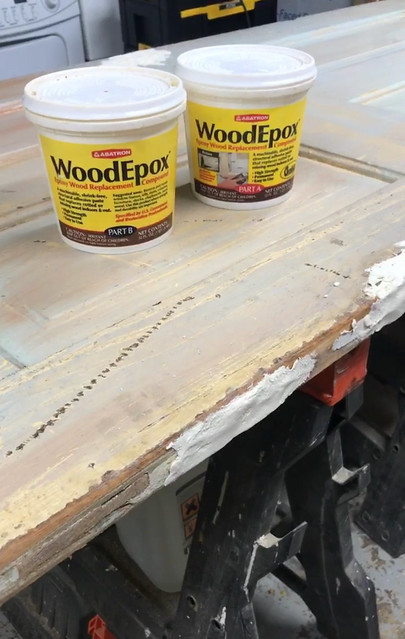
Once the door is selected, I like to start the process by doing any paint stripping and repair before I get to mounting it in its opening. It certainly means more work up front, but it helps ensure that the work you do to square and mount the door isn't impacted by any repairs you need to make later.
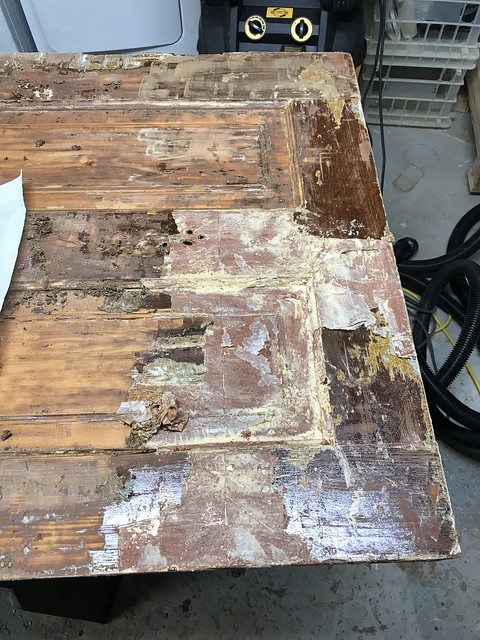
After stripping if the door is loose or has any missing parts or major issues, I'll re-glue, apply epoxy, and do my initial sanding to get everything ready for mounting. This includes filling any old hinge mortises with epoxy to give myself a clean slate to work from. I'd rather do this than try to deal with trying to make old hinge mortises match up in the door jamb. (But keep in mind, if you're trimming large pieces of the sides off, there's no need to epoxy the old hinge mortises since you'll just cut it all off. I've made this stupid move several times.)
When the door is all set and any epoxy is sanded, we're ready for the next item.
Prereq 3 - Hardware
You'll want to figure out the hardware you're using early in the process. Figuring out the hinges you want to use is the most important piece, but the lockset and anything else is important as well. We're using antique cast iron hinges and surface mount rim locks on all of our doors, so consistency has certainly helped us hone our process.

If you're doing your whole house, even over a long period of time, take some time up front to come up with the plan you want to follow for all of your house's hardware. While salvaged hardware may be a bit harder to source and work with, the end result of using only salvaged hardware is really the icing on the cake of an old house renovation.
But one thing you must do, please use plain old slot head screws. And where appropriate, antique those screws to look old, not all shiny and new.
Prereq 4 - Tools
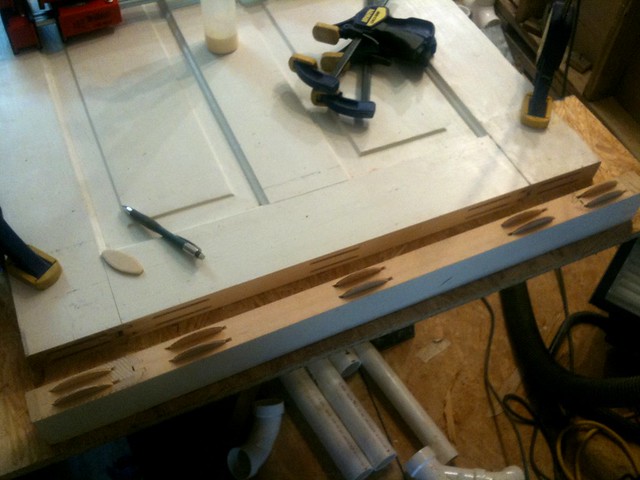
The following tools are the tools that we've found work best and are invaluable for this process, beyond the standards of tape measure, pencil, etc.
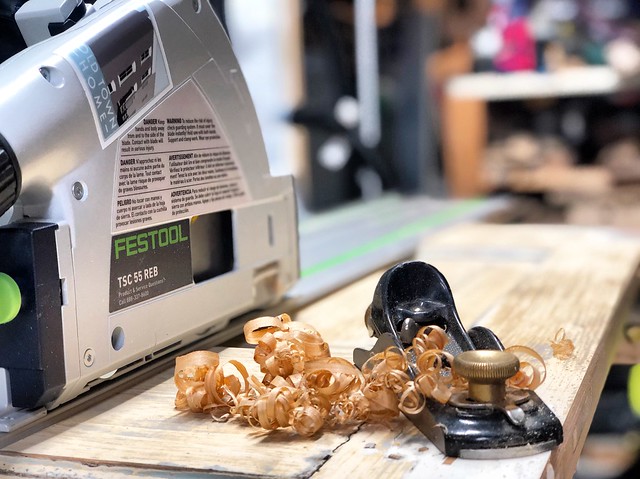
I'm also outlining the specific model of tool we're using for each.
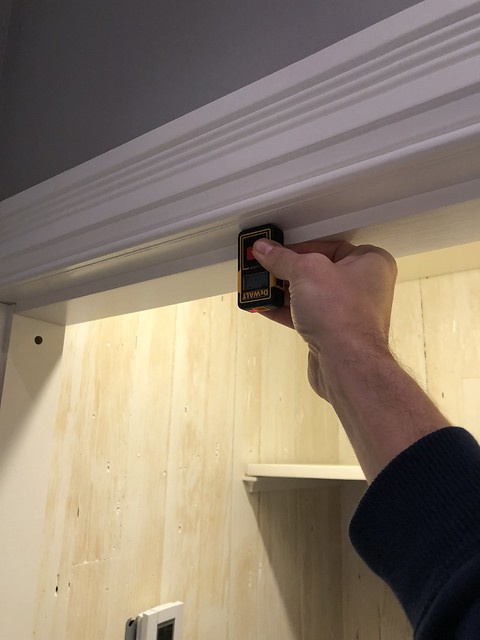
- Laser Distance Measurer - DeWALT Pocket Laser Distance Measurer
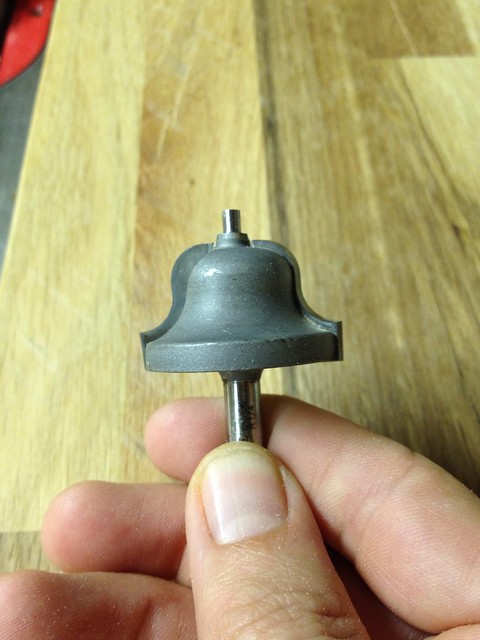
- Hinge Mortising Jig - Porter-Cable Hinge Template
- Router - Makita Cordless Compact Router
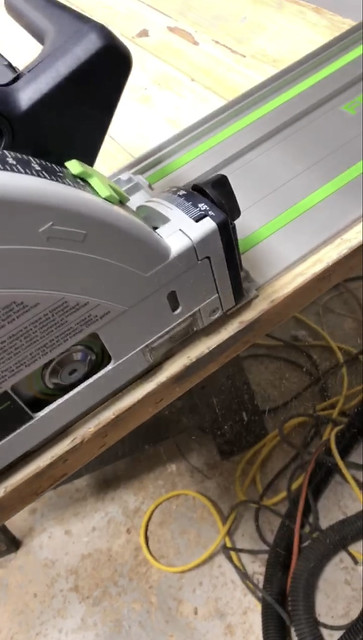
- Track Saw - Festool Cordless Track Saw
- Chisels - Stanley 750 Series Chisel Set
- Hand Plane - Stanley Low Angle Plane
Okay, lets get started!
Step 1 - Jamb Hinge Mortising
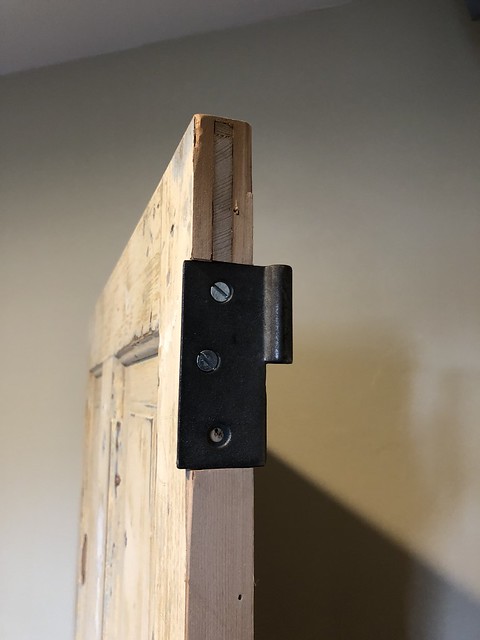
Once our door is ready to go I'm going to actually turn my attention to the hinge jamb mortising. In our case we are using 3-1/2"x3-1/2" antique cast iron lift off hinges for our doors throughout our second floor. We're using decorative salvaged removable pin hinges on the first floor, but these old lift-off hinges upstairs are great. They are moderately forgiving when it comes to alignment, can be mounted easily by one person, and have a great old look to them.
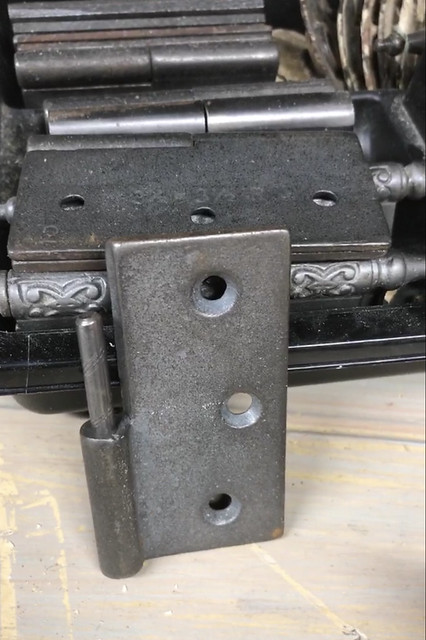
Since the door had its prior hinge mortises filled with epoxy, we can mount our hinges pretty much wherever we need them to sit in the jamb. To do this I simply held the hinges in place and gave myself some pencil marks where the hinge mortises need to sit.
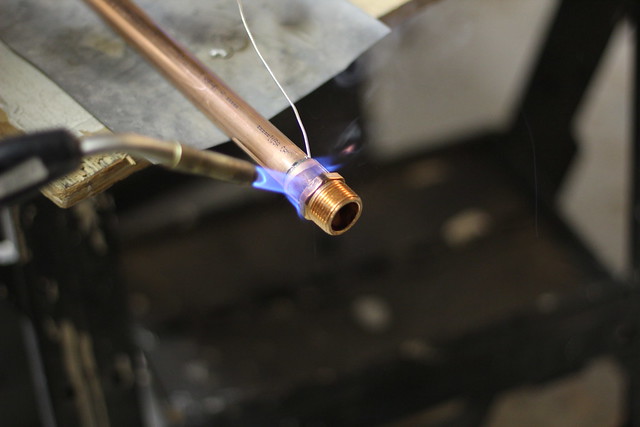
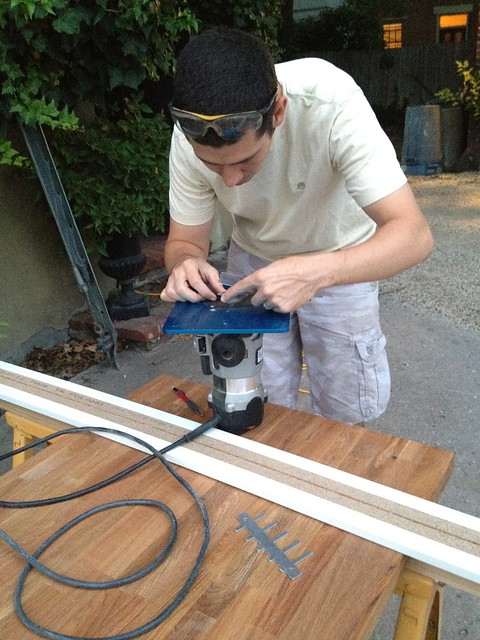
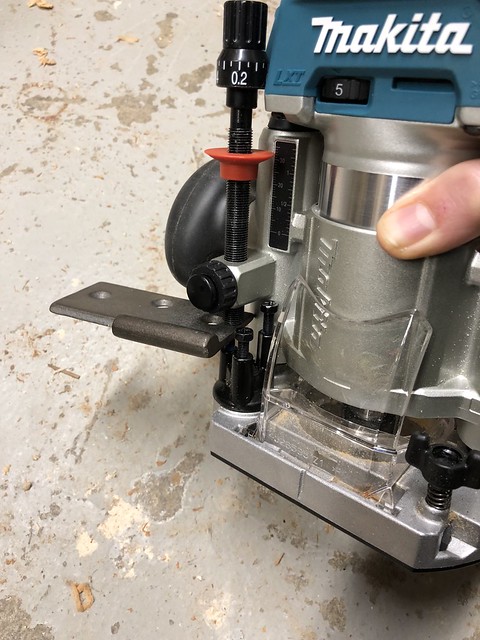
Using a standard mortising template and router with collared bit I cut out the mortises for the hinges. In this case we are doing this in a finished space, and are using the new Makita cordless router with the plunge base and dust extraction attachment. This really helped to keep the mess down on what is typically a pretty dusty process. The mortising template expects a modern jamb and door, so I've had to modify it a bit to work for our needs. I cut off the end then drove a few nails through the middle of it to hold it in place.

Setting the correct depth on the router is key here. I find using a plunge base tends to really help this situation. I can essentially zero out the setting so that the router bit is flush with the jamb, then I pull the stop on the plunge base up a little and actually use one side of the hinge to set a gap between the stop of the router and the base. Then, removing the hinge you can let the bit plunge all of the way down to the stop and you've got yourself a perfect depth. This is important with old hinges since they are always just a little variable on size. And on the lift-off hinges we're using, the thickness is tapered from the front to back, so we set our depth to by the midway point of the hinge.
If you're using old hinges (or any hinges) with square corners, you're going to need to make the rounded corners of your mortises square. There are several tools that promise to do this quickly and easily, but I find using a good and sharp chisel is all you really need. Mark the edges of the corner with the chisel, then begin working the material until it's a nice and flat corner. I also try to remove a little more material with the chisel in order to accommodate the slightly graduated thickness of the hinge.

A little sanding after the chisel and you've got yourself a nice flat hinge mortise.
After mortising the jamb I mount the jamb half of the hinges into the mortise and then move onto the next step.
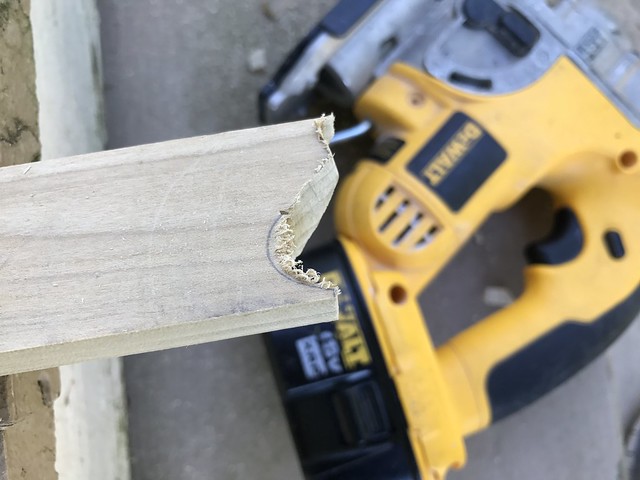
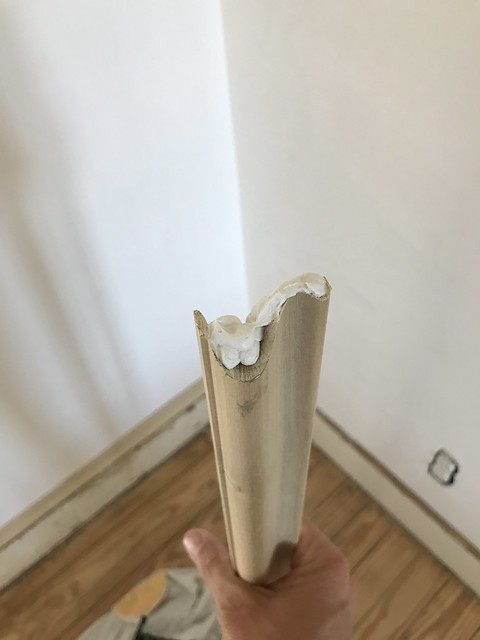
The tiny baseboard piece is just resting in place right now.
You might notice that our upper hinge in this door is very high. That's as a result of a mistake I made on the contact closure switch. I mounted the switch too high on the jamb and as a result the hinge had to be a little too high or WAY too low.
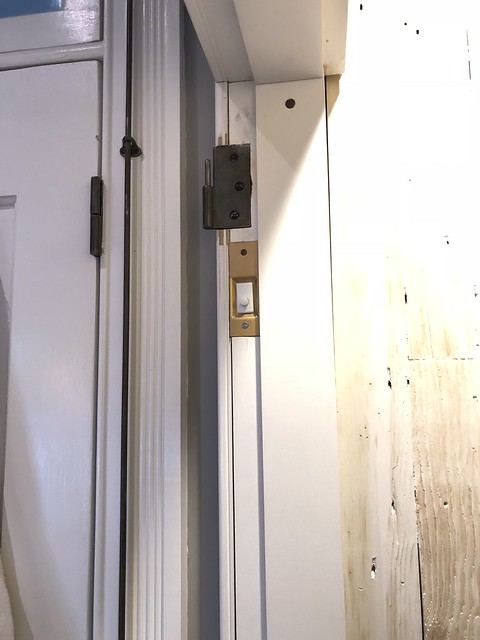
I went with a little too high. I also had a minor issue with the router bit and template, which caused it to jump slightly and took a little too much material from behind the upper hinge. I'll end up filling that with a little wood filler once everything is said and done.
Step 2 - Trimming the Door
With our hinges in place on the jamb we want to get the door fitting nice and tight in the opening. Please note, it will be way too tight to fit properly at this step, but it's always easy to take more off, much harder to add material back, so we want it to be slightly oversized.
My first step is to use a small laser measuring device to determine the height and width of the jamb opening at several different locations. This little DeWalt pocket laser distance measurer is perfect. It has a max range of 30', is USB chargeable, and is extremely accurate in my experience. I take measurements at three places across the top of the jamb, and at three places down the sides. The hope is that they are all the same and the opening is square. If it's close enough I can go onto the next step. But if something is seriously out of square and we'll need to transfer this over to the door, it may be easiest to make a simple template of the opening with some thin mdf and hot glue (think counter top template), and then use it to transfer the measurements over to your door.
With our measurements of the door jamb in hand, we need to begin trimming the door. I like to start with trimming the height of the door to be correct. Keep in mind that old doors are typically built with mortise and tenon joints. This means that the door is holding itself together, and you don't want to compromise that if you don't have to. In our case, I needed to take off enough material from the height that if I cut it all from the bottom, it could have compromised the door's structure. Rather than taking it all from the bottom, I opted to take some from the bottom and some from the top.

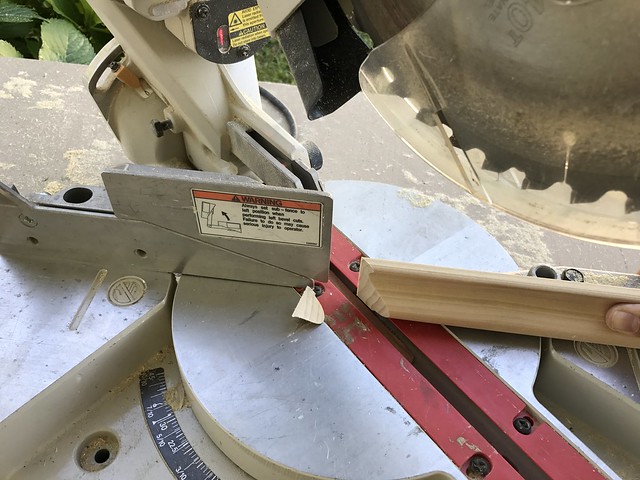
To do this I marked the cut line, dropped the track on the door, and zipped the bottom off with the track saw. A track saw makes ridiculously short work of trimming a door. I can't stress enough how great a track saw is for this purpose, and if you don't have one, you should definitely consider adding it to your tool collection. Otherwise I'd be clamping straight edges based on offset measurements, then taping to prevent splintering and using our circular saw. While the Festool is an expensive model, Makita and DeWalt
both have cordless track saws that are far less expensive and work just as well. Best of all, these saws all work universally on the various other brand tracks with minor adjustments. So you can mix and match based on best deal.
After cutting the top and bottom I move onto trimming the hinge side of the door. It's important to determine the total amount you need to take off of the door's width, and then trim from each side accordingly to make sure the trimmed door is balanced with equal sized stiles on either side. Assuming a square door opening, I make sure the amount I'm trimming from the hinges side of the door is square to the cut on the top and bottom of the door. Again, I measure everything, make my marks, and then drop the track on the door and cut.
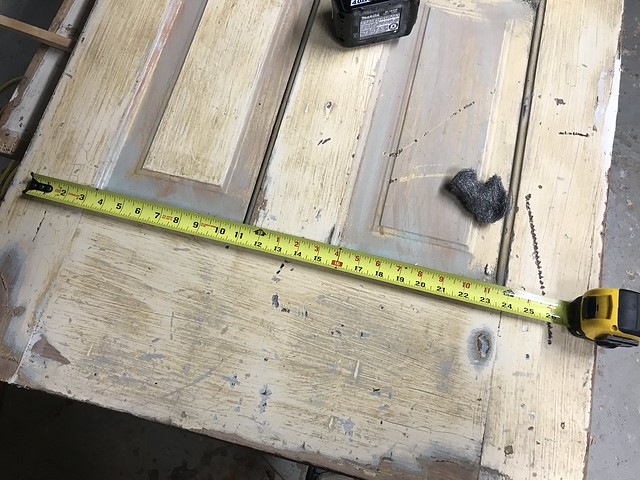
Next, I double and triple check my measurements, and maybe even take the door to the opening to test fit and make sure I'm on the right track with things. Then I do the same on the knob side of the door and trim off only enough material to make the door just fit in the opening. This is important, just keep thinking "measure 800 times, cut a bunch but only what you need to cut."
Once the final side is cut I take the door to the opening and prop it in place checking for a good snug fit (that is ultimately way too tight of a fit for it to actually work once hinges are on).
Step 3 - Hinge Mortising
With the door theoretically cut to the correct rough size it needs to be, we're ready for the next step of marking the hinge locations and mortising the hinges on the side of the door.
When it comes to doors, it's always better to have more space at the bottom of the door than the top. A minor gap at the bottom won't be noticed, but at the top it will always stand out since it's much closer to eye level. So before marking the hinge locations I like to slide several shims under the door when it's propped in the opening to force it to the top of the doorway.

Once the door is forced to the top of the opening, then you can use a pencil to mark the locations of the hinge mortises based on where you cut them in the first step of the install. Make clear and simple lines at the top and bottom of each hinge, then transfer those marks onto the side of the door with a carpenter's/rafter square.
Next up, grab your router and the same hinge template you used in step 1. Hopefully you have the same depth settings on the router and you can just tack the hinge template onto the side of the door and route out your mortises for your hinges.

In our case the mortise template made a mortise that was just a hair too small for our hinges, so I needed to widen it ever so slightly with our chisels. Since the door we're using is a little thinner than many old doors, the hinge mortising went straight through front to back, so there were no rounded corners to carve out. But just like in step 1, if you need to you can just use a good sharp chisel.

With the hinge mortises cut on the door, I mount the hinges in their opening. In our scenario I can mount the hinges as far forward or backward as needed to get the right look in the door opening. In our case I mounted them slightly overhanging the rear of the door. Ideally we would have had 3-1/2" x 3" hinges so there's be no overlap, but finding exact salvaged hardware can be difficult, and I knew this would still work well. The only consider I'll need to worry about later is possibly placing a few smaller stop blocks on the jamb to ensure the thinner door doesn't try to over close when shut.
After mounting the hinges I took the door to the opening for the first real fit. Dropping the hinges on their posts and the door was looking good. However, it was slightly "wider" now than when we initially fit it in the opening since the hinges added about 1/8" on the left of the door. Since we have the door hung we can close it as far as it will need to close and then mark the new cut line on the top and bottom of the door based on where the edge of the jamb sits. This is also a great way to account for a minor out of square situation with your jamb.
With the new location marked we make one final trim with the track saw, then pop the door back on the hinges and see how we're doing.

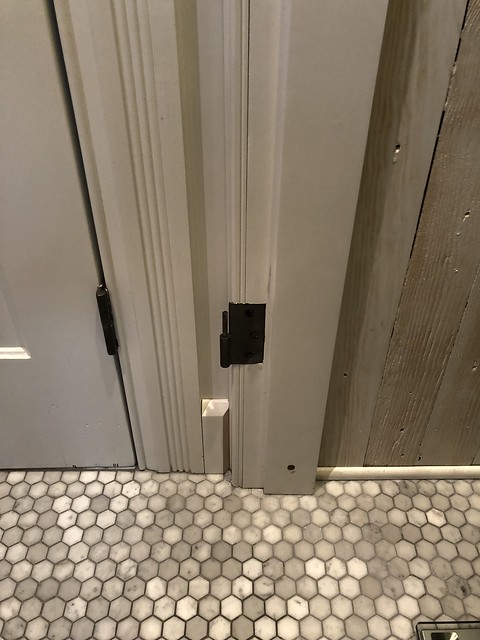
And with that, we have a very old door hanging in a new opening using salvaged antique hardware.
We still have lock/knob hardware to mount and install, but that will vary pretty drastically based on what kind of hardware you're using. In our case we're using a rim lock, which is one of the most forgiving to mount since it's all on the surface and requires no mortising. We'll still also need to do a final sanding of the door since the track saw leaves very sharp and clean lines that tend to look out of place on old doors. Then, when we're all done with hardware, we'll still need to paint the door.

In a nutshell, hanging a salvaged door is far from an impossible task, and is actually quite reasonable when you take it one step at a time. It can feel daunting initially, but remembering the golden rule, measure twice, cut once, will take you far.
Do you have any experience hanging salvaged doors? If so, any tips or tricks you'd like to share that might help? And if you've never done it before but have wanted to, does this seem like something you'd be willing to try given what we've outlined? Would love to hear some of your experiences.
]]>