Our basement may be a complete disaster, but dammit, we want it to be a well lit disaster!!
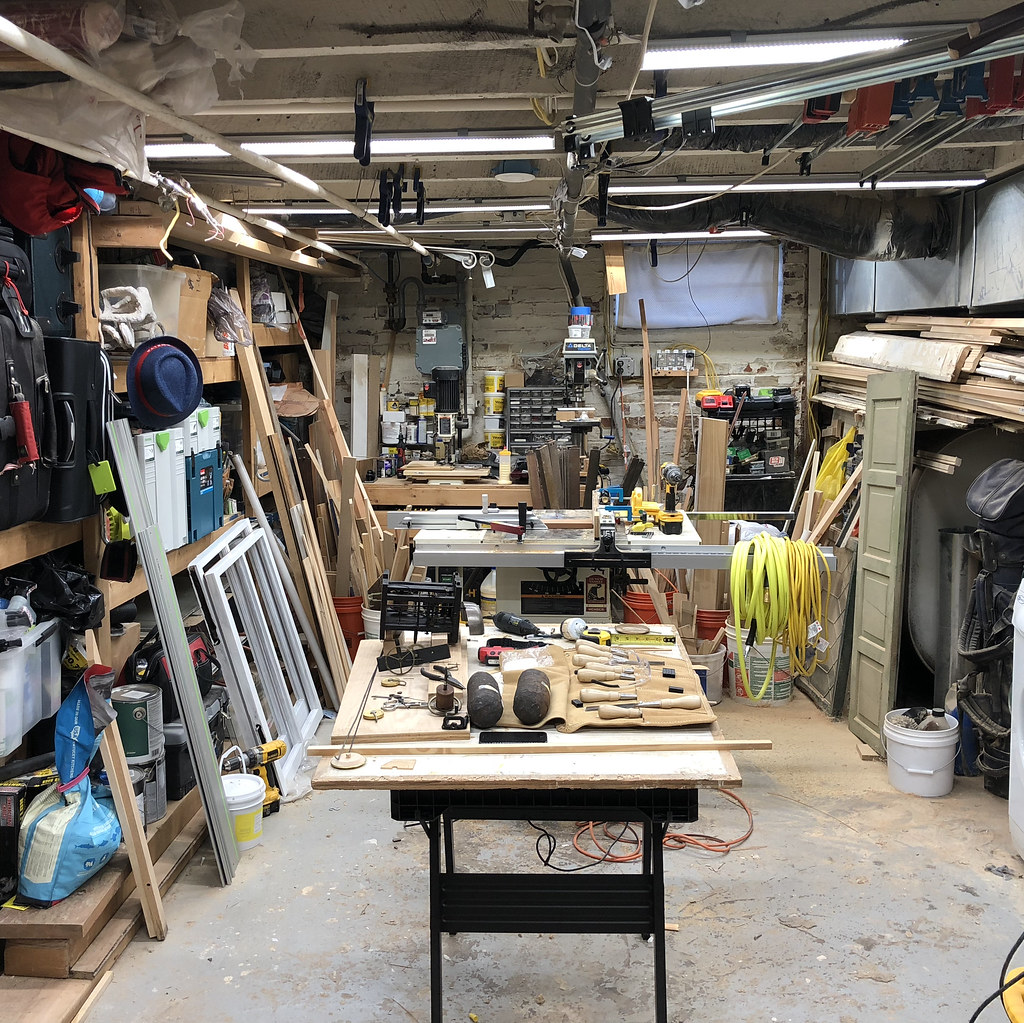
Ever since we bought our house in 2003, we've been fighting a bit of a losing battle in our basement. This narrow but long space plays quintuple duty on a daily basis. Storage, laundry, utility room, server closet, and shop. Oh how we long for the early days of a nearly empty basement area.
Though it may have been virtually empty when we bought our home, we quickly took care of that quality of the space and built some shelving for storage and a little work bench from plywood and 2x4s.
In the years that followed we've ended up with so much stuff down there that, at times, we can't effectively get around without having to act like we're on American Ninja Warrior! Wendy accuses me of treating it as my hoarder's lair. At times, she's not entirely wrong.
 Continue Reading Full Post
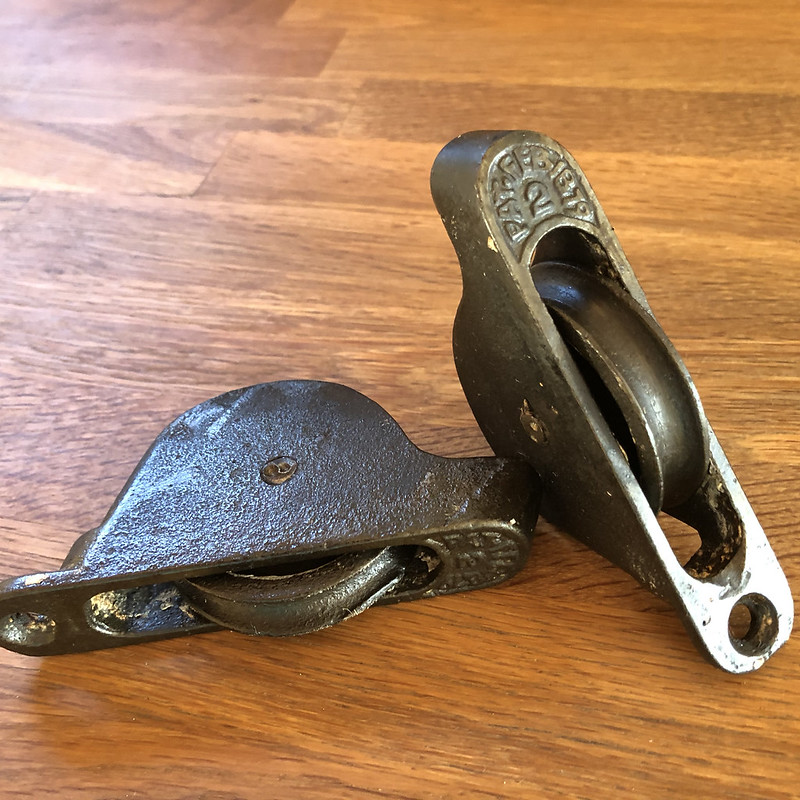
Antique cast iron architectural hardware is beautiful, but what's the best way to protect it from rusting? Would you believe it may be as simple as giving it a bath?
I picked up this method of treating cast iron many years ago while working in a window restoration shop. It's a tried and true method for protecting cast iron from rust, but there isn't a whole lot of information about it on the Internet. So it's our hope this will go a long way to helping others looking to restore their windows or other cast iron hardware in a classic and lasting manner.
We're very fortunate to have several of our original windows almost completely intact. This means that our original cast iron sash pulleys are also in place and fully functional. However, they were all creatively disguised by many layers of paint, hiding their utilitarian beauty.
As beautiful as these original architectural details may be once stripped, they're also made of cast iron and are prone to rust. A few years ago we stripped and reinstalled several of our pulleys without protecting them from the elements. Even though they aren't directly exposed to water, the humidity in the air and blowing rain or snow is enough to leave surface rust on exposed portions of the iron. The end result after a few years in the window frame is a fine coating of the orange-brown patina we'd like to avoid, especially since it begins to stain the sash ropes.
 Continue Reading Full Post
Back in November we shared or progress on our Window Restoration project, and then we got distracted by other projects.
This is the way of our home blogging and DIYing since the beginning. We start projects and then other projects take priority, so we stop projects. And sometimes we stop them for a long time. A really long time. And it makes Wendy angry with me. She doesn't understand why I stop them for so long, even though she does understand, but it doesn't mean she has to like it.
Our entire lives as DIYers has been a series of overlapping projects and priorities. Some projects are really important, until another one is more important. In the case of our windows, I started them and then we started our dining room, and then we started stripping a bathroom closet door, and then I started cleaning the basement, and then we started our foursquare's dining room, and then I started working on some clocks. SO MANY PROJECTS!
But before we get too derailed, let's circle back on that project that has been put off for so long that even once it's in progress, it gets put off again...the restoration of our original double hung windows. We left off in November by describing how we'd been able to successfully deglaze, strip, reinforce, and repair the first of five sash.
 Continue Reading Full Post
Friday, February 23, 2018
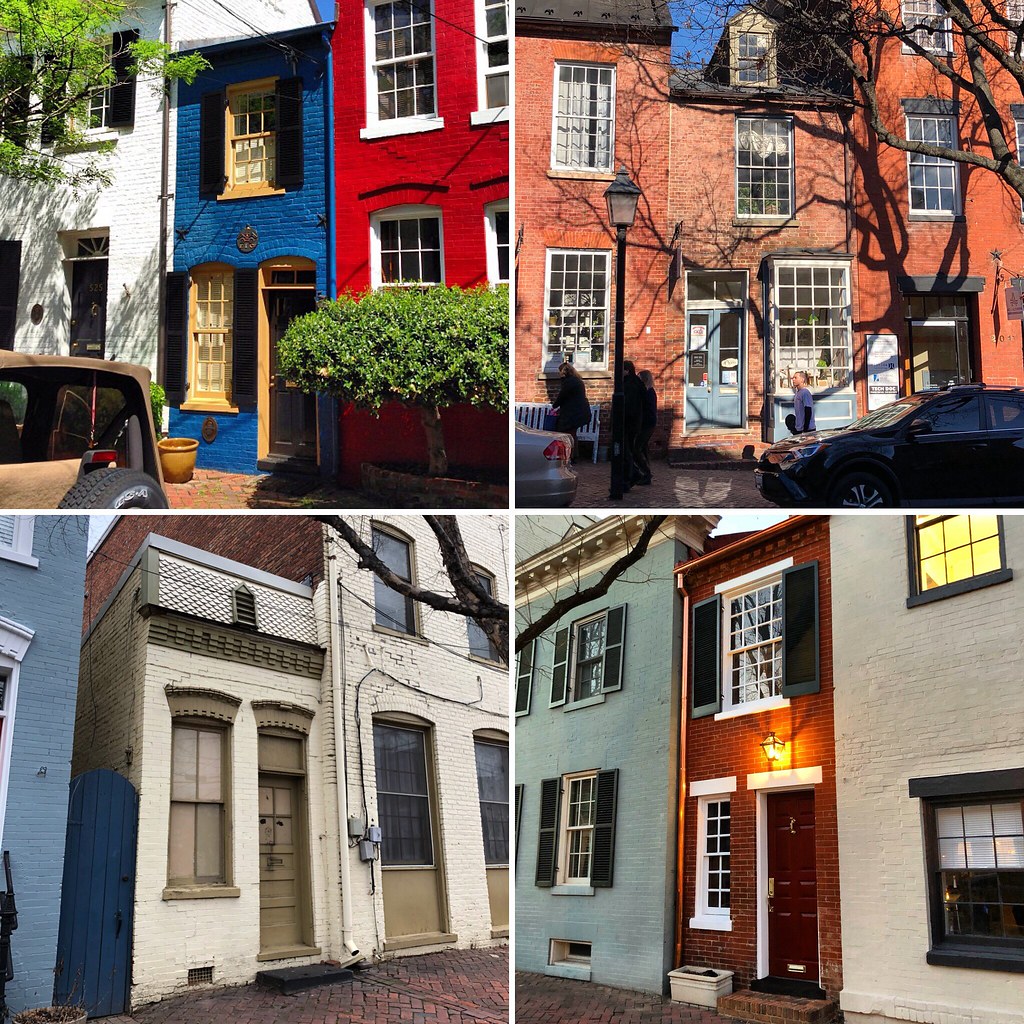
Even if you know of Old Town's famous "Spite House" on Queen Street, did you know that it's not the only one in town?
Though Old Town Alexandria is full of stately historic homes that leave many visitors impressed, one of the most famous, or perhaps infamous home's in Old Town's historic district is well known for its demure size. At just over seven feet wide, Old Town's "Spite House" has been featured in magazines, books, newspapers, and on TV shows as the "narrowest home in America."
As well known as this home is, even by Oprah, would it shock you to learn that it's really not that uncommon in Old Town Alexandria?
Yes, it's true. While most assume there's just a single "Spite House," in reality there are at least four historic houses in Old Town that fit the bill as a spite house, or alley house. The story behind these homes may actually be far more related to practical usage of space than they are centered around an owner's spite. You just have to remember that old alleys of Alexandria often looked like the few originals that remain.
 Continue Reading Full Post
Tuesday, February 20, 2018
Meet Yogi. He's an adorable goofball and he is in need of a forever or foster home!
Today Yogi is with Lost Dog animal rescue and they are working to find him his new family. While that's Yogi's story today, we want to share with you how Yogi's story crossed paths with our story, why we think he's pretty special, and why he might be the perfect addition to your family.
Yogi's story in our lives started on a Saturday back in October when we were on the way to our Foursquare. Driving along a well trafficked two lane country road on a cool and overcast fall afternoon, we saw a little brown dot moving around on the side of the busy road off in the distance.
As frequent travelers of this road we've seen it all. From foxes to deer to possums to skunk, it's a great part of the area to see wildlife but we're always concerned about them getting hit by passing cars. Not knowing what the creature was we slowed as we approached, both interested to see what sort of animal was ambling along the road, and also wanting to be sure we didn't have an animal meets car encounter. But when we got close enough to see who it was, we were shocked to see that the animal we'd been approaching was a very cute dog jogging along the side of the road, apparently looking for food.
 Continue Reading Full Post