Amidst this past long holiday weekend's marathon of moderate gluttony spliced with periods of recovery, which most often resembled one or both of us wallowing like a beached whale, we were fortunate to experience a Thanksgiving with several wonderful friends and excellent food. Sprinkle in some unabashed consumerism, a ceremony to flick the switch on a tree covered in lights, and the unfortunate need to interrupt the preferred holiday and weekend's events with day job drudgery (being an adult stinks), and you've got yourself a recipe for much of our last several days. But I'd be foolish if I left off our attempts to work as much as possible on our ongoing house projects.

That's right, we continued on our seemingly endless march of tasks in the bathroom and our attempts to produce crisp clean walls and beautiful ceilings. At a certain point the incessant sanding begins to feel like I'm fully entrenched and have become some sort of a maniacal sanding savant, but unlike Dustin Hoffman's character in Rain Man, whose useful character trait was counting cards in Vegas, I have this particular aptitude for sanding compulsively until the walls are smooth. Wow, what a gift.

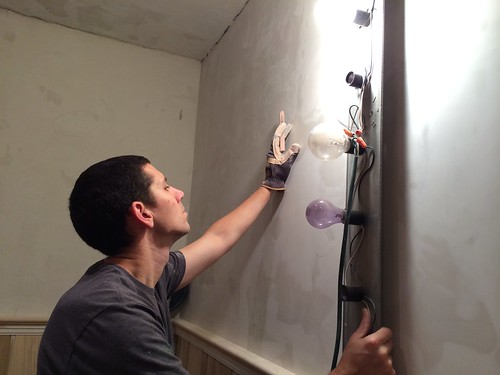
Like my makeshift bright light for spotting sanding imperfections?

However non stop the sanding had been, it's not only been limited to the walls but also involved the countless dots of wood filler we've been placing on all of the small nail holes in wainscoting, trim, and crown moulding throughout the room.

Ah, wood filler, the putty like material that's nearly driven me—out of a level of frustration that only ever mounts at this stage of a project—to commit heinous acts. If there are two things I'm rather sure of in my life as a DIYer it's:

  1. Wood filler seems incredibly simple to work with until you actually begin working with it.
  2. I'm certain I'm doing it wrong.

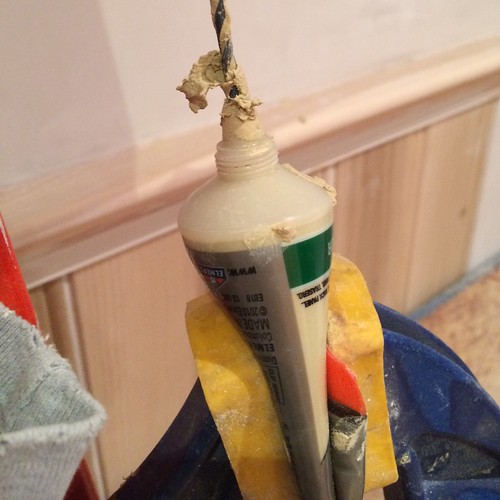
While I've known the first fact for some time, my recent realization of this second nugget of wisdom came only recently. It wasn't until I had grown so angry at my tube of wood filler that I grabbed several clamps and placed it, balled up, within what appeared to be a medieval torture mechanism of some sort. No, the tube wasn't charged with public drunkenness, spreading lies, or baking bread that was too small (all things that would get you tortured in medieval times), its crime was simple. This stupid tube of wood filler had clogged yet again.

I posted my wood filler torture on Instagram where other renovators commiserated on the propensity for tube based wood filler to dry prematurely, leaving the user confused at what went wrong.

This made me take stock of my entire wood filler process to determine the error of my ways. The results of my assessment? A resounding "whole lot."

It all starts with my initial purchase. When I pick up the tube based filler I apparently take a first significant misstep that will almost surely bring me long term frustration. There's something about the tube's design that causes it to dry at the tip roughly three minutes after removing the cap, leaving you with a tube that's full of useful wood filler guarded by a hardened defense more capable than the ferocious wizardry and mountains surrounding Mordor.

Once I get to the point where I'm equal parts squeezing out the wood filler and swearing uncontrollably, I seem to be still doing it wrong. Since the tube is no longer easily manipulated I'm not squeezing out wood filler directly onto the exposed holes, but instead squeezing it only my finger.

When my finger becomes the most effective delivery mechanism for the mixture of dry and wet filler I was able to coerce from its sarcophagus-like tube dwelling, I feel the intended design has failed, but I could be completely wrong here. I don't know, I'm just flying in the dark at this point.

By the time the filler is caked onto my fingers I begin smearing it into the various voids where this wood filler will take residence, moderately to significantly over filling the hole to ensure there are no voids left once it's all removed.

I repeat this step time and again, slowly moving around the room. As each of my clean fingers becomes unusably soiled with the filler, creating more of a mess than the intended filling of holes, I move onto a clean finger, from my thumb to my pinky.

When the wood filler would not move, no matter how much pressure I applied with mechanical devices, I would employ a "drill baby, drill" approach, using a long drill bit to coerce the filler to the surface. At one point, with enough pressure applied, and the drill bit dislodging just enough wood filler, a veritable explosion tends to occur, sending splatters of wood filler as miniature projectiles eight or more feet through the air at a rather high rate of speed. Who knew you needed to wear eye protection when using wood filler?

This has been my pattern for years, but my level of frustration reached a boiling point this past weekend. Rather than continue to fume at the fallible function of the frozen filler funnel I turned to the ways of a mad surgeon. Fed up, I grabbed my utility knife and turned our work zone into a makeshift operating theater, performing an advanced level of open chest surgery on the wood filler tube. I sliced the filler down the middle and gave myself a door to the perfectly preserved treasure trove of wet and pliable wood filler.

Although I had completely destroyed the intention of the wood filler tube, I didn't care. I was finally able to freely move around the room taking as much filler as necessary and applying (via finger) to the intended target. I didn't care that my tube was defunct and would not be useful past the conclusion of the evening. I had overcome the horrible design in a rage of wastefulness and I both hated and loved myself for taking the bull by the horns. It gave me a scary level of satisfaction to know I had both freed the wood filler from its tomb and killed the delivery vessel I now despise.

From this point forward I plan on purchasing only the wood filler in a can or tub. I've sworn off the tube based filler that I originally believed was such a good idea. My stubbornness caused me to continue to buy this inferior product as I feared it was more user error than design flaw. But today, I say to you, I am a changed man. I see the follies of my ways and will not make this same mistake again. Onward and upward, I will not be tortured by a tube spout clogged by a dry stone of filler any longer.

That being said, I still have that pesky issue with using my fingers to apply wood filler. But is that so wrong? Is there a better way to do it? If so, can you show me the way?

Comments 24

Comments

Leah M.
12/2/2013 at 2:04 PM

Yes, definitely the tubs vs. tubes! I put a layer of saran wrap over the surface before closing it back up again, which seems to help prevent drying. As for the fingers...I got nothing. I have the same problem! I wipe them on a rag as I go but it doesn't keep them totally clean.

Alex
12/4/2013

The saran wrap is a great idea, especially with a lid that seals the whole thing up really tightly. Would you put the saran wrap tight over the top (leaving an air gap), or would you try to get it down against the wood filler? I've been dipping my fingers in water mid way lately, and that's been working.

Leah M.
12/11/2013 at 9:59 AM

I put the saran wrap right against the filler so there's no air. I just use the filler that sticks to the wrap when I peel it off first, then start in on the stuff that's in the tub.

Emiles
12/2/2013 at 2:48 PM

I do tubs, but there's really no hope, I buy as small of an amount at a time as I can. And, if I'm painting said wood...it's getting caulked.

Alex
12/4/2013

Hah! My motto has always been "Do your best then caulk the rest!"

Mary
12/2/2013 at 8:54 PM

I am SO loving this bath series, OTH! Great job on all the hard work so far.

I've got a humble request for a future post: Would it be possible to draw up a rough floor plan of the bathroom? I remember the kitchen napkin plan from awhile ago, but I'm wondering if things have changed.

Also, you haven't yet addressed electrical and plumbing. Are you doing these yourself, or did you hire it out? I am most curious about the plumbing because it looks as though you moved the location of the bathtub to the opposite wall (if I am reading your pictures correctly)and have also added a new shower. So I'm wondering on how you handled the drains and the water supply lines.

Keep up the great work! I am so impressed by your meticulous attention to detail. I'm sure the end result will be amazing.

Alex
12/4/2013

Thank you so much!

We've actually been working on floor plans for a while (and planning to post them even longer). We need to do one of the whole house just so everyone can get a better idea of just how long and narrow our house really is. So, yes, floor plans and layouts are on the way, we just need a little time to make them look correct and nice. The various utilities were actually completed long ago. We've actually been working on this bathroom for longer than we've been running the blog. We're just finally getting back to it and actually finishing things.

We honestly can't wait to get to the end and get giddy thinking about it. When a project has gone on for 4+ years...you get that way.

Jan
12/2/2013 at 10:05 PM

I store my cans upside down. That way the moisture sinks to the bottom which is actually the top.

I could re roof our house with the $$$ wasted on dried up caulk tubes large and small, liquid nails tubes, dried up glazing compound, and of course wood filler.

When we have a small spot to fill we make a mixture of wood glue and saw dust. Mix with a putty knife until it looks and feels like wood putty.

Alex
12/4/2013

Great idea on the upside down storage, seems very effective. I've heard this for a few other items too, but never wood filler.

I'm definitely going to use the sawdust + glue, I've got a whole lot of both of them laying around. Alt smile

Mike
12/2/2013 at 11:08 PM

Try acetone. I've used it to thin wood filler when it starts drying out on me. I've never used the Elmers stuff you are using, but it might work for you.

Alex
12/4/2013

I think I'll give it a try the next time I've got a tube totally bound up. Good tip!

Larry
12/3/2013 at 9:03 AM

Alex - Last winter I did all the prep and priming and painting for the woodwork in three rooms we added to our house. I didn't use wood putty for the trim that was scheduled to be painted, rather I used a lightweight spackling compound such as Dap Fast n Final Lightweight Spackling. This is labeled to be used on wood as well as other substrates. It is smooth, light and creamy, easy to apply with either your finger or a flexible putty knife and most important of all it is easy to sand down quickly. I used the foam sanding blocks in a fine grit to sand it smooth. For the seams in woodwork, I use an acrylic latex caulk and smooth it either with a finger tip or a just barely damp large utility sponge. These suggestions are only for the instance of painted wood trim not if you are going to stain your woodwork.
Good Luck!

Alex
12/4/2013

I think I'm going to need to do this on my painted trim (which is essentially all of my trim). It seems so much more straight forward then the wood filler. I'm sure once I hit it all with a final 220 paper it all has the same texture anyhow.

12/3/2013 at 1:02 PM

Here's my solution for avoiding getting wood filler all over your fingers. For applying/spreading wood filler, I use a plastic spatula-like tool that is intended for applying auto body filler. They're cheap and make working with any type of putty much easier and cleaner.

Also, you're going to look at me strange when I say this, but if the wood I am filling is a surface that is going to be painted, I use Bondo. It dries a lot quicker than wood filler and I am able to sand and prime within an hour or so of application. Of course this method doesn't work with wood you are going to finish.

Alex
12/4/2013

I'll give the spatula a try. Maybe Wendy has an extra small spatula she normally uses for cupcakes that I can sacrifice.

I've used bondo once before on our bedroom doors when I ran out of the WoodEpox. The only problem was the amazingly bad smell. It instantly gave me a horrible headache. I think I can only use the stuff when I can work with the windows open.

12/3/2013 at 1:20 PM

Def wood filler in a tub or can. I also use spackle on stuff I'm going to prime & paint. I like the texture better.

Alex
12/4/2013

I've heard that about spackle from more than just you. I might need to give it a try in the future.

12/3/2013 at 6:40 PM

hahaha...I have done all those exact same things to a tube of wood filler. I think it's a conspiracy to make you buy new tube with every project.

Alas, I am in sanding purgatory at the moment...someone make it stop...

Alex
12/4/2013

I feel your pain on the sanding purgatory. We send you good luck and encouragement, to say the least!

laura
12/3/2013 at 10:36 PM

I laughed the whole time I read this...because I just threw out 2 tubes today for the same reasons as you. Therefore, I could only lead you further into the wood filler tube depths of despair & frustration. The tubs never seal tight either...I figure it is a marketing ploy to get us to buy tube after tube. I just mark it up as my constant contribution to improve the economyAlt smile

Alex
12/4/2013

I'm glad I'm not the only one! Alt smile

I agree, we're single handedly keeping the economy afloat through needles purchases of wood filler tubes. Hey, at least we're doing our part.

12/4/2013 at 5:02 AM

It is always very fascinating to make a repair by yourself. Especially before holidays, because it makes your house fresh and free from old things which were too dull and gloomy.

Brendan
12/6/2013 at 1:06 PM

MH Ready Patch. After first use, lay plastic wrap over the top of the surface of whats left in the can (to break its contact with the air), then hammer the can shut. I've seen people more fun than me blow up a balloon and put that in the gap between the compound and the can lid. MH cleans up with mineral spirits.

Or since you might have some plaster laying around, fill your nail holes with plaster (or in your case, mud). That's the way they used to do it.

JC
12/9/2013 at 10:19 PM

Oh man. I feel your pain. I've dealt with my fair share of wood fillers, and the general consensus is that you just can't win.

I speak from having at least 10-15 years of experience with nearly daily use of at least 4 different brands/types.

For the most part, you can actually revive a plugged-up wood filler tube (like yours) by soaking it in near-boiling water for several minutes. This will usually soften it up enough that you can squeeze-out the hardened crap, and get back to soft filler.

One of the better designs I've seen (for tube style filers) was with a screw-on cap, similar to a tube of tooth paste, and with a similar sized hole (but the cap was more in the shape of a makeup product type tube). It tends to seal out the air better, but can still end up drying out over time.

I've found that the tubs are easier to use, but they generally suffer from poorly designed covers. Either the covers are flimsy and don't seal out the air enough, or they are insanely tight, and nearly impossible to open. I distinctly remember one particular brand that toted the wording: "New Easy Open Cover" (or lid, I can't remember the exact wording). What a total joke. The thing was so tight that I had to pry a screw driver into the gap around the container/lid, and pry it up like a paint can (but it was just a plastic cover on a plastic container, so it eventually got wrecked). I usually ended up just barely pushing the cover in place to close it. We used it often, so it didn't dry out too much.

Last bit of info: If you have a tub type, and it does start to dry out, or stiffen-up, just add a bit of very hot water into it, and mix it all together thoroughly. It may be lumpy/chunky, but it will all end up being usable again.

Since you've not signed in yet, you will need to fill in your name and email below. If you have a Facebook account, save yourself a step and use Connect to login.

Denotes a required field.

Please enter full URL, including http://

You can use Markdown syntax in your comment. And you can also use lots of Emoji!
  • Search

  • Login
  • Follow
  • Advertising

If you're looking for information on advertising and sponsorships, head on over to our sponsorships page. You can purchase site sponsorships in a few easy clicks. 

Toolbox Tuesday
Open Housing
  • We're Featured!

Old Town Home has been featured in the following places and publications:

The Washington Post
 
Washingtonian Magazine
 
Domino
 
Old House Journal
 
 
Apartment Therapy House Tour
 
Washington Post Express Feature
 
Home & Garden Blogs
 
© 2024 OldTownHome.com. - Privacy Policy
Login Below
or
Sign in with Facebook
Connect

Unexpected Error

Your submission caused an unexpected error. You can try your request again, but if you continue to experience problems, please contact the administrator.

Working...

Working...