The lights in our family room are horrible. It's not our fault, the house came that way, honest! As it currently stands, the primary lights for the room are cast by: our tiny little table lamp with a single 40-watt bulb; from the television; and from two massive flood/spotlights in ceiling recessed fixtures. Not the most effective lighting I've ever seen, but at least those flood lights give the four-legged kids a good spotlight to fight under when they're having a moment.

The two large 6" spotlight recessed flood lamps, when not burned out, provide just enough illumination to make everything look hideous, and enough heat to bake a batch of cookies. But right now, yep you guessed it, they're both burned out. This has left us with a less than desirable lighting scenario.

The last thing we want is to have a gaggle of people coming through our house this weekend for the home tour and saying "That house was so small compared to the other houses!" Oh wait, that's the truth and we can't avoid that one bit. What we really want to avoid is to have someone say "The house was nice, except for that one really dark room in the middle." To remedy this situation, I have a plan.

I've longed for more efficient and better looking lights in this room. Is that too much to ask? Additionally, I would LOVE to have light bulbs that don't sound like a swarm of bees has entered the room when they're dimmed to 50%. Am I selfish? Given the current recessed fixtures look like this, I'm going to have to say my feelings are well founded.

I went out this weekend and picked up a few new 6" can recessed light fixtures from our local big box home improvement store. I also grabbed two of the 6" retrofit LED dimmable lights they had available.

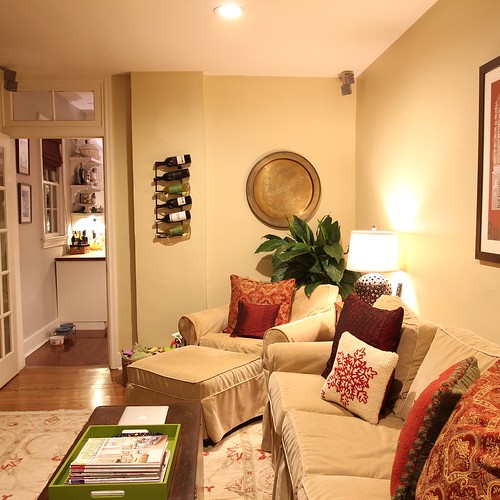
My goal was to swap the existing fixtures and pop in the new lights to give our family room a warm and inviting look with efficient and dimmable lighting -- lighting that doesn't look like it would be better suited for illuminating an alley or comedy stage.

I started the project with an easy goal, but quickly ran into problems. The recessed fixtures I had purchased are a standard 6", but the old can's hole was slightly larger than the new one, letting the fixture fall into the ceiling rather than being secured in place by the clips. Instead of throwing my hands in the air and giving up, I came up with an idea. The old cans fit correctly, so why not use that to my advantage?

I began cutting the old can hood with tin snips until I had a ring from the lower rim of the can.

I then slipped that ring over the new can and fit it down over the boot of the can, making the base of the new can the proper size for the old hole. Crisis averted.

Swapping out the fixtures was quick and easy. The one thing that can be tough about these big box can lights are the clips to hold them in place. It can be nearly impossible to snap them into their seats to secure the can. To correct this, I bent the clips to be a little bit wider. Not too far, I just put both hands on them and spread them just a bit. This lets the clip secure the light in place without having to kill yourself to get the clip where it needs to go.

Once the can was in place I just had to pop in the retrofit LED light. The light we chose is one of the Utilitech 6" retrofit devices. Though there were several different options, we went with this version due to the "warm" 2700 K color temperature. If you're not familiar, the lower the temperature the light is rated, the warmer the light appear. We looked at one that was 3000 K, and though it was okay, the 2700 K looks far better in our house.

The install was quick and easy. The retrofit kit just screws into a standard light socket. The back of the light has tension clips that slide into place on the new cans and you're done.

I flipped the circuit back on and we were in business with warm and energy efficient light in a room that was previously a dungeon. The new lights have a far greater spread and are less of a spotlight the way the previous lights were. This really helps to light the whole space rather than highlighting two random areas on either end of the couch.

And with that, we checked another item off of our to do list. We've got this evening and just one more full day left before the home tour. We'll be spending most of Friday frantically getting ready for the tour, but at least now we don't need to worry about people wandering in a dark family room and complaining about "that hideous house with that dark room." We're going to be taking a ton of photos over the next few days and sharing them with you next week, and we can't wait.

Have you used any of these retrofit lighting kits in your house? Or can you think of a place or two where one might be good? We used one previously in our basement stairwell overhaul and liked it enough to use it in our family room too. Do you know of any similar products that offer good results? Let us know.

Comments 18

Comments

11/29/2012 at 12:07 PM
with all the new light options out there, 2700 is always the number I try to shoot for. Not too cool, not too yellow. Just right in the middle and tends to match older lighting if you've got it. A lot of LED lights teeter into the 3000 range, and those tend to look really terrible, especially if you're mixing with old incandescents and the like. Good choice!
Alex
11/29/2012
It's so hard to tell when not in your own room, which is what makes it much harder. The 3000 looks so nice and warm when you're under the fluorescent lights at the hardware store, but when you get it in place above your own furniture, it shows its true colors. The under cabinet lights we installed in the kitchen shelves are also 2700, which look almost the same as the halogen puck lights. It would have looked really bad if it were very different, so we got lucky there.
11/29/2012 at 12:23 PM
What a difference!

The back part of our house (kitchen, family room and master bedroom) gets very little natural light which can be down right depressing. Last January we had recessed lighting added to the kitchen and family room, and it made a HUGE difference. I'd like to do something in the master next. Actually, the lighting in your master inspired me to do something about it!

Good luck tonight and tomorrow!
Alex
11/29/2012
Can't wait to see how your bedroom lighting turns out, and glad we could be an inspiration. As much as I'd love to replace these two lights with four 3" fixtures, it's only temporary so I'm restraining myself. But the 3" spotlights spread around the room REALLY make the room look great.
11/29/2012 at 12:34 PM
That room looks so cozy. Lighting is everything!

Good luck for the tour this weekend! I'm sure you'll receive a lot of POSITIVE comments.
Alex
11/29/2012
Thanks, and we like your optimism! :-)
Elizabeth
11/29/2012 at 1:26 PM
This sounds just like what we need in our new house. We wanted energy efficient lights, but didn't think we could do it because they are all on dimmers. Looks like we might be investing in some new LED cans. Do you have a link to the ones you got?
Elizabeth
11/29/2012 at 1:29 PM
Oh, and good luck with the tour this weekend! Sounds like you all have hit the home stretch and that everything will get done in time. At least all the stuff that people might truly notice. :) Wish I could head up there this weekend to check it out in person. Can't wait to see pictures!!! Are you going to take pictures of some of the other houses on the tour too?
Alex
11/29/2012
I don't have a specific link to the lights we bought. They seem to be a Lowes specific brand, go figure. Here's one that's very similar amzn.to/Tt0t8d/ But it costs a little more than what we spent. I think we spent $39 per light, and $15 per can. So about $55 per fixture for a light that is dimmable, saves energy, and won't burn out for 15 years. One thing I do have to note, the dimming isn't quite like I'm used to. It's more of a stepped dim, not quite as gradual as normal bulbs. But that shouldn't matter too much.

As for the photos of the other houses. As much as we'd love to, they typically frown on that a bit. It's understandable, but I wish we could share them. We'll at least take photos of the outside.
Elizabeth
11/30/2012 at 3:56 PM
Thanks for the extra info. Bummer about the photos, but totally understandable.
11/29/2012 at 2:02 PM
Our living room currently has no overhead lighting at all. If you didn't already have pot lights...would you have added them? Or gone another route?
Alex
11/29/2012
That's a good question. In this room, we may have still added them even though it is only temporary as the dropped ceiling and access from the basement would have made it somewhat easy to run the wires.

If we were doing this as a permanent solution we would have probably used the smaller 3" recessed fixtures and put more of them around the perimeter of the room. More like our bedroom. Since you can now use the LED style bulbs in those you can get all of the benefit of energy efficiency with the style of fixture you like.
Kelly
11/29/2012 at 5:18 PM
Mel slays me, lol! The expressions, and I'm a dog person! Love your fur babies! Good luck & I can't wait to see what happens with the tour!
Wendy
12/2/2012
:-) Thanks, Kelly! Mel has expressions like no other!
ryan
11/30/2012 at 10:52 AM
Thanks for this writeup; been thinking about replacing all of my cans (which look a little old anyway) with some LED inserts. I've been worried about the brightness claims - the dodgy CFL world has made me very weary of "equivalent" measurements. Even now that they typically list lumens instead of "60W equiv" it's sketchy - I've seen up to two or three different lumens claims on boxes of otherwise identical bulbs on the shelf (which makes me think the manufacturer over-rated them & was forced to revise).

I think I'll pick up a few today and replace some of the eye ball cans in the family room... May even pick up a few new housings and swap out the (useless, excessively bright, tanning-bed hot) arrays of track lighting the previous owners installed... No dimmer & they've got two tracks with 8 lights on each! You could do surgery in that room!

Here's a bonus tip I learned: If you have a Home Depot account & mention that you also have a Lowes account (which they do not verify) you'll get an extra 5% off everything. May want to stick to the pro checkout line so that you're sure to have a more senior cashier, but I've not had a problem with this at a few different stores - I think it's an unadvertised corporate policy.
Wendy
12/2/2012
Good luck with the lighting project, and thanks for the tip about Lowes, Ryan!
12/3/2012 at 10:34 AM
Hope the tour went well!! I'm sure you were working until the last second but it was all worth it!
Wendy
12/3/2012
LOL! You can say that again! Thanks, Melissa. I'd say it was a success. We just posted pictures from the weekend if you're interested: www.oldtownhome.com/2012/12/3/Its-Christmastime-in-the-City-Designer-Home-Tour-Behind-the-Scenes/index.aspx
Since you've not signed in yet, you will need to fill in your name and email below. If you have a Facebook account, save yourself a step and use Connect to login.

Denotes a required field.

Please enter full URL, including http://

You can use Markdown syntax in your comment. And you can also use lots of Emoji!
  • Search

  • Login
  • Follow
  • Advertising

If you're looking for information on advertising and sponsorships, head on over to our sponsorships page. You can purchase site sponsorships in a few easy clicks. 

Toolbox Tuesday
Open Housing
  • We're Featured!

Old Town Home has been featured in the following places and publications:

The Washington Post
 
Washingtonian Magazine
 
Domino
 
Old House Journal
 
 
Apartment Therapy House Tour
 
Washington Post Express Feature
 
Home & Garden Blogs
 
© 2024 OldTownHome.com. - Privacy Policy
Login Below
or
Sign in with Facebook
Connect

Unexpected Error

Your submission caused an unexpected error. You can try your request again, but if you continue to experience problems, please contact the administrator.

Working...

Working...