Our seemingly endless efforts to strip the paint in our home have led to years of trial and error experiences until we found the tools that really work well for our purposes. Today's Toolbox Tuesday will cover the tools we use that are must haves when stripping layers of old paint.

Yesterday we covered our fortunate salvage yard find of several paint covered doors. We were lucky to find just what we needed. (That rarely happens in a single stop.) However, our find was only the first step in a long restoration process. The doors were covered in flaking and thick layers of paint, and before we would be able to hang and paint the doors, we would need to strip them.

We're actually old pros at paint stripping at this point. We've been stripping paint off of various items in our house since day one -- baseboards, molding, doors, hinges -- just about anything that had thick layers of paint that hid the details or impaired function has been on our lengthy paint removal list. We have our favorite methods and chemicals for paint removal, but the things that actually make the biggest difference in our paint stripping are the tools we use to do it.


General Tools

When I start out on a paint stripping project, I usually try to cover the largest flat surfaces with a few simple tools. A standard 5-in-1 tool is my standby for scraping off chemically stripped paint. If not using chemical stripper, I use a paint stripping heat gun and a 5-in-1 tool to get the majority of the paint off.

There really isn't anything shocking or special about these two items, and they will remove about 80%-90% of the paint you need to remove.

Scraping Tools

When the general tools have reached their maximum effectiveness, we turn to our specialized paint scraping tools. These tools consist of a few small hand tools with various blade profiles to match the flat or intricate details of the surfaces we are stripping. These tools are typically called "pull" type paint scrapers, because as you pull the blades across the paint it pulls up the stubborn paint. 

The are two primary types of pull type scrapers: large flat blades and smaller profile blades for intricate details.

We use the large flat blades on surfaces such as the baseboards of flat portions of doors, windows, or molding, These flat blades work alongside chemical strippers, the heat gun, or by themselves. Just be careful that while using it you aren't tearing up the wood by causing "threading." Threading occurs when the scraper begins to tear up the fibers in soft wood.

When you move onto the intricate or smaller details of molding, you can use the interchangeable profile pull type blade scraper. These blades mimic the various curves, beads, and angles that you will typically find on intricate molding and doors.

Dental Tools

The final elements of my stripping arsenal are the pick style tools that resemble what you typically see at the dentist's office. The extremely intricate details that seem to really hold onto paint, such as the groove between fluting or the tiny corners in the detailed elements of doors, require the fine points you have with these tools. Using the dental tools in conjunction with the heat gun work best on the most stubborn detail areas of the wood.

If you stock your paint stripping toolbox with the items I've outlined above, you will be well on your way to stripping almost anything in the house. Like just about any other job around the house, paint stripping requires the right tools and patience.

Do you have any tried and true techniques for paint stripping you'd like to share with us? We're always looking for better ways to improve our process. Let us know if you do. 
Comments 11

Comments

6/21/2011 at 10:58 AM
Great roundup all around. I've been doing that first 85% on most of my projects, so I've been just using the heat gun and the 5-in-1 for everything thus far, so I'm glad to see the other specific tools you've been using. I'll need those to finish the never-ending banister project. And then we'll move on to doors, one by one.

Thanks for the list!
Steve
6/21/2011 at 11:18 AM
Oh, and no mention of Peel Away and all the chemical strippers? That sure would be helpful too!
Alex
6/21/2011
I was thinking about that. I may do a roundup of the chemicals we've used in another post. We've sure run through our fair share. I also want to try out that new Smart Strip stuff on a the new double doors.
6/21/2011 at 5:23 PM
After stripping all the paint out of our old house, I tell folks that I am the supreme Queen of Paint Stripping. I used to refinish furniture, and I took this knowledge onto a much larger scale with the renovation of this house.

I tried Peel Away, and I hated it for anything that I couldn't take outside to work on. It's SOOO much easier, and you have better control, to do like you say and remove the bulk of the paint using a heat gun and a 5-in-1. My favorite scraper is a carbide pull scraper ... I don't remember the brand, but it has an orange handle. Clean up after using the heat gun is easy, and there's no chance of dripping chemicals onto the original heartpine floor.

On rare occasions where I'm staining and varnishing the wood after paint removal, I use a methylene chloride stripper to get the remaining paint out of the wood ... sometimes scrubbing carefully with a brass brush in the direction of the grain. In cases of stubborn specks of imbedded paint light-colored paint, I have been known to use acrylic paint to touch up the specks and then varnish over them. No one would EVER know.

My best tool for stripping paint out of concave surfaces is ... are you sitting down ... a melon baller! You can hold it at various angles as you scrape, and it fits beautifully into a wide range of profiles.
Alex
8/2/2011
We have some paint stripping with somewhat concave surfaces coming up. I think I'm going to find a cheap melon baller and give your trick a shot. Thanks for your tricks!
Kerstin
7/5/2015 at 4:30 PM

I stumbled on this website today - fantastic helpful tips ( just bought a 105 yr old Victorian house, and some cosmetic work has to be done.). The melon baller worked miracles for the paint strip job that I'm doing right now. Also - round metal measuring spoons are helpful, depending on the curvature of the wood .
Looking forward to more helpful tips - your website rocks!!!!

DAM
8/2/2011 at 12:45 PM
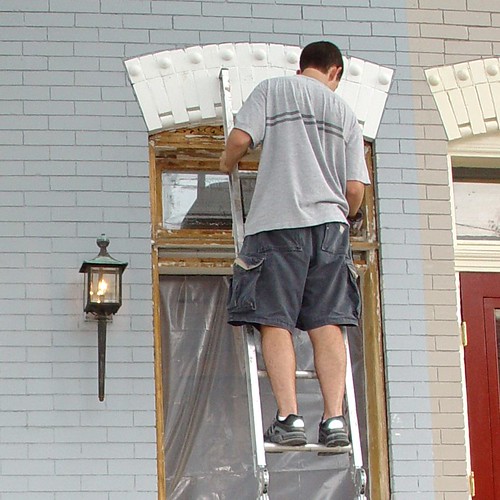
What do you recommend for removing paint from brick facade? We probably have 2 or 3 layers of paint on a historic DC house. We would like to repaint or leave the original brick exposed. The old paint is peeling in some places already. I have seen Peel Away used on brick and it appears to take up some of the mortar, too. I understand scraping is an option but was told by a painter that it might not get all of the paint off the brick. Thanks!
Alex
8/2/2011
This is an interesting question. I've seen a lot of houses around us get the brick stripped of paint, all with varying results. What year was your house built?

What neighborhood are you in?

The best results I've seen are on houses with smooth smooth face brick from the late 1880s-1910. The older brick that is porous and with a bumpy surface tends to hold onto the paint, even after stripping.

I've seen peel away used quite often, but the owners do sometimes need to have the house re-pointed afterwards. This is especially the case when the mortar joints are somewhat larger and the mortar is lime based and softer. Often the re-pointing is done with portland cement instead of lime based mortar, which is a very bad thing for the brick.

You may want to try a bucket of the SmartStrip stuff that I recently used on our door. It took two coats, but worked well. I would stay away from scraping, otherwise you are likely to damage the surface of the brick. Also, be sure NOT to do a sandblasting. That will quickly destroy the brick and ultimately cause the whole house to fail.

Look at the first house in this post. www.oldtownhome.com/2011/7/4/Broad-Stripes-and-Bright-Stars---Alexandrias-Celebration-of-July-4th/index.aspx That whole house used to be white and was stripped with Peel Away 1. As you can see, the brick is not smooth, so it held onto some paint, but it still looks really good now.

If you strip with peel away, the next step would be to power wash the brick. Unfortunately, that will kick any loose mortar out of the brick and might require you to get a mason. If you do, and you have lime mortar, make sure you use lime mortar to point. Make sure you check out this link for correct mortar. www.virginialimeworks.com

If
your brick is only 2-3 layers of paint, you should not have too difficult of a time, but it will still be very time consuming, expensive, and potentially dangerous up high (ugh). Do you only need to do the facade or is there a side wall or two you need to do as well?
DAM
8/2/2011 at 4:52 PM
It sounds like peel away or that type of compound is pretty much essential. I didn't think about the damage that scraping would do to the brick, most of which is very old.
Our house is circa 1900. Based on areas exposed by peeling, the brick is very smooth. The facade is the only part that needs this work. (We have a rowhouse.) Thanks for your advice!
Alex
8/2/2011
Since your brick is smooth, you are in decent shape and shouldn't have the hardest time. Look at the red brick building to the left The Majestic restaurant in the photo on this post. www.oldtownhome.com/2011/7/11/First-the-Shops-Now-the-Food-A-Bit-of-Napa-Here-in-Old-Town-Alexandria---Part-2/index.aspx#majestic

That house was completely covered in paint and was stripped using Peel Away 1. I think it took 2 applications of Peel Away to remove all of the paint, then they re-pointed the brick. It couldn't have been cheap, but it looks pretty awesome now. If you want to see it in person, it is 911 King St. Also, there is a house that just completed having its paint stripped. It is a little older, but again, smooth brick. That house is at 113 S. Lee St. in Old Town. It has had scaffolding up for two months until just recently. Now that it is down, the house looks amazing. Again, couldn't have been cheap, but looks great!

If you are up for it, order a bucket of the SmartStrip off of Amazon, about $50 I think, and try it in a small area on your house. When you put it on, cover it with wax paper and let it sit 24 hours. Peel off the paper, clean the brick, then do another coat of stripper to see how far you get. Don't use a wire brush or anything on the brick. Any damage to the smooth brick will make it look horrible. The real hard part will be getting the paint out of the mortar joints, and not the brick. You can scrape off the surface and just tuck point the brick (like repointing but you only scratch the surface, so much less invasive). Good luck, and let me know how it goes.
Harry
8/2/2014 at 6:23 PM

Coming very late to the game...

What do you recommend for stripping paint from a cylinder? I need to strip paint from chairs that have dowels for the seatbacks and I'm dreading that chore.

Since you've not signed in yet, you will need to fill in your name and email below. If you have a Facebook account, save yourself a step and use Connect to login.

Denotes a required field.

Please enter full URL, including http://

You can use Markdown syntax in your comment. And you can also use lots of Emoji!
  • Search

  • Login
  • Follow
  • Advertising

If you're looking for information on advertising and sponsorships, head on over to our sponsorships page. You can purchase site sponsorships in a few easy clicks. 

Toolbox Tuesday
Open Housing
  • We're Featured!

Old Town Home has been featured in the following places and publications:

The Washington Post
 
Washingtonian Magazine
 
Domino
 
Old House Journal
 
 
Apartment Therapy House Tour
 
Washington Post Express Feature
 
Home & Garden Blogs
 
© 2024 OldTownHome.com. - Privacy Policy
Login Below
or
Sign in with Facebook
Connect

Unexpected Error

Your submission caused an unexpected error. You can try your request again, but if you continue to experience problems, please contact the administrator.

Working...

Working...