In our last post about the construction of our custom built in cherry office desk, we covered the basic construction and first steps of staining the lower cabinet portion of the piece. We were off to a great start, though constantly checking for level and plumb against the very out of level floor weighed on my nerves. I was quite glad to have reached a point where the base was done and I knew the rest would be level working up from my established line. At that point my focus then turned to the desktop.
I know that in the past I've mentioned a certain trait I tend to possess. When I hit a point in a project that I don't feel particularly sure or comfortable with, I obsess. Really, I absolutely obsess about the minor and major details of the project, how it will work, if I'm doing it the right way, the ramifications if I do it wrong, and generally dread the idea of working on the project, crippled by my own obsessive tendencies. Is that crazy and honest enough for you? This ugly flaw really came out at this stage of the game as the desktop was one of those points. In retrospect, I really don't know why, but you couldn't have convinced me otherwise when I was in the middle of it. So instead we just kept staining and ignored it for a while.
We decided that we wanted the desktop to be solid pieces of cherry, not the plywood we had used on the interior portions of the cabinets. Our thought was that if we ever nicked, gouged, or scratched the surface deep enough, we wanted it to add character to the desk after refinishing, and not need to be repaired because it showed the core of the plywood. But the problem with the plan wa that our desk top was 24" deep in places, and the widest stock cherry we could get was just 12".
The other thing we wanted to do was to add a nice finish front profile to the desk to give the illusion of a much thicker desk top than standard stock 3/4" lumber provided. We wanted the front edge of the desk to make the whole thing appear far more substantial.
Those were our grand plans, but I didn't know exactly how I was going to accomplish this, so I obsessed. Luckily, I obsessed long enough to determine the best way to proceed, or at least I can make that excuse now.
The first step was to turn two 12" pieces of stock cherry into one large piece of 24" desk top for the project. I decided to purchase a biscuit joiner to marry the two pieces of 12" stock lumber. I figured I could do the old pocket hole and screw trick on the underside, but that was sort of a cheap and cheating way to do this. Besides, i had to follow my rule about one new tool purchase for each major project, this and the rest of the desk construction was a perfect opportunity to get the biscuit jointer I had been needing and wanting for some time.
By the time we got to actual desk top construction, I had already used the jointer for some of the face frame construction on the lower cabinets, so I was confident it would work. I'd say it turned out nicely.
The next major issue was how to thicken and decorate the front edge of the desk top. To tackle this I started with a piece of 1 1/2" x 1 1/2" cherry. The plan was to route the profile using several router bits and steps of cutting to give us a significant and decorative edge banding piece.
I then needed to attach this piece of cherry to the front of the desk top. Since the top of the edge piece way too thin to use even a '0' biscuit on without cutting through the front, I did opt to use the pocket hole screws on this. Placing two screws every foot we were able to securely fasten and glue the decorative piece to the 24" table top to give us a large and solid piece for our desk top. Here's a photo of the underside of the top portion, complete with pocket holes and glue drips.
The final steps were to cut the fully assembled piece to size for the location, scribe and cut out the notch for the chimney, cut the necessary hole for any cabling (like power and video for the monitor or speakers) and carefully test fit it over and over. Measure twice and cut once? Try measure 400 times and cut like your life depended on it as there was no way I was messing up this piece. I had worked too long.
The solid desk top piece I had obsessed about was not horribly difficult, but it was time consuming. With its completion we just had to sand it all smooth and stain it with the same combination as the lower portion of the desk. Easy peasy, right? (Insert record scraaaasastttttccchhhhh sound effect here!)
I don't have any photos of what transpired, primarily because I was beside myself with frustration and was nearly destroyed. We stained the desk top we had worked so hard to assemble and felt like everything was going great, but it was far from it. Apparently, the new can of stain we had purchased had sat so long in the store that much of it had settled near the bottom, and our shaking/stirring hadn't resolved this sediment issue. The end result was a desk top that was a significantly more red in hue than the rest of the desk.
We were distraught to say the least. After working so hard, the jerk hole stain had derailed us on one of the final steps. We asked friend after friend if the color was too different, too red, just plain horrible, etc. We're lucky to have some very honest friends as they were able to tell us that it did in fact look bad.
Gladly this was stain, and I had a lot of sanding pads and a random orbit sander. After a little bit of swearing, a sprinkle of whining, and a smidge of pouting, and some stomping around for good measure, I put in a couple of hours of sanding (my over agitated hands paid the price for that) to bring the desk top back to a piece of wood just waiting for its next coat of stain. I think it only took a few hours to get it to where it needed to be again. Ugh.
This time the stain process went far better. I'll tell you on thing for sure, there was no way the can of stain was going to have anything unmixed in the bottom. No way, no how!
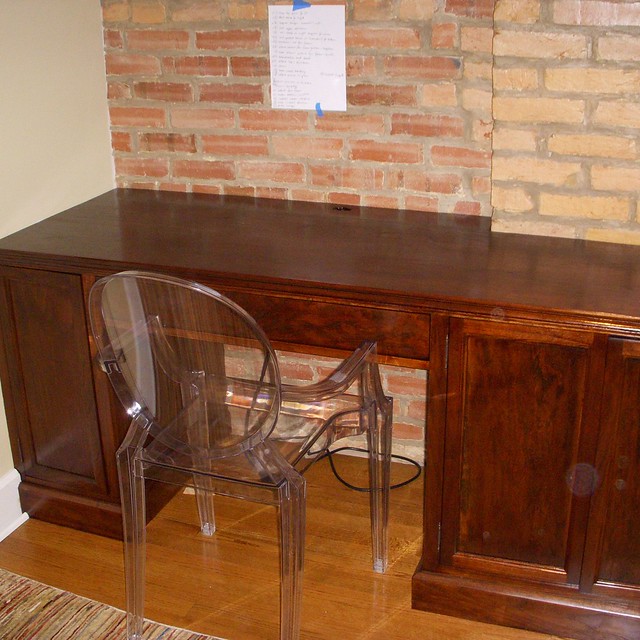
We probably could have left it the different color and only a few people would have really noticed, but it was one of those things I would stare at and hate every day. I'm very glad we took the time to correct the issue and to be sure it looked as good as it could. The end result was a deep and rich solid wood desktop that fit perfectly with place. After years using a self assembly particle board desk with fake wood veneer, our dream of a desk was finally coming true.
We weren't done by any means. Remember, we drew a top half plan for the desk on another sheet of paper. Besides, do you see that list in the photo above? Yeah, it had all of the items that remained and I still had to build the upper cabinets, come up with some shelves on the right, and figure out a good way to light the whole thing. But the base was finished, and we were thrilled with the results.
So what do you think of the base? Does it looks like a first attempt at furniture building? Do you think the desk works well in the space? Stay tuned as I'll cover the construction of the upper cabinets in a future post.